
Effective Autodesk Vault lifecycle configuration is critical for any engineering team looking to streamline their design data workflows, enforce revision control, and ensure compliance in Vault Professional. Lifecycles and revisions work together to control how files move from creation to release, and how they’re tracked over time.
This guide will walk you through:
- Understanding lifecycle states, categories, and revision schemes.
- Setting up lifecycle definitions.
- Creating and applying revision schemes.
- Linking lifecycles and revisions to control document flow.
Key Terms You Need to Know
Before diving into configuration, here’s what each term means in Vault:
-
Category: The classification Vault assigns to a file (e.g., “Design Document”). Categories determine which lifecycles and revisions are available for that file.
-
Lifecycle Definition: A set of states (e.g., Work in Progress, For Review, Released) that a file passes through, along with the rules for moving between them.
-
State: A single step in the lifecycle that controls access, permissions, and behavior of the file.
-
Transition: The action that moves a file from one state to another.
-
Revision Scheme: A defined sequence of revision identifiers (e.g., A, B, C or 1, 2, 3) that Vault applies when files change states.
-
Revision Bump: The change from one revision to the next, triggered by a lifecycle transition.
Planning Your Lifecycle and Revision Strategy
Before creating anything in Vault:
-
Identify Your Categories
Think about the types of documents you store (parts, drawings, assemblies, etc.) and what lifecycle/revision rules they require. -
Define States
Typical examples:-
Work in Progress (WIP)
-
For Review
-
Released
- Quick-Change
-
Obsolete
-
-
Determine Transitions
Example: Work in Progress → For Review or Released → Work in Progress (if edits are allowed). -
Choose Revision Schemes
Decide if you’ll use alphabetical, numeric, or custom sequences.
1. Accessing Vault Configuration Settings
Before you begin any vault configuration, confirm you have administrator rights in your Vault environment:
- Log in as a Vault user with Site Administrator privileges.
- In the Vault client, go to Tools → Administration → Vault Settings.
- Under Behaviors, select Lifecycles to launch the lifecycle configuration interface.
Tip: If you’re still evaluating Vault, spin up an Autodesk Trial or consult KETIV Virtual Academy or Autodesk University sessions for additional best practices.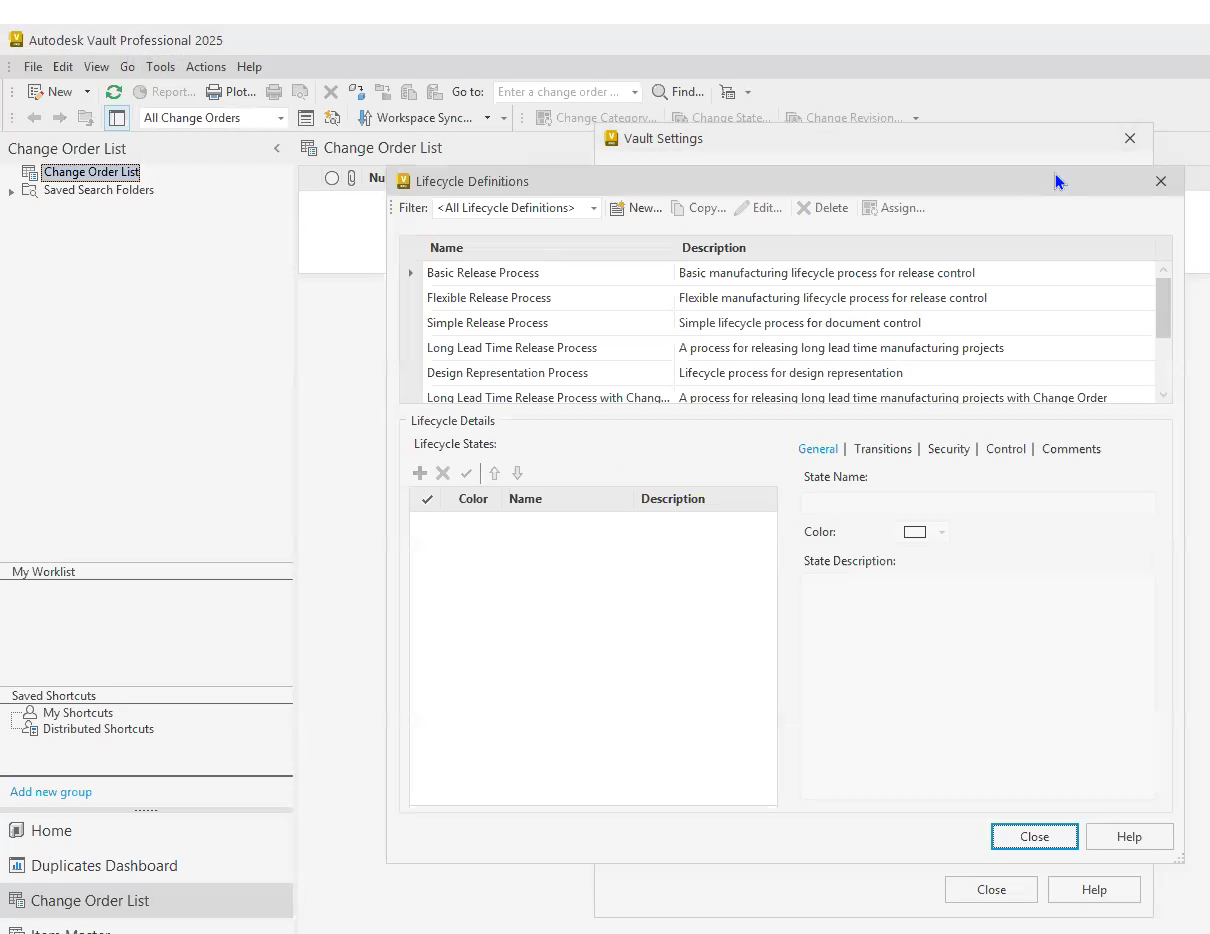
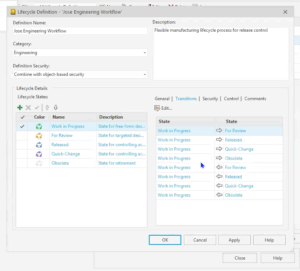
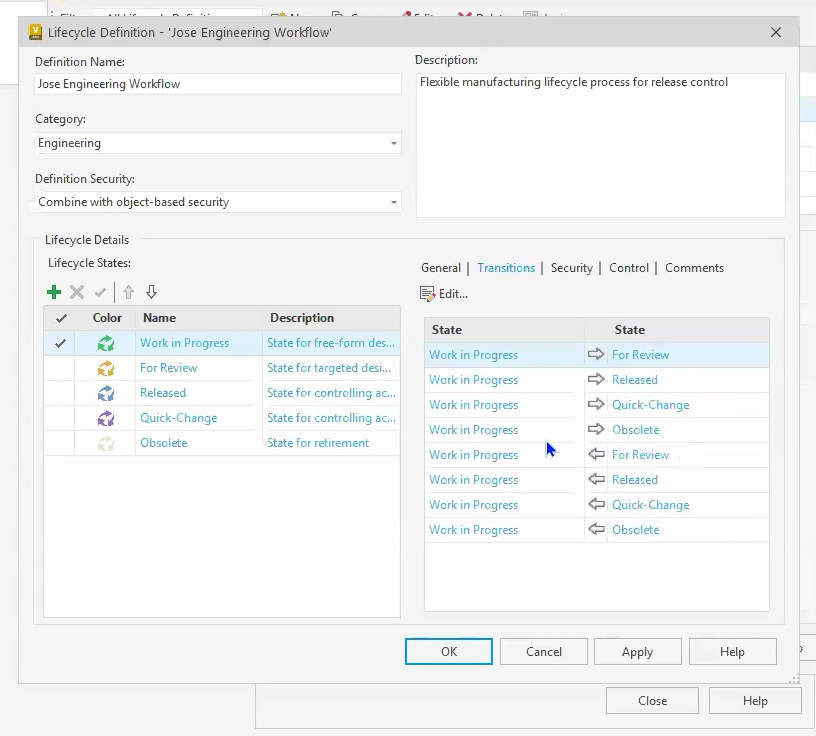
2. Defining Your Lifecycle (Lifecycle Definition)
Vault ships with several out‑of‑the‑box lifecycles, like the “Flexible Release Process”, but the real power lies in tailoring them to your engineering and product design workflows:
- Create anew, or copy the template lifecycle you wish to customize (e.g., Flexible Release Process).
- Give it a clear, descriptive name, such as “Mechanical Design Lifecycle” or “Civil 3D Release Workflow.”
- Assign the lifecycle to one or more categories (e.g., Engineering, Manufacturing).
This lifecycle definition ensures the right rules apply to specific file types and disciplines, from AutoCAD Plant 3D models (see Plant 3D Forums) to Inventor assemblies (see Inventor Forums).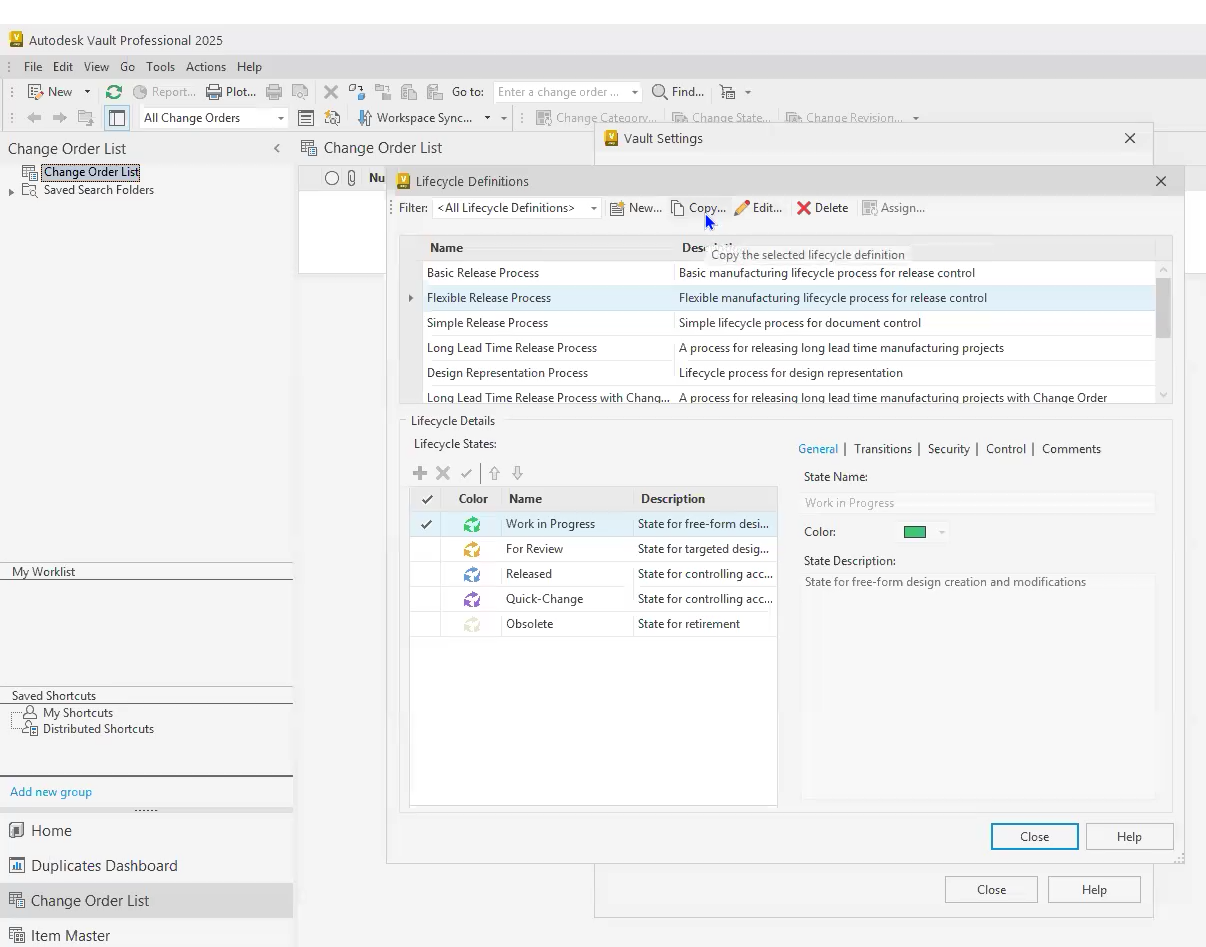
3. Configuring Lifecycle States (Stages)
A lifecycle stage represents a discrete lifecycle state in your workflow:
-
Work in Progress (WIP)
This is where active design and development happen. Files in WIP are editable, and users can check them in and out freely. The intent is to allow unrestricted changes while work is still ongoing. These files are not ready for formal review or release. -
For Review
Once work is complete enough for feedback, files move to this state. Edits are typically restricted here — the goal is to have a stable version for reviewers to evaluate. Permissions are set so that reviewers can view and comment, but only designated users can approve or send it back to WIP. -
Released
This state locks the design for official use. Released files are read-only for most users and represent the authoritative version for manufacturing, purchasing, or downstream processes. No further edits should occur unless a formal revision process is initiated. -
Quick-Change
A specialized state for minor edits that don’t require the full review process. This is used to bypass lengthy approval when changes are urgent or low risk, while still ensuring changes are tracked. Permissions are set to allow quick turnaround while maintaining control. -
Obsolete
Marks files that are no longer valid for use. Obsolete files remain in Vault for historical reference but are clearly labeled to prevent accidental use. Access may be restricted to administrators or engineering leads.
Lifecycle State Settings
- Assign a color (for at‑a‑glance clarity) and a description.
- Mark which states count as Released or Obsolete, used later for version control.
You can add or remove stages to match specialized processes, whether you’re integrating with Autodesk CAD or with ERP job servers like Factory Design Utilities or Epicor Kinetic.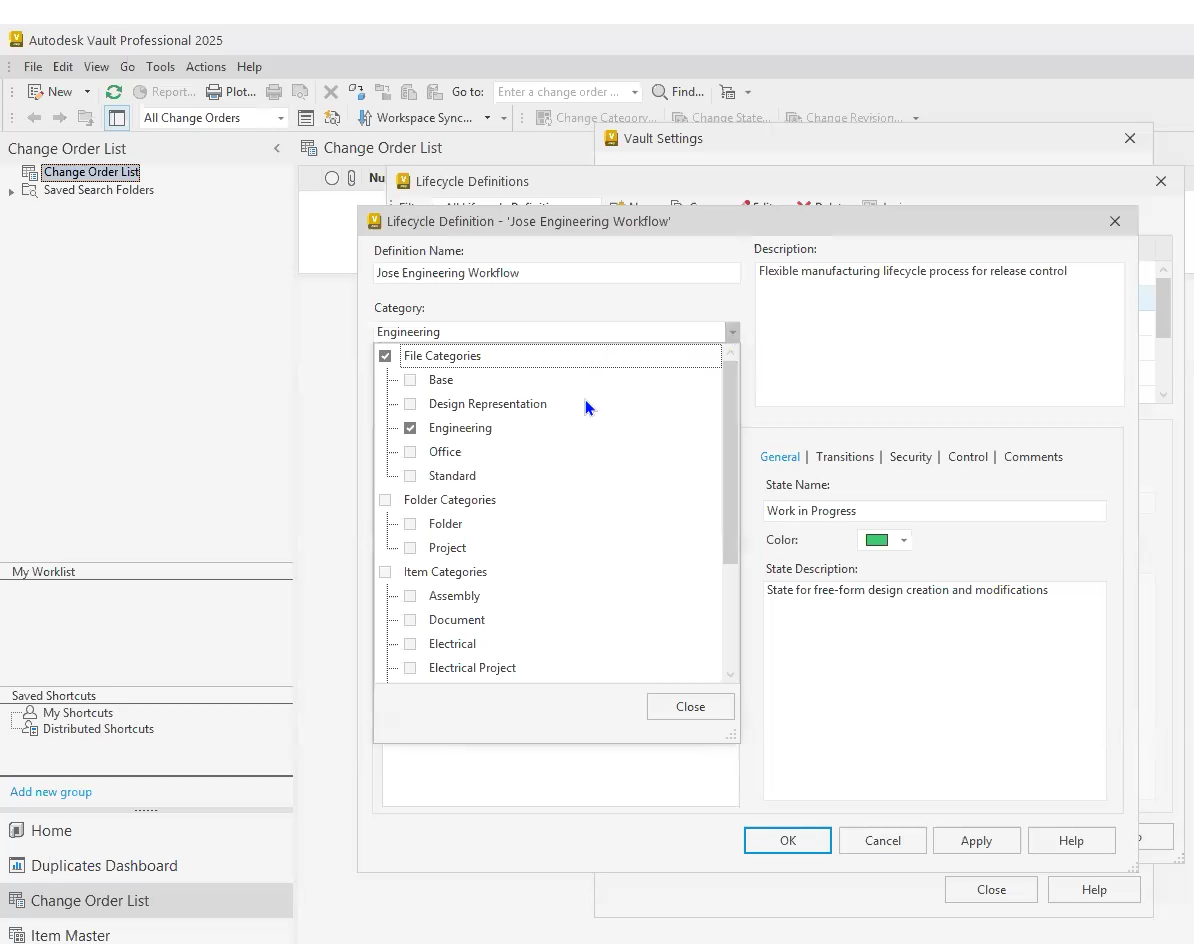
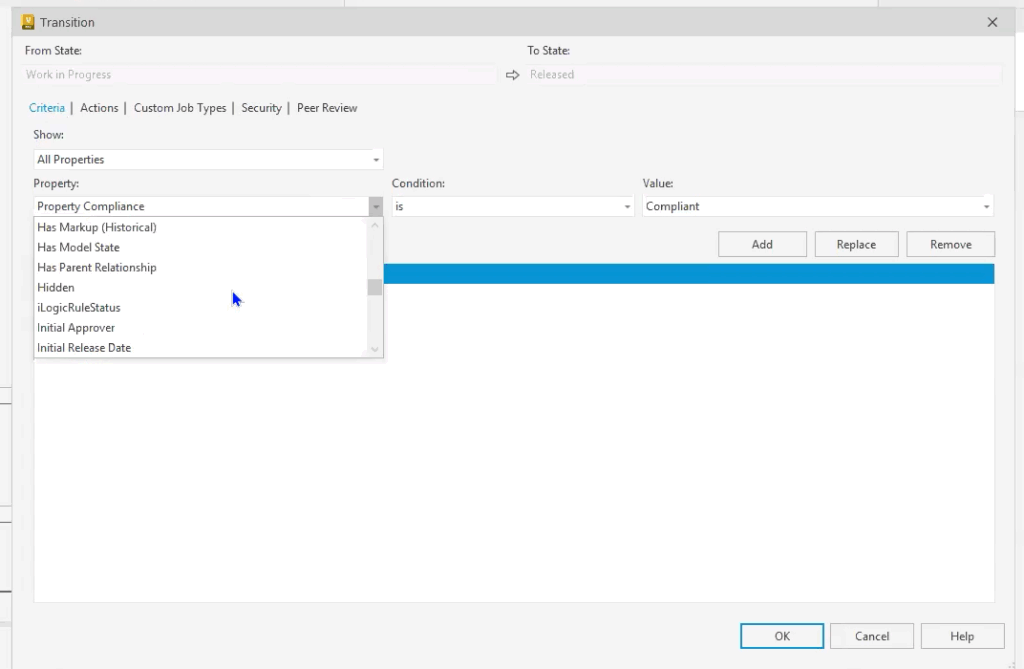
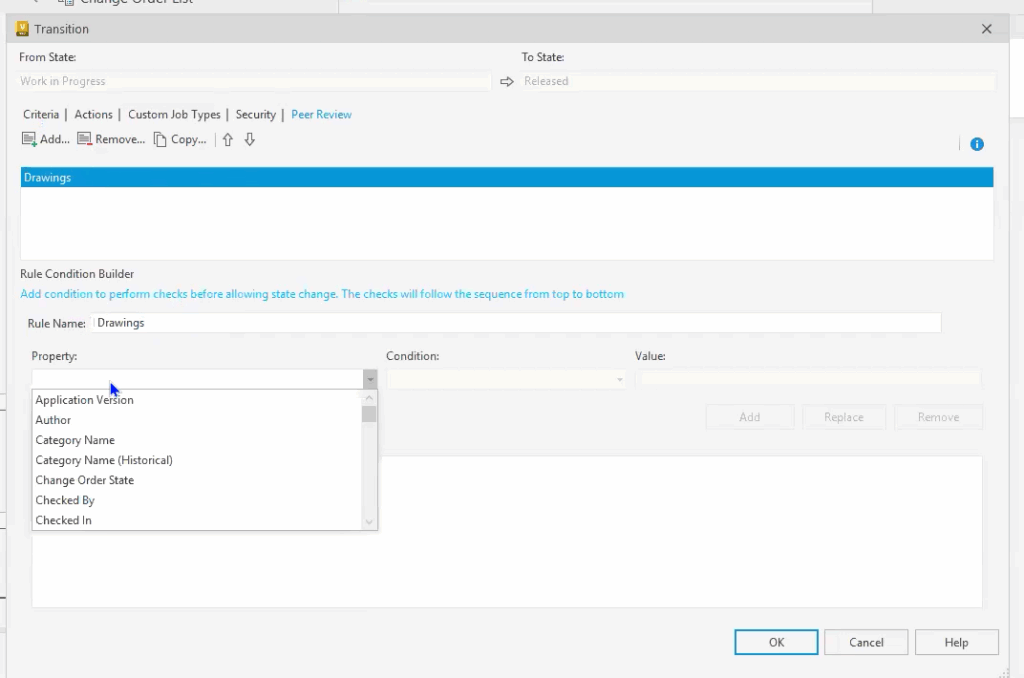
4. Mapping Lifecycle Transitions
Lifecycle transitions define how files move from one state to another. This is where most of your configuration time will go:
-
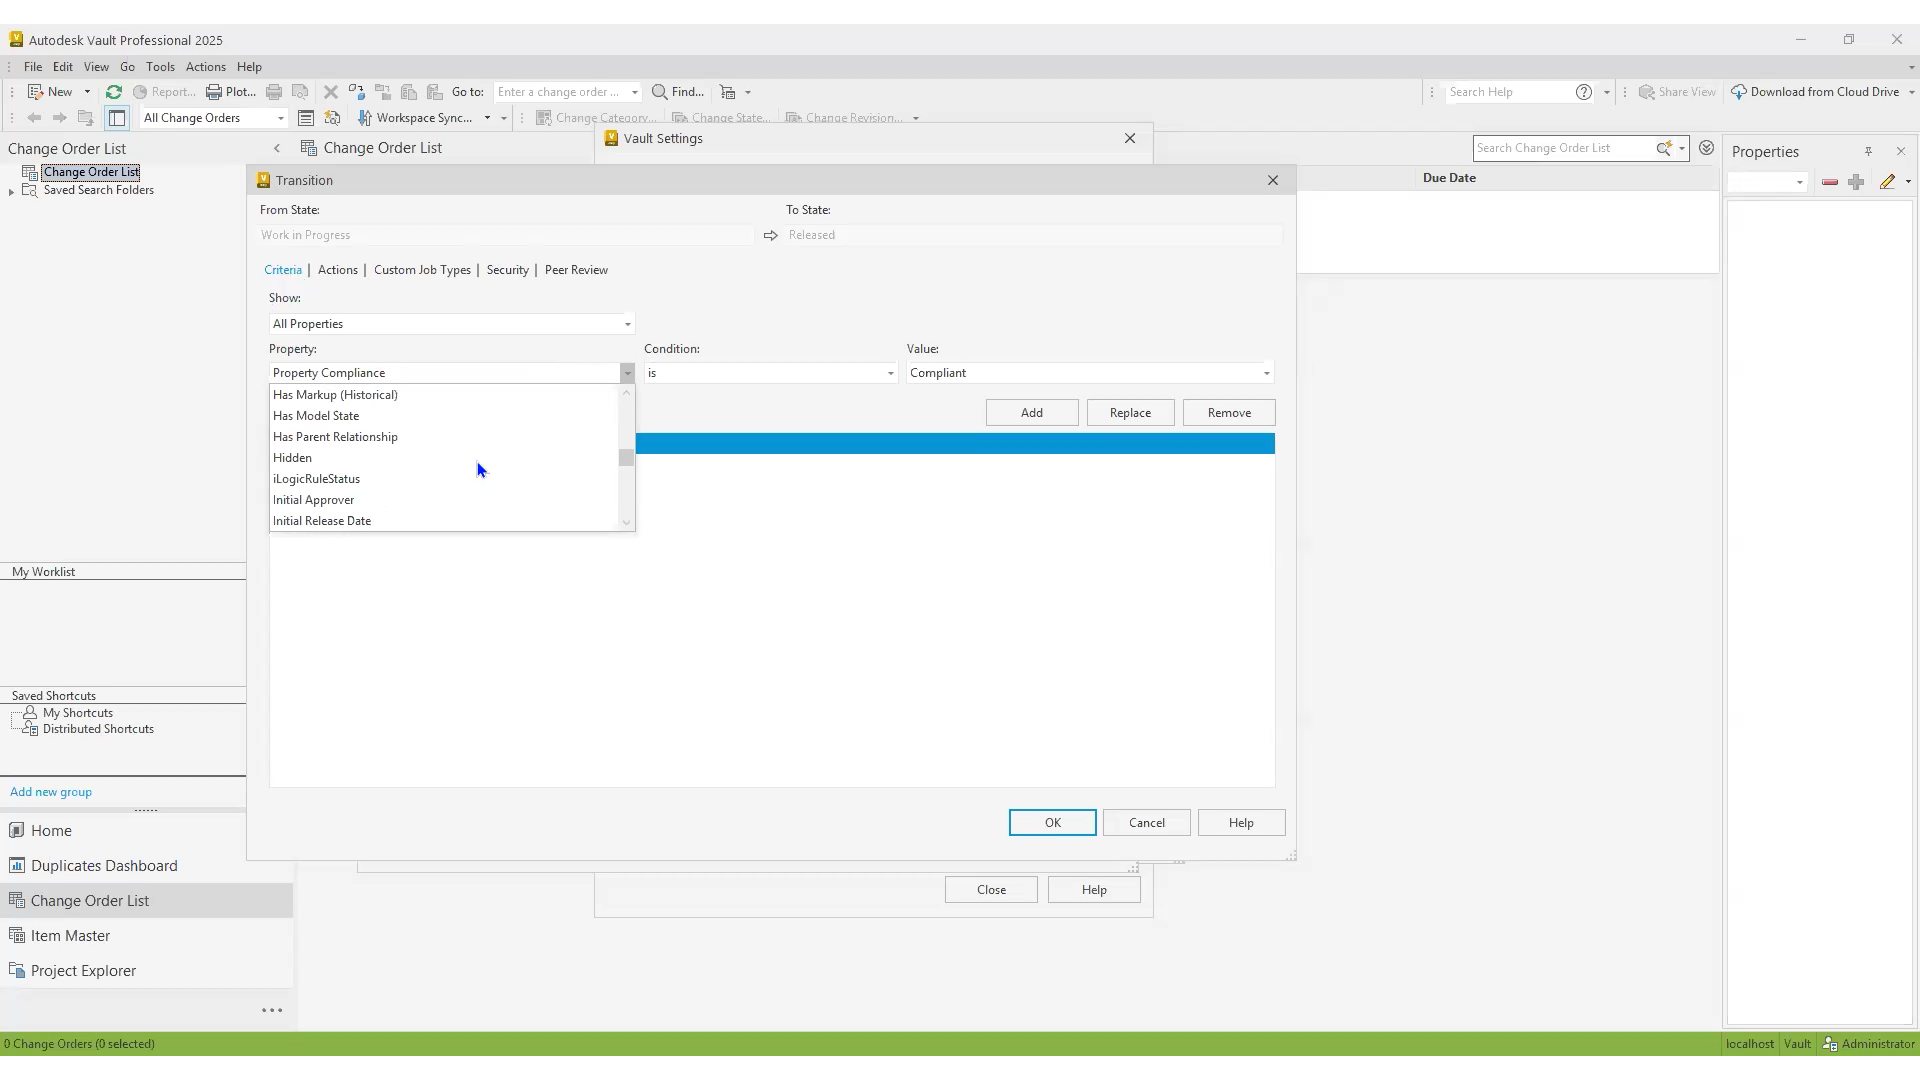
- Select a transition (e.g., Work in Progress → Review).
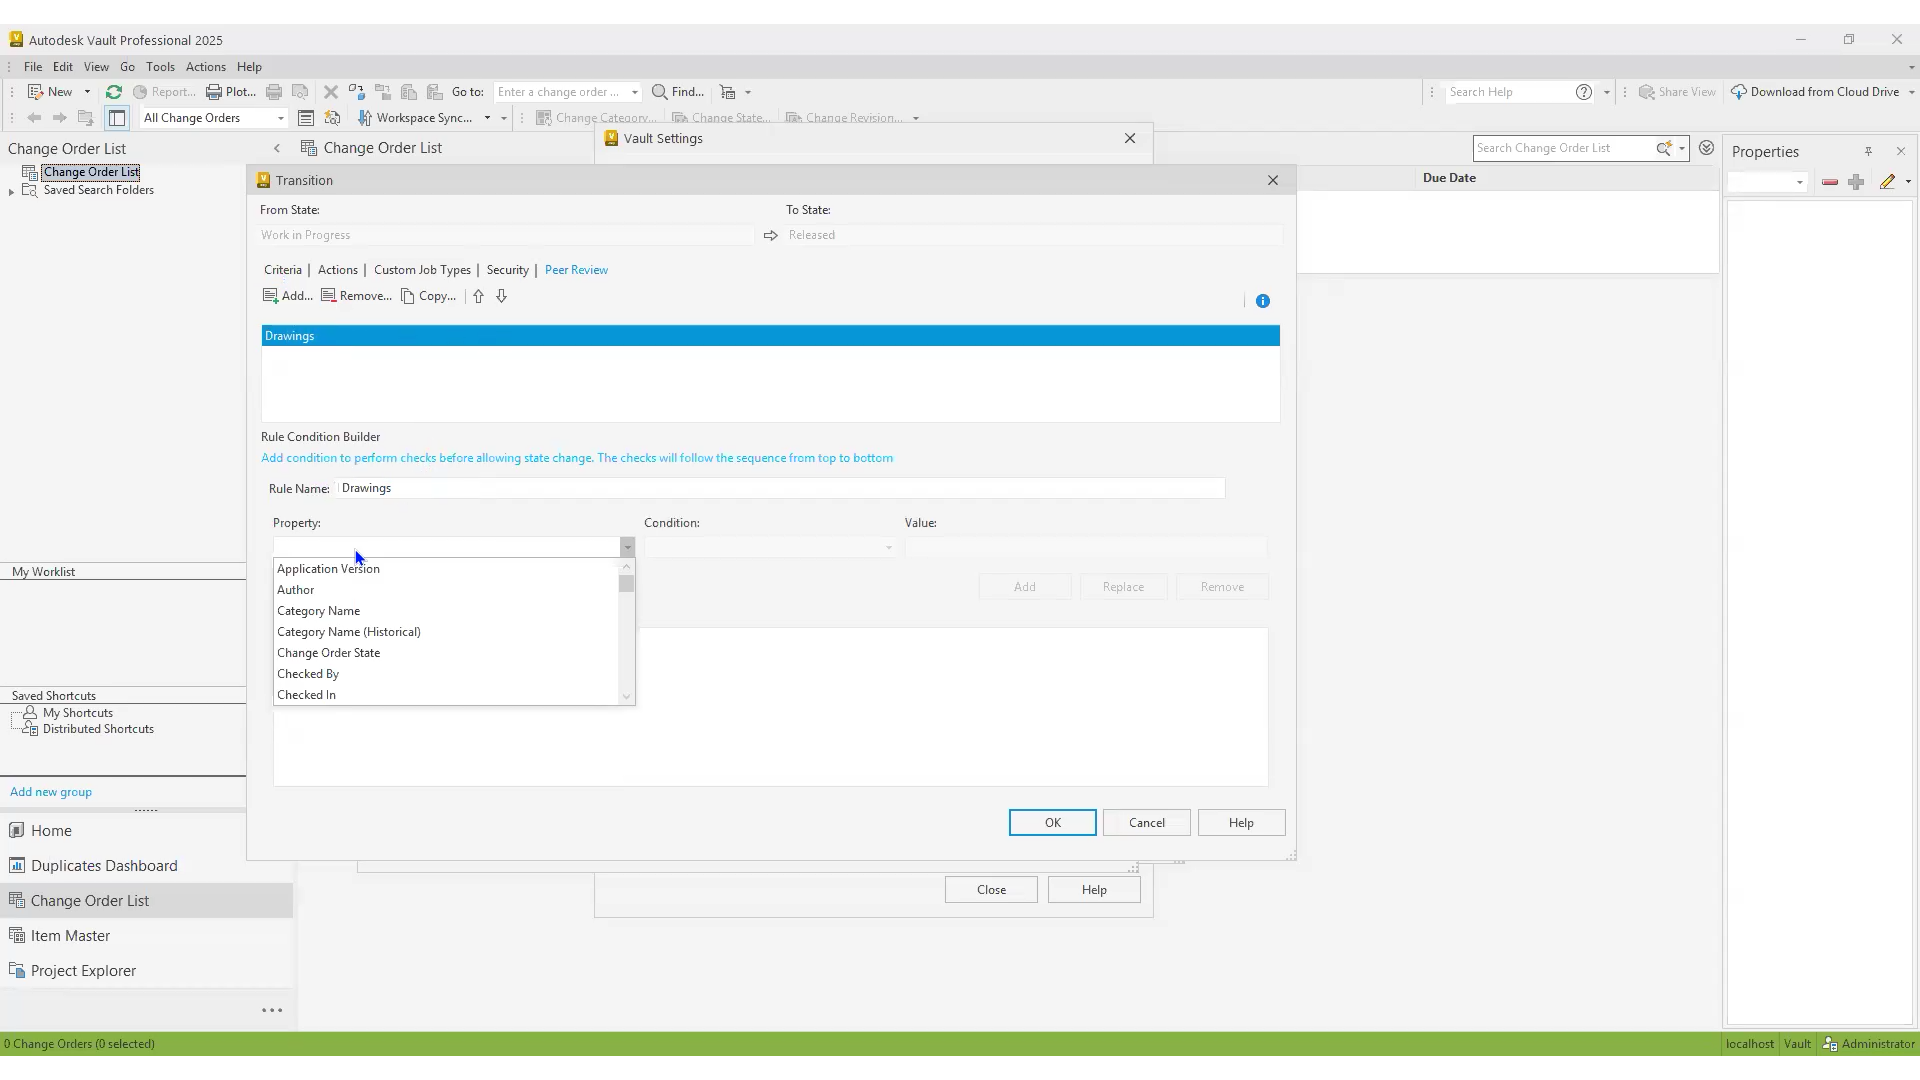
- Under Criteria, enforce revision control or property compliance (e.g., Description ≠ empty).
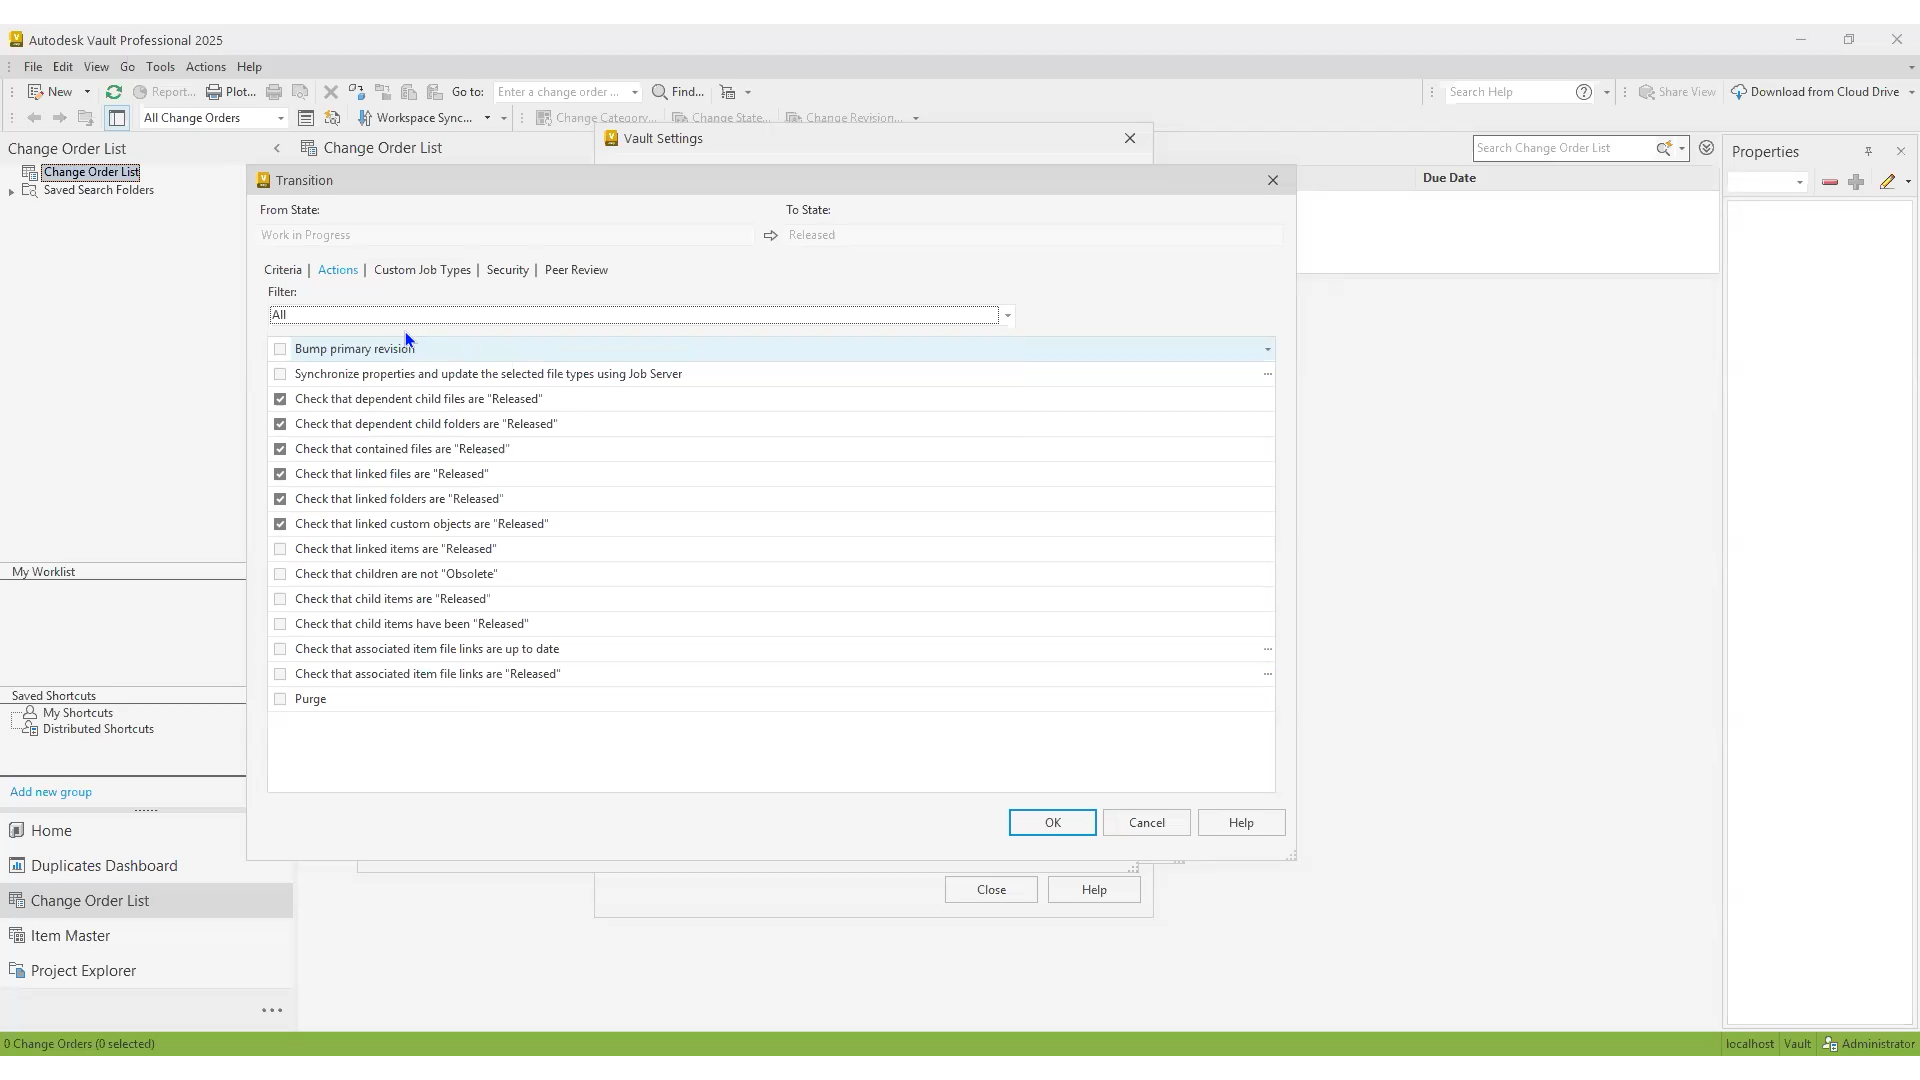
- Under Actions, trigger built‑in tasks:
- Bump primary/secondary revision via the Job Processor
- Synchronize properties (e.g., ApprovedBy)
- Purge intermediate versions (use “First & Last” for work in progress)
- Launch custom jobs (e.g., PDF thumbnail generator)
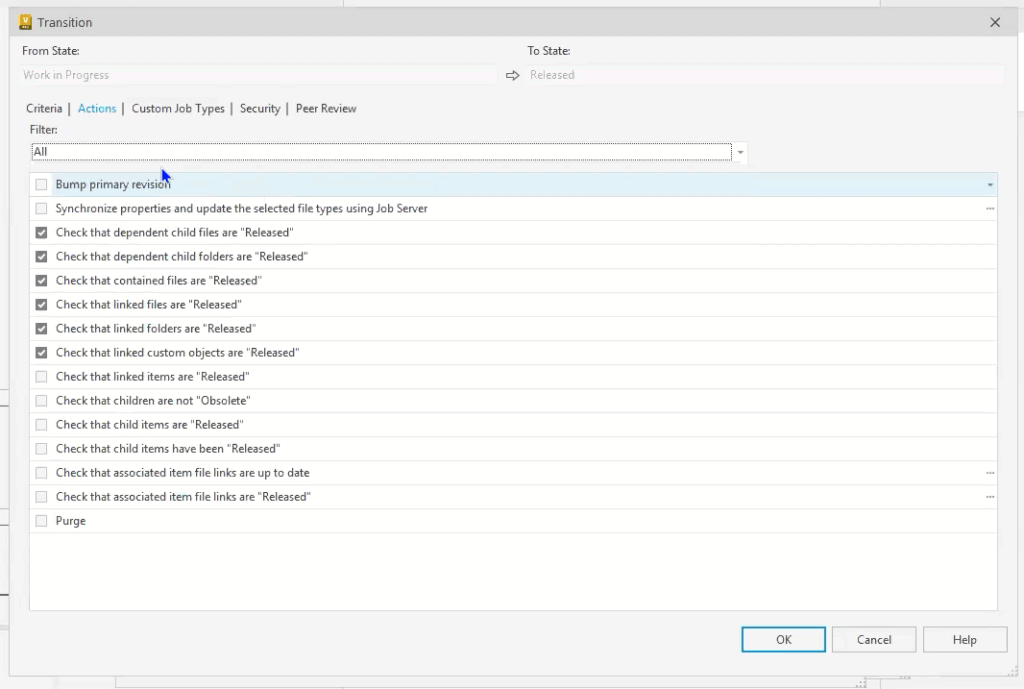
- Custom Job Types allows you to integrate your own custom add-ins or job.
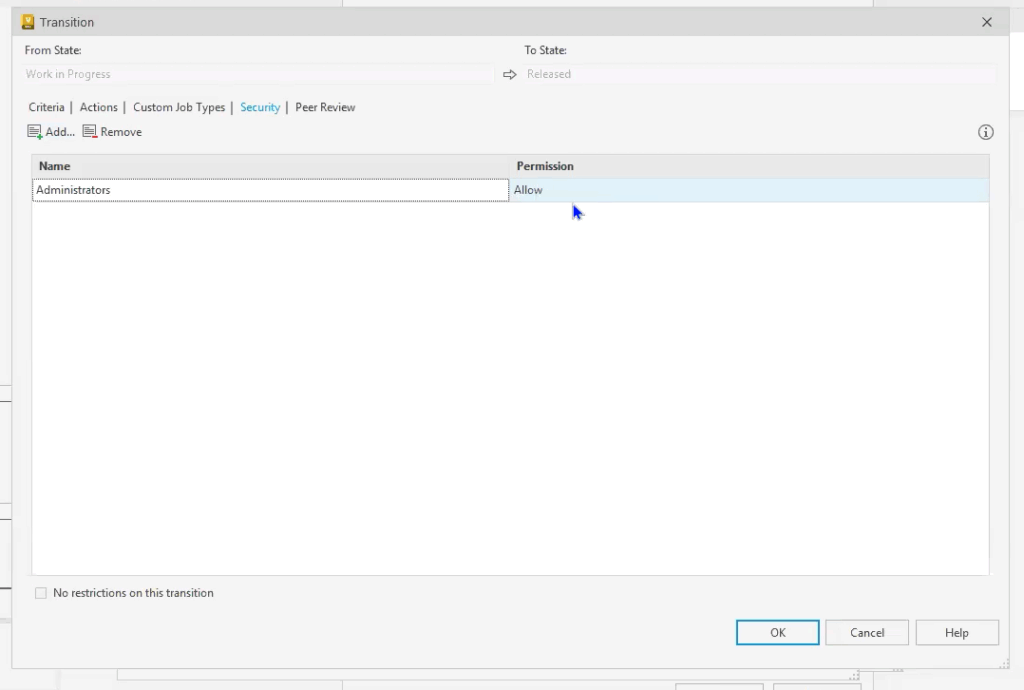
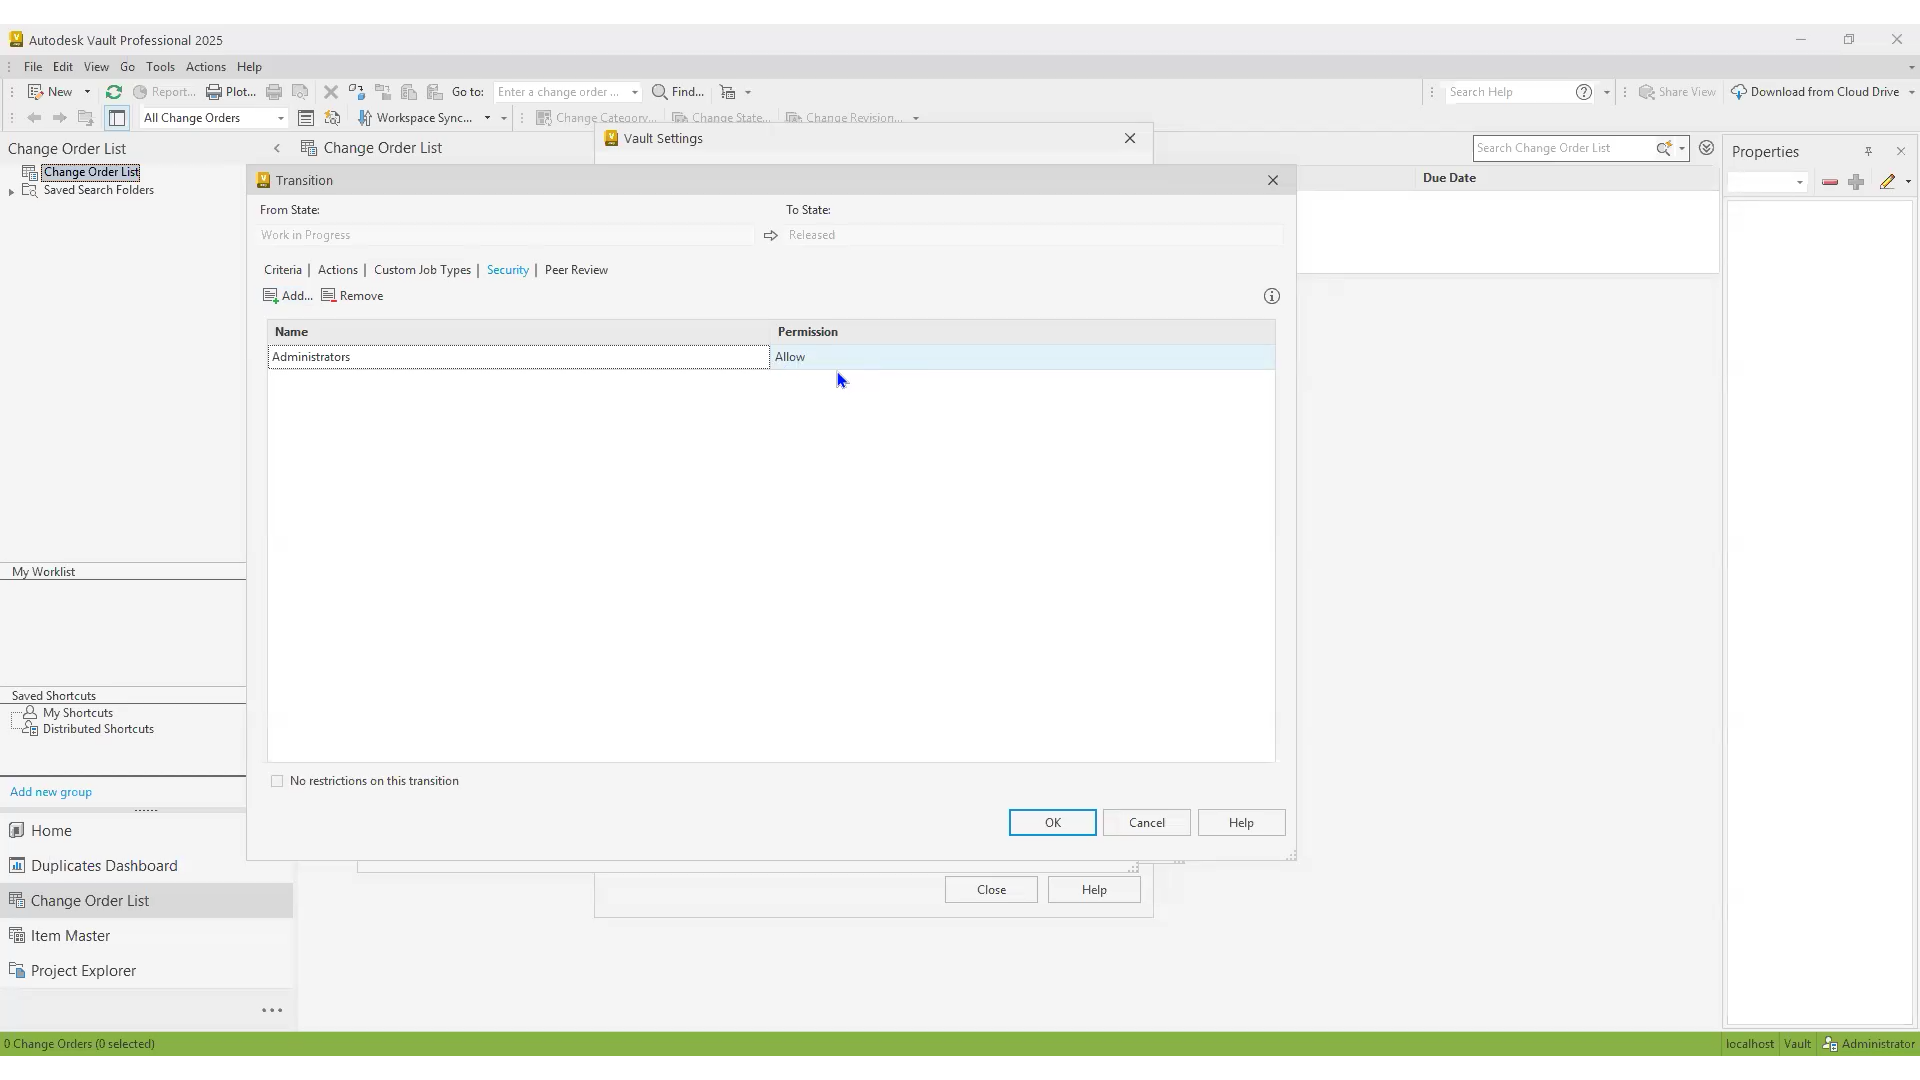
- Under Security, explicitly Allow or Deny groups for that transition, securing critical steps (see Technology Administrator Forums for role‑based best practices).
- Optionally enable Peer Review to prevent the same user from advancing a file twice in a row. You can restrict the review based on the logic rules selected and configured.
- Select a transition (e.g., Work in Progress → Review).
Best Practice: Plan your transition matrix on whiteboard or paper before configuring. That way, you’ll avoid the classic “spider‑web” problem where every state can go to every state.
5. Securing Your Workflow
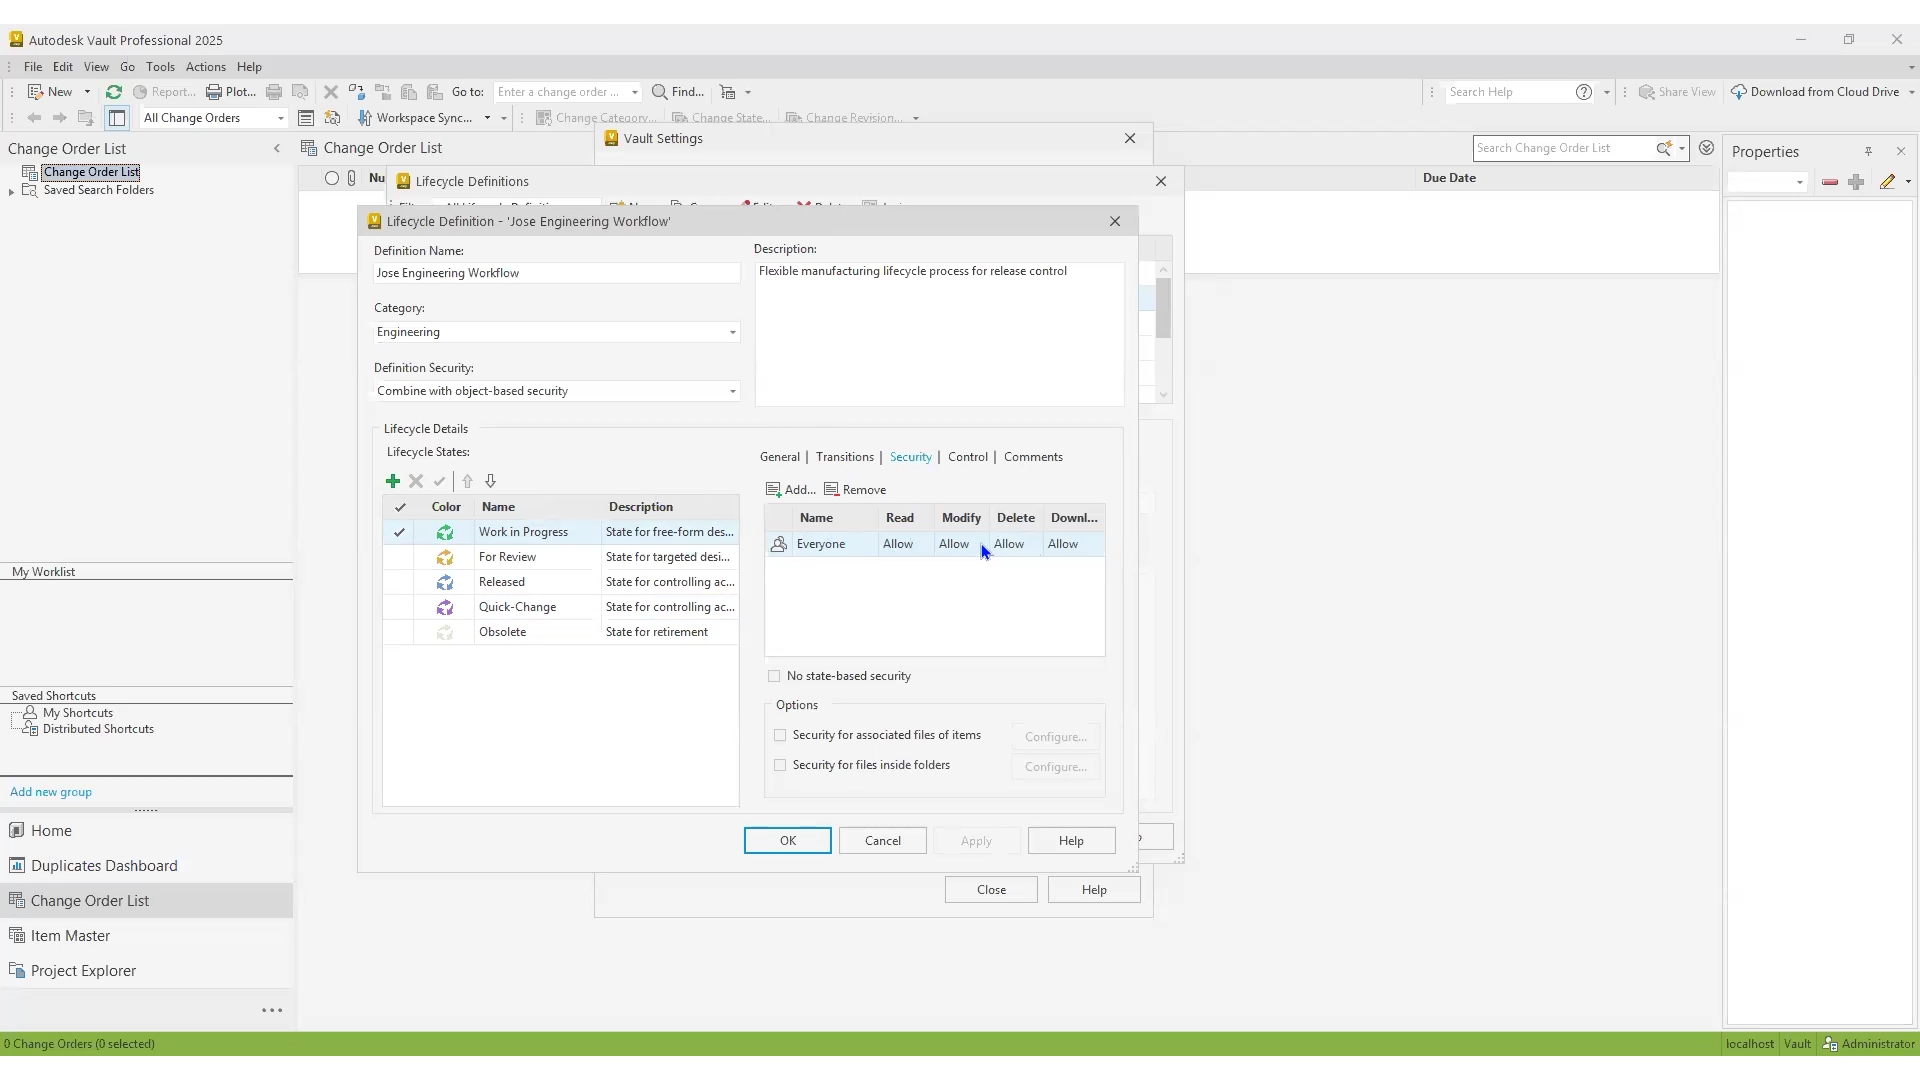
Vault lifecycles can combine with folder‑based permissions or override them entirely during workflow execution:
- Combine is ideal when you want lifecycle security to mesh with existing ACLs.
- Override forces lifecycle rules to take precedence.
Within each lifecycle stage, refine permissions for Modify, Delete, Download, and Read. For example, you might:
- Deny Delete in the Released stage to protect your official design data.
- Restrict Modify rights in the Review stage to a QA group.
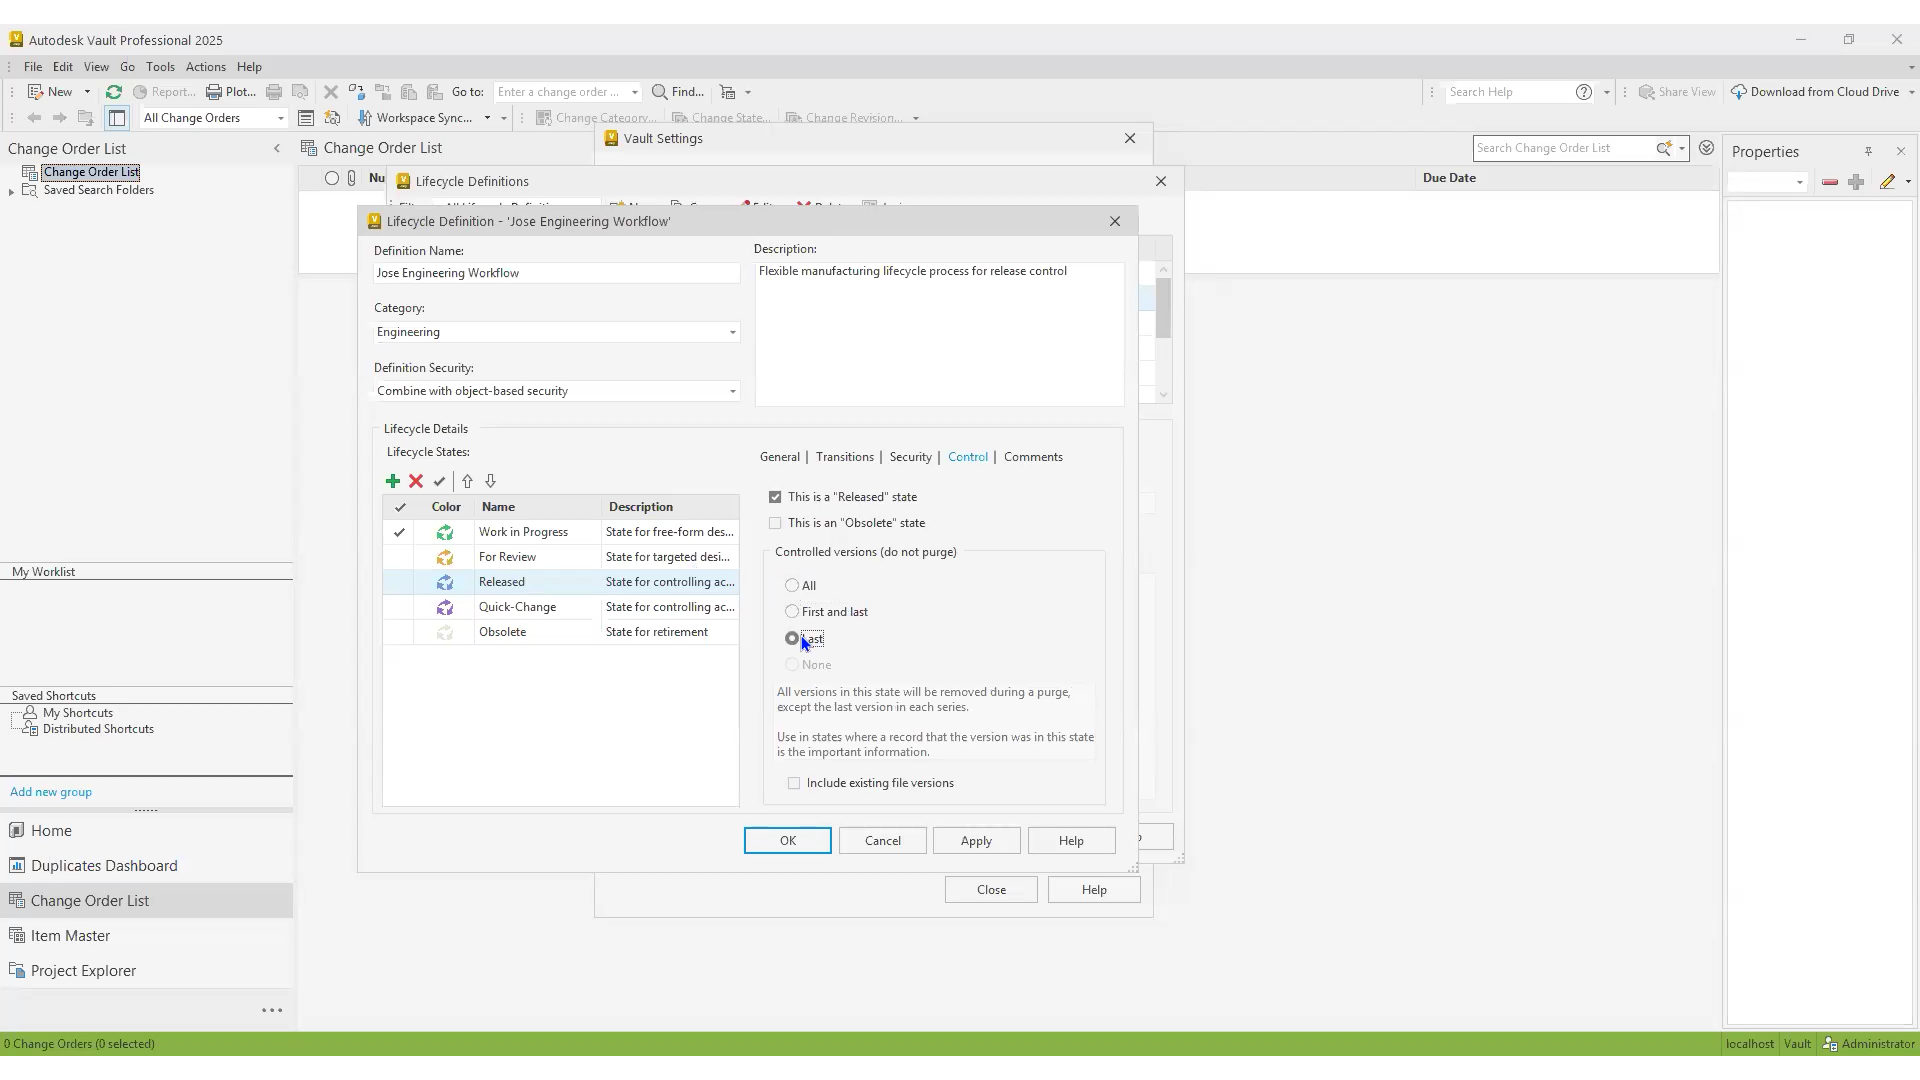
6. Controlling Version Retention
Use the Control tab on each state to manage how many file versions Vault retains:
- None: No automatic purge.
- First & Last: Keeps the initial and most recent versions, ideal for rapid prototyping.
- All: Retains every version, recommended for Released states to maintain a full audit trail.
Enabling Include Existing File Versions applies these rules retroactively to files already in your lifecycle.
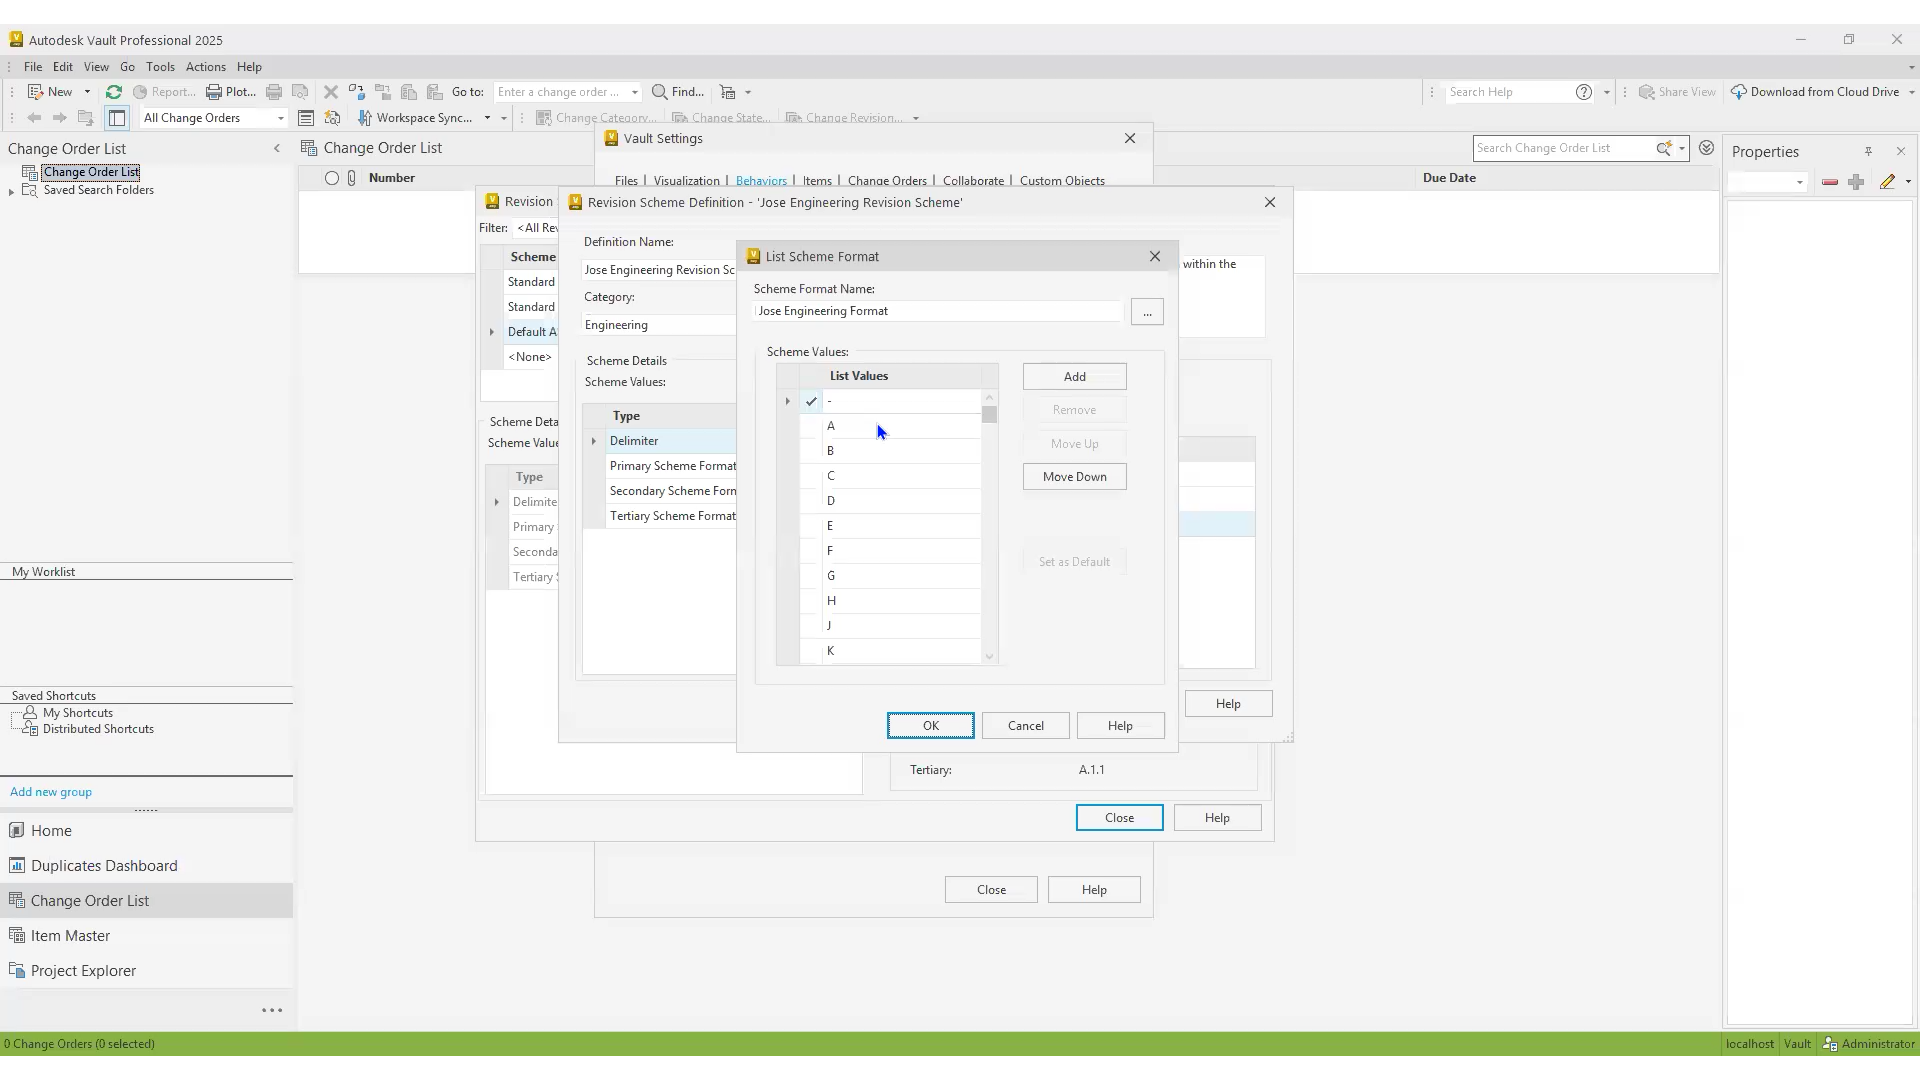
7. Configuring Revision Schemes
Once lifecycles are in place, define your revision scheme so Vault can automate version numbering:
- Switch to Revisions under Behaviors.
- Copy a standard, alphabetic, or numeric scheme, then rename it (e.g., “Engineering-AlphaDot”).
- Set Delimiters (e.g., “.” or “-”) and map Primary, Secondary, and Tertiary formats.
- Add custom values, such as a default “R” for Not Released, and mark it as the default start revision.
- Provide a Description and Comment for clarity.
Your scheme will then integrate seamlessly with lifecycle transitions that bump revisions on state changes.
Conclusion
A well-planned Autodesk Vault lifecycle configuration is more than just an administrative task; it’s the backbone of reliable, secure, and efficient product data management. By clearly defining lifecycle stages, transitions, revision schemes, and security controls, you empower your engineering teams to move confidently through design, review, and release processes without bottlenecks or ambiguity. Whether you’re working in Vault Basic or leveraging the advanced tools in Vault Professional, following the step-by-step framework outlined here ensures your workflows remain consistent, compliant, and scalable. Use this guide as your blueprint, and engage with Autodesk’s vibrant user community and KETIV’s resources to fine-tune your configuration for long-term success.