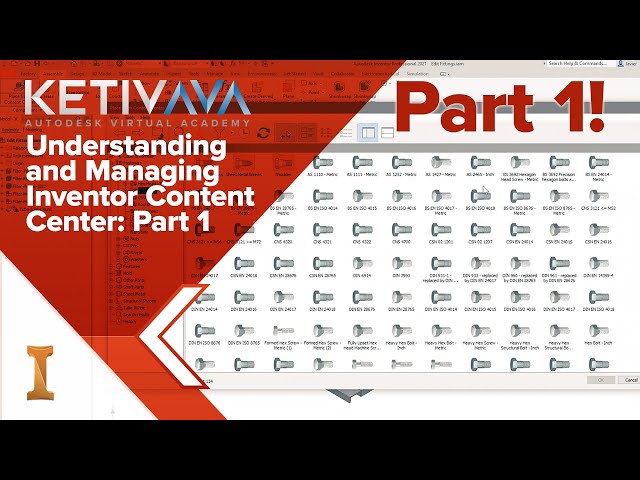
Introduction
If you’re still relying on local Content Center libraries in Autodesk Inventor, you may be missing out on the true power of data management with Vault. Moving your Content Center libraries into Autodesk Vault centralizes your data, eliminates duplication, strengthens security, and enhances collaboration—especially in multi-user environments.
In this guide, we’ll explain why configuring Vault-based libraries is a game-changer and walk you through the steps to install and set up your libraries, ensuring Inventor is properly connected to Vault-managed content.
Why Move Content Center Libraries to Vault?
Using local Content Center libraries may work fine for single-user or isolated environments, but they fall short in a team setting. Vaulted libraries offer the following benefits:
-
Centralized control: Ensure consistent access and versioning across all users.
-
Improved collaboration: Eliminate conflicts caused by outdated or duplicated parts.
-
Better data integrity: Protect critical files with Vault’s user permissions and backup tools.
-
Streamlined workflows: Automatically reuse existing components and reduce design errors.
-
Scalability: Ideal for complex, team-based projects where consistency is key.
Step-by-Step: How to Configure Vault Content Center Libraries
Prefer a video?
Step 1: Download the Standard Libraries
First, make sure you have administrative access to your Vault server.
-
For Vault 2024 and newer, download libraries directly from your Autodesk account.
-
Navigate to Autodesk Account > Products > Vault Professional > View Details > Libraries.
-
⏱ Screenshot Timestamp: 03:18
-
Select and download the libraries you need.
-
-
For Vault 2023 and older, search online using:
Autodesk Inventor [version] remote content center libraries - Click the official Autodesk link to access and download the libraries.
Step 2: Install the Libraries (Extract Zip Files)
Once downloaded:
-
Right-click and Open each library file. This unpacks a
.ziparchive and an installation utility. -
Run the installer to extract the files, but note this does not install the libraries into Vault yet.
Step 3: Configure and Run Setup Script
Inside the extracted folder:
-
Navigate to the
setup.batfile. -
Right-click > Edit, and enter your Vault admin username/password and SQL credentials (only if different from defaults).
Once complete:
-
Right-click > Run as Administrator to install the libraries to Vault.
Step 4: Verify Installed Libraries in ADMS Console
-
Open Autodesk Data Management Server (ADMS) Console.
-
Confirm that your standard libraries are listed.
-
To add a custom library (for company-specific parts), right-click Libraries > Create Library, and follow prompts.
-
Choose the appropriate Inventor version for the partition.
-
Step 5: Create Vault Folder for Content Center Files
-
Open your Vault Client.
-
Right-click Project Explorer > New Library Folder.
-
Name it something like
Content Center Files. -
This folder will store generated parts from Inventor.
Step 6: Configure Inventor to Use Vaulted Libraries
-
Open Autodesk Inventor.
-
Go to Tools > Application Options > Content Center.
-
Switch the library location from local to Vault.
-
Ensure the path for generated parts points to the folder you created in Vault.
Unlock the Full Potential of Inventor’s Content Center
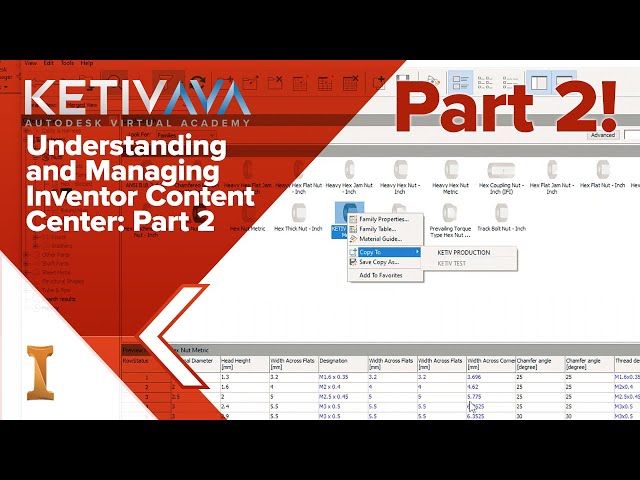
Just set up your Vault Content Center libraries? Now it’s time to put them to work. In this follow-up video, Senior Application Engineer Javier Chavez shows you how to take full advantage of your newly vaulted libraries inside Inventor. Learn how to place standard parts efficiently, customize your Content Center to match your part numbers and BOM standards, and build a smarter, more connected design workflow.
🎥 Watch now to bridge the gap between setup and day-to-day usage—and unlock the real value of your Vaulted libraries.