
Engineering change orders (ECOs) are a critical component of managing revisions, design approvals, and regulatory compliance in any engineering or manufacturing environment. In Autodesk Vault Professional, engineering change orders help streamline the change management process by integrating with lifecycle workflows and centralizing data around product modifications.
Autodesk Vault enables engineering teams to automate and track the full lifecycle of a change, from initial request through approval and final implementation. By setting up ECOs correctly, companies can improve data integrity, maintain compliance, reduce errors, and improve cross-team communication.

Why Use Engineering Change Orders in Autodesk Vault?
Autodesk Vault Professional offers built-in support for ECOs that align closely with your product development workflows. Here’s what you gain:
- Controlled workflows for change approvals and revisions
- Role-based permissions to assign accountability
- Audit trails and markups for full design traceability
- Automated notifications to keep engineers, managers, and stakeholders informed
- Integration with Autodesk Inventor, AutoCAD, and other design tools
- Customization based on your specific engineering processes
Whether you’re implementing change requests, revising BOMs, or managing compliance-related documentation, ECOs ensure that design changes are executed systematically and consistently.
Step-by-Step: How to Set Up Engineering Change Orders in Autodesk Vault
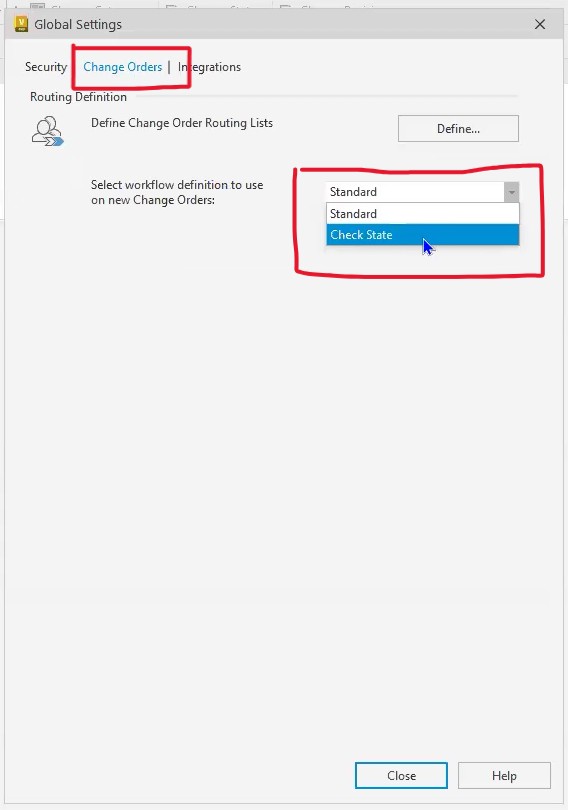
1. Enable or Change the Workflow Type
- Go to Tools > Administration > Global Settings
- Click the Change Orders tab
- Under Workflow, select either:
- Standard – if you want a direct Work > Review > Approved process
- Check State – if you want an iterative Work<> Check > Review > Approved process
- Click Close
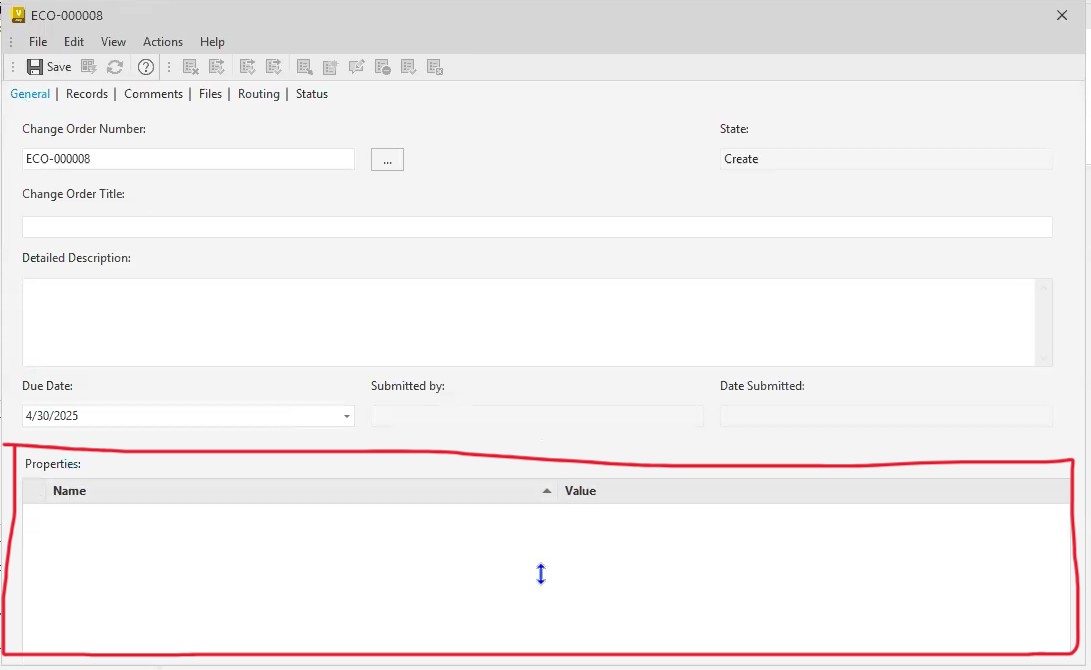
2. Add Custom Properties to Change Orders
- Open a Change Order and go to the General tab
- Add custom Properties (such as Department, Urgency, etc.)
- These are empty by default and must be configured in Vault Settings
- These fields appear on the “cover page” of the ECO
3. Create a New Routing Template
- Go to Tools > Administration > Global Settings
- Select Change Orders > Define
- Click New
- Name your routing (e.g., Mastering Vault Routing)
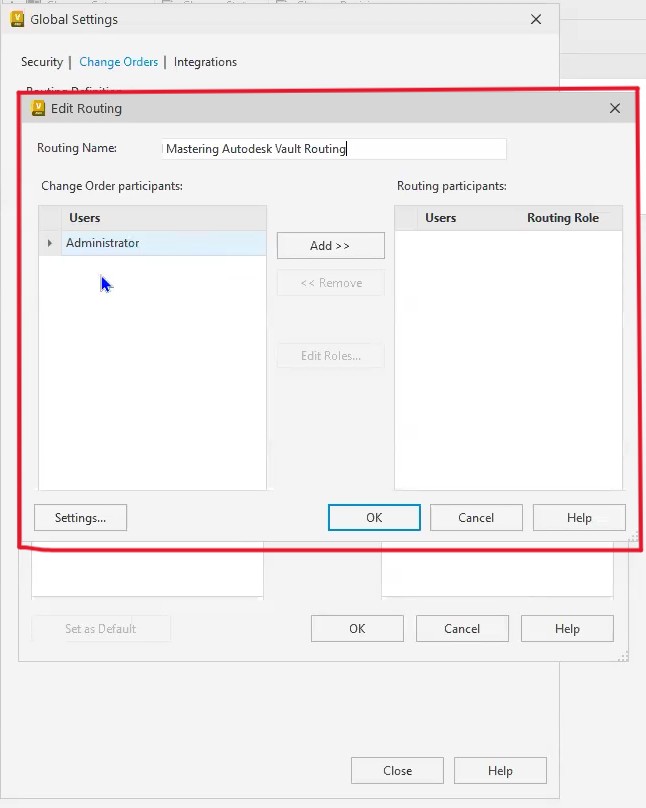
4. Assign Roles to Routing Participants
- Click Add to insert users into the routing
- Assign roles such as:
- Approver
- Change Administrator
- Checker (only if using Check State)
Vault will display an error if required roles (e.g., Responsible Engineer) are missing
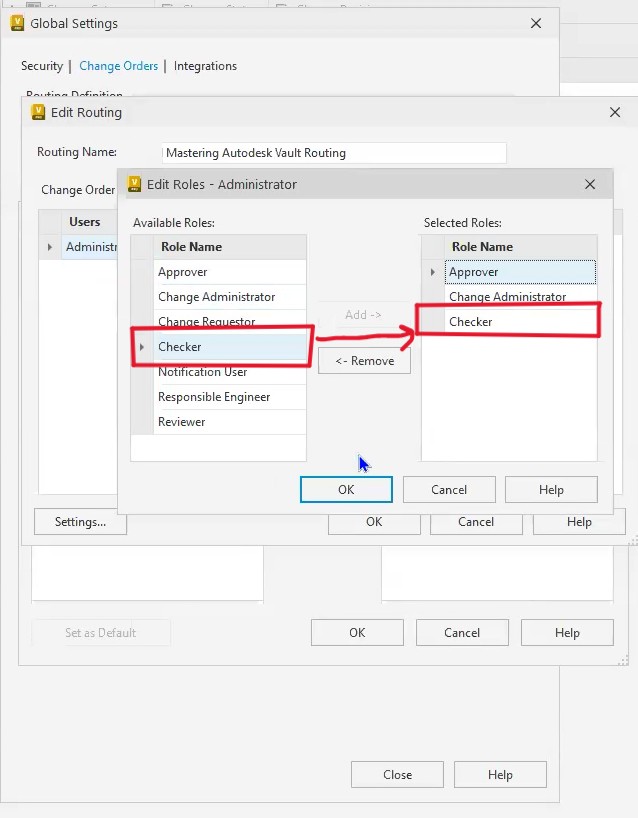
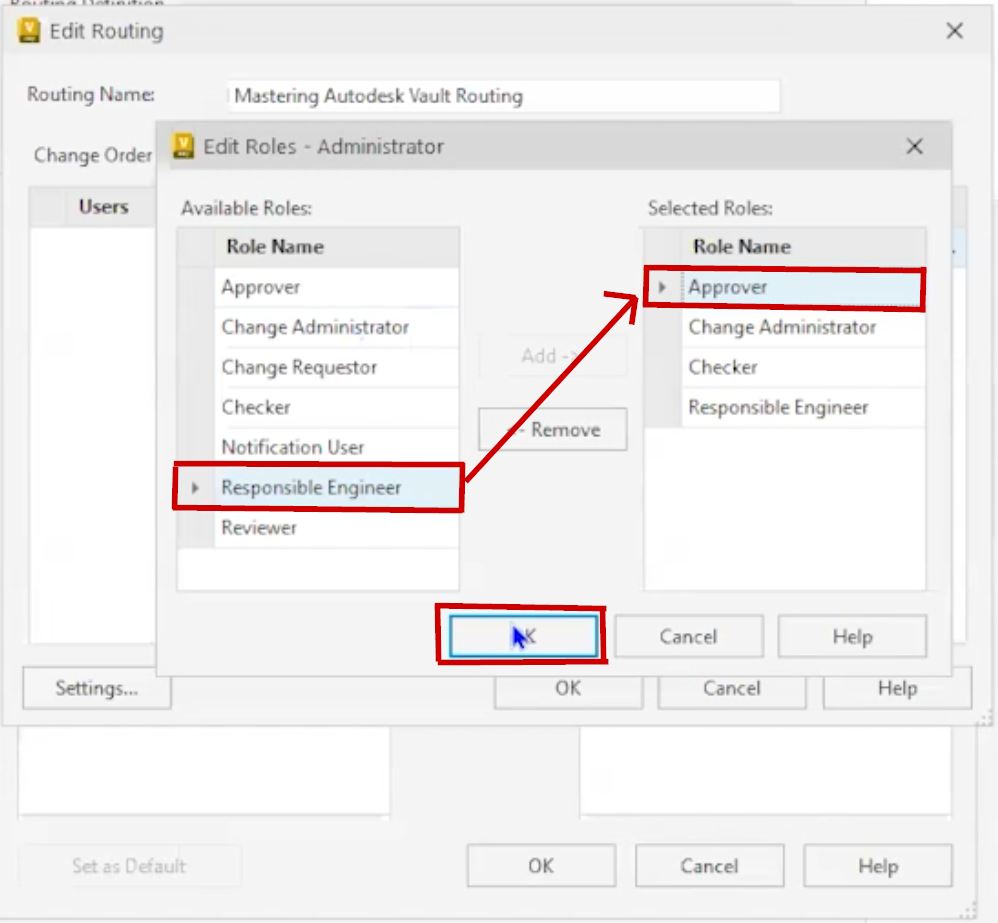
5. Add the Responsible Engineer
- Select the user already added to the routing
- Click Edit Roles
- Assign the Responsible Engineer role
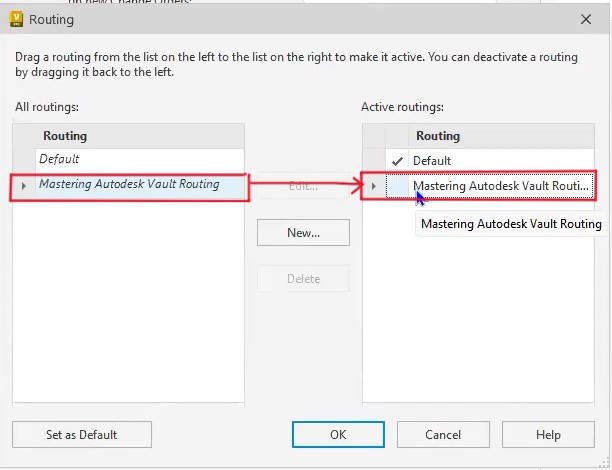
6. Set the Routing as Active
- In the Routings list, drag your new routing to the Active Routings section
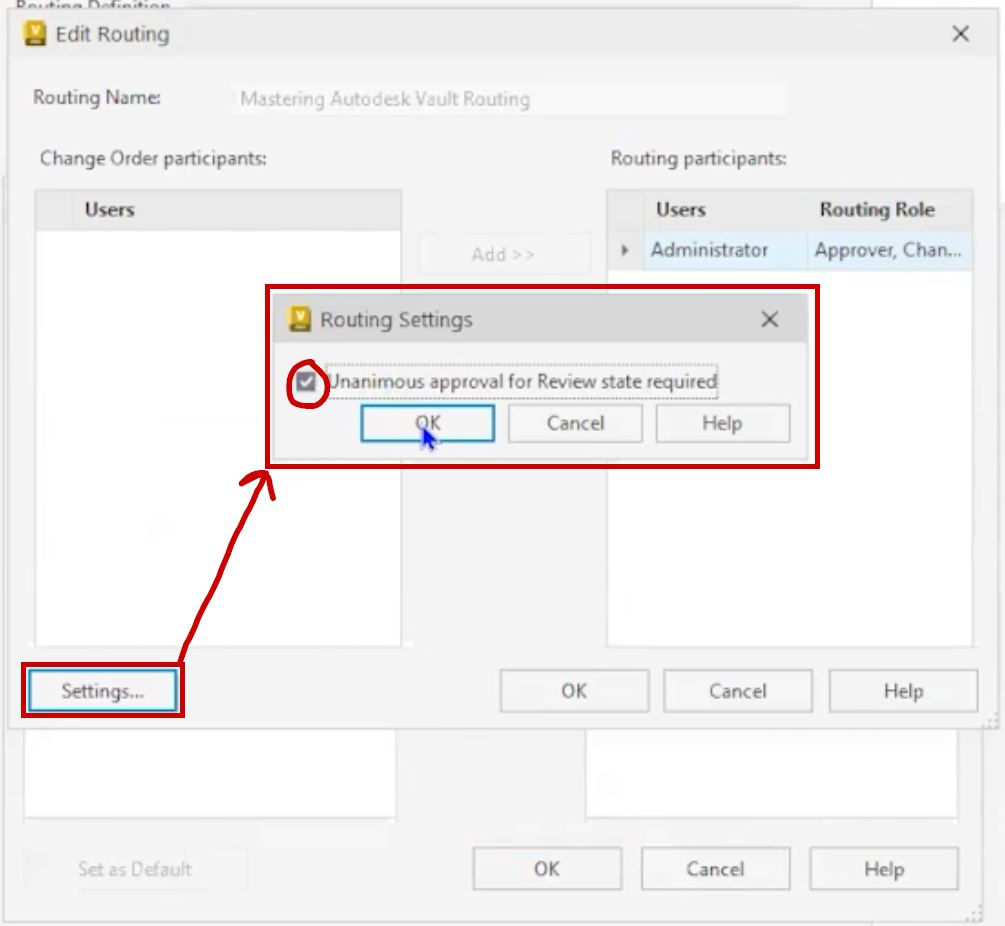
7. Set Unanimous Approval [optional]
- Select your routing and click Edit
- Under Settings, check “Requires Unanimous Approval” if needed
- Click OK
8. Apply the Routing to a New Change Order
- Click New to create a new Change Order
- In the Routing dropdown, select your newly created routing
- Click Save

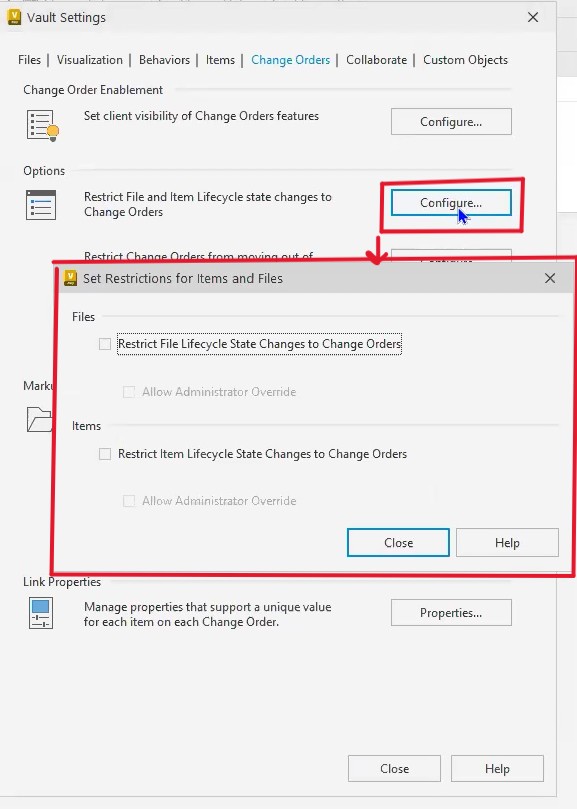
9. Enforce Lifecycle State Changes via ECOs
- Go to Tools > Administration Vault Settings > Change Orders > Options
- Enable:
- “Restrict file/item lifecycle stage changes to Change Orders”
- “Allow Administrator Override” (optional)
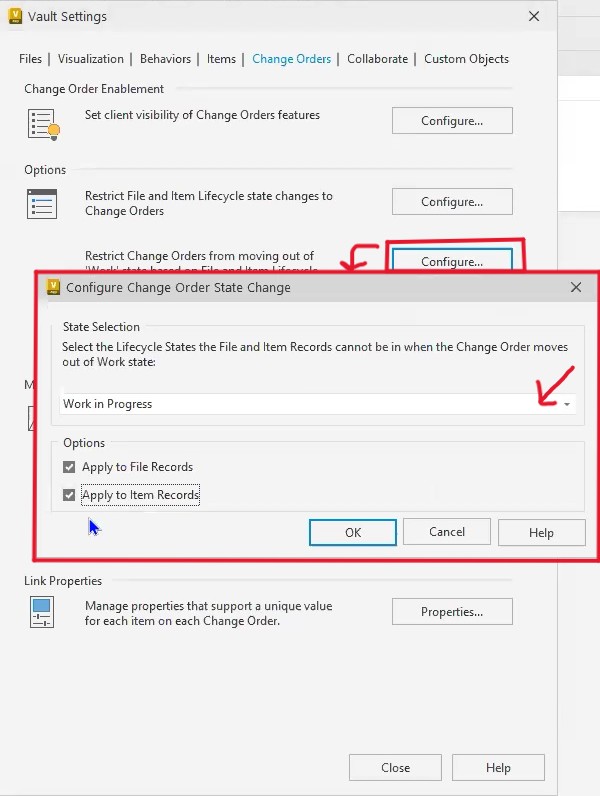
10. Configure Required Lifecycle States for Files/Items
- In the Options tab again, click Configure
- Select a lifecycle (e.g., Flexible Release Process)
- Set restricted states (e.g., disallow Work in Progress)
- Apply to Files and/or Items
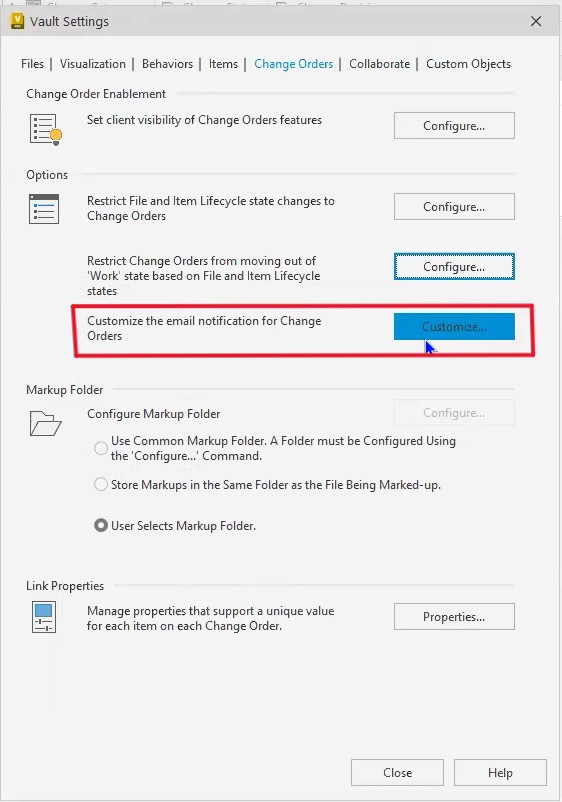
11. Customize ECO Email Notifications
- In the Options tab again, click Customize
- Edit the subject, body, and fields of the notification emails
- Configure content for assignment or reminder messages
Conclusion
Engineering change orders in Autodesk Vault provide a structured, repeatable way to manage design revisions across engineering and manufacturing. By aligning Vault ECO tools with smart workflows, clear permissions, and data controls, you can drastically reduce costly errors and maintain high data integrity across your organization.
Whether you’re working with Autodesk Inventor, AutoCAD, or Vault Thin Client, these tools help engineering teams stay aligned, compliant, and efficient—no matter how complex the project.