
This guide explains how to configure groups and permissions in Autodesk Vault, covering best practices for group setup, assigning roles, managing permissions, and optimizing your Vault server for both Autodesk Vault Basic and Vault Professional users.
Autodesk Vault is a robust data management solution designed to support engineering, architecture, and construction teams who rely on Autodesk products such as Autodesk Inventor and AutoCAD. Efficiently configuring groups and permissions in Autodesk Vault is essential for streamlined workflows, secure data management, and simplified administration, especially in multi-user environments.

Why Configure Groups in Autodesk Vault?
Groups in Autodesk Vault function like teams or departments within your organization, such as engineering, sales, or production. By configuring groups, Vault administrators can:
- Simplify permission and access management across multiple Vaults
- Assign user permissions at the group level rather than individually
- Streamline folder and lifecycle state permissions
- Ensure consistent access control for all group members
- Scale and adapt as the team grows or roles change
With group-based access control, admins can easily manage team access—simply add or remove users from a group, and their permissions update automatically across folders, lifecycles, and Vaults.
Key Concepts and System Requirements
Before you begin, ensure your Vault server meets the current system requirements for your Autodesk Vault deployment. This includes having Autodesk Vault Professional, Vault Basic, or Vault Server installed on your Windows Server and ensuring SQL Server compatibility. Make sure you have administrator privileges in Vault Explorer to configure groups and permissions.
Step-by-Step: How to Configure Groups and Permissions in Autodesk Vault
1. Open Vault as an Administrator
Log in to Autodesk Vault Professional as an admin user.
2. Access the Group Management Window
- Go to Tools > Administration > Global Settings.
- Click the Manage Access button.
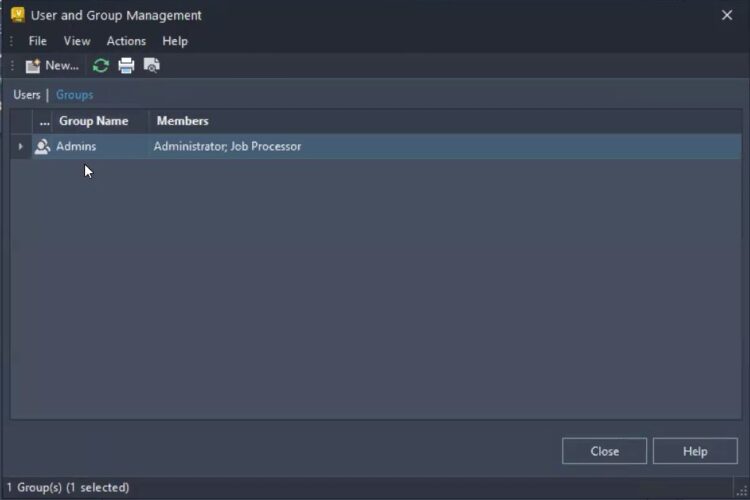
- In the user and group management window, click Groups to view your list of existing groups.
3. Add a New Group
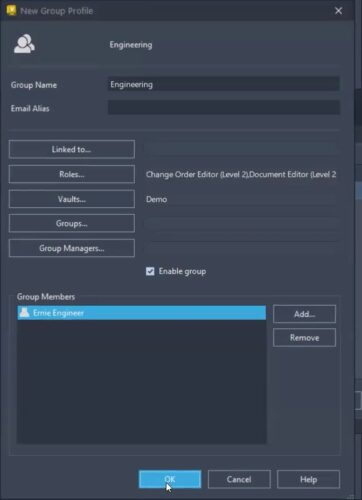
- Click New to start creating a group.
- Enter a descriptive name for the group (e.g., “Engineering”).
- Assign one or more roles to define permissions for the group.
- Assign the group to one or more Vaults.
- (Optional) Add a group manager to manage group members.
- Add users to the group by selecting group members.
- Click OK to save the new group. You will see your new group appear in the list.
4. Manage Group Membership
- To add or remove members, select the group and use the add/remove options.
- You can also add users to a group by editing the user’s profile and adding them to one or more groups.
5. Review and Customize Group Permissions
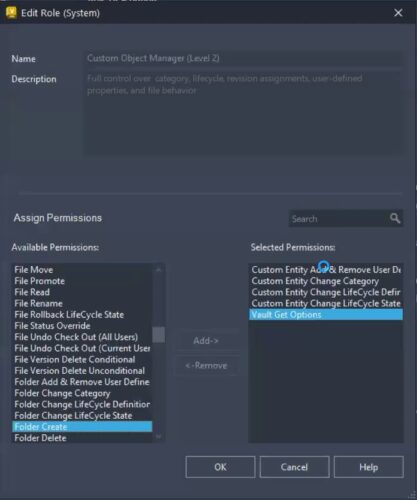
- In the Global Settings window, click the Manage Roles button to see a list of available roles for the group.
- Double-click a role to review the specific permissions assigned.
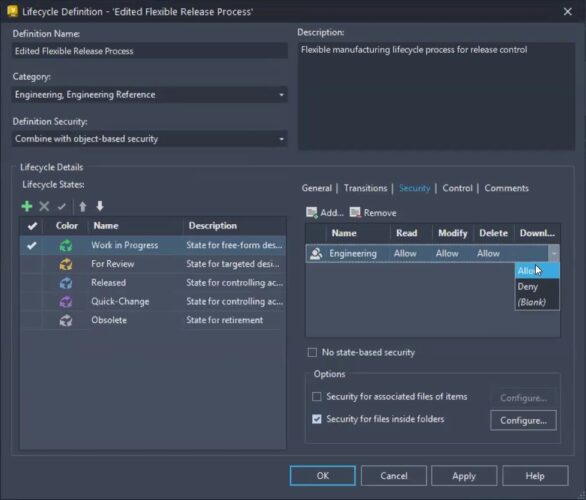
6. Assign Permissions to Lifecycles and States
- Go to Tools > Administration > Vault Settings.
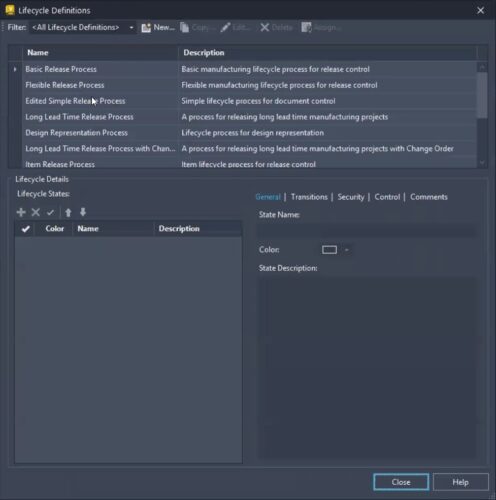
- Click the Behaviors tab, then choose Lifecycle.
- Select the lifecycle you want to configure and click edit.
- In the Security tab, remove the default “Everyone” group if needed, and add your custom group.
- Assign the desired permissions (Allow or Deny) for each group.
- Repeat this process for each lifecycle state and transition as needed.
- For transitions, go to the Transitions tab, select the transition, click Edit, then go to the Security tab, and set permissions for your group.
Additional Best Practices
- Consistent Naming: Use descriptive group names for easy identification.
- Group-Based Security: Always assign roles and permissions to groups rather than individual users, where possible.
- Audit Regularly: Periodically review group memberships and permissions to maintain security compliance and operational efficiency.
- Leverage Community Resources: The Autodesk Vault forum, Community Hub, and Autodesk University offer additional best practices and troubleshooting tips.
- Cloud Management: For organizations looking to offload configuration management, consider Autodesk Vault in the Cloud through KETIV.
Conclusion
Configuring groups and permissions in Autodesk Vault is critical for securing project data, simplifying administrative overhead, and enabling team collaboration. By following the steps and best practices outlined in this guide, Vault administrators can create a scalable, secure, and efficient access control system that meets the evolving needs of modern engineering and construction teams.