Challenge:
I have too many constraints (relationships) in my assembly, how can I streamline my assembly and lower the amount of relationships I have? How can I use the Inventor Joint to optimize that?
How to use Inventor Joint to optimize the number of part relationships
Solution:
The solution is the Joint relationship inside of Inventor 2016. The Joint feature can create relationships between parts that would otherwise take two or even three constraints.
First, go to the “Assemble” tab, and select the “Joint” icon, if it’s not visible you may have to expand the Relationships panel to see it.

The Joint command dialogue box will appear:
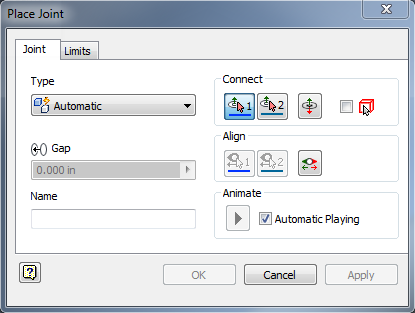
Similar to the Constrain dialogue box, it will ask for the user to select the two part features to apply the joint to and what type of joint to apply.
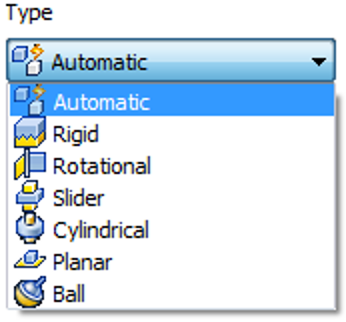
Different type of connections in Inventor Joint feature
The default connection type is Automatic. Automatic determines the joint type based on the following rules:
- You will select “Rotational” d if the two selected origins are circular
- “Cylindrical” is selected if the two selected origins are points on a cylinder
- You can select “Ball” if the two selected origins are points on a sphere
- Rigid is selected for all other origin selections
For moving joints, selection order is important. You’ll want to be sure to select the origin on the moving component first and the origin on the stationary component second. If necessary, change the joint type and click apply. When you do, the program displays a small simulation of how the parts will interact with the selected joint type.
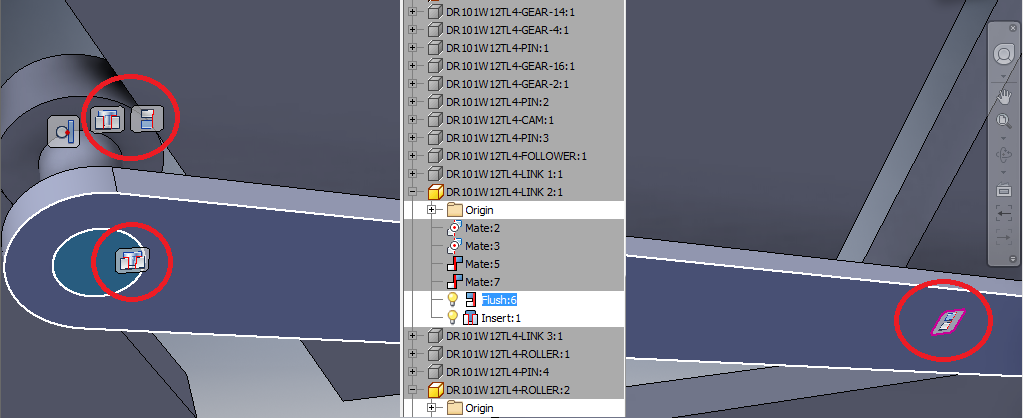
Now, how does this help to streamline my work flow? Well, if you were to use Constraints to get the desired behavior of the roller joint in it would take one Tangent, a Flush, and Insert applied between the pin and arm and pin and roller. This comes out to be a total of 5 relationships for one joint!
If you were to instead use Joints to the same roller joint between the pin and arm and the pin and roller, it would only take 3 relationships total when you include the Tangent Constraint. This comes out roughly to be a 1:2 ratio between the number of Joints used compared to Constraints used.
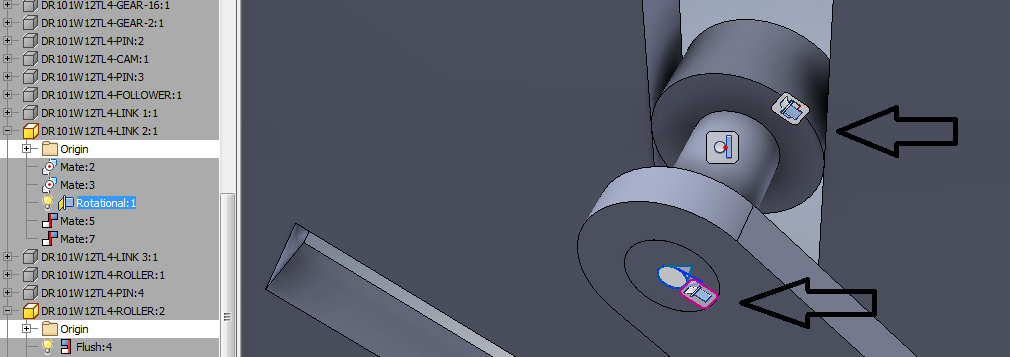
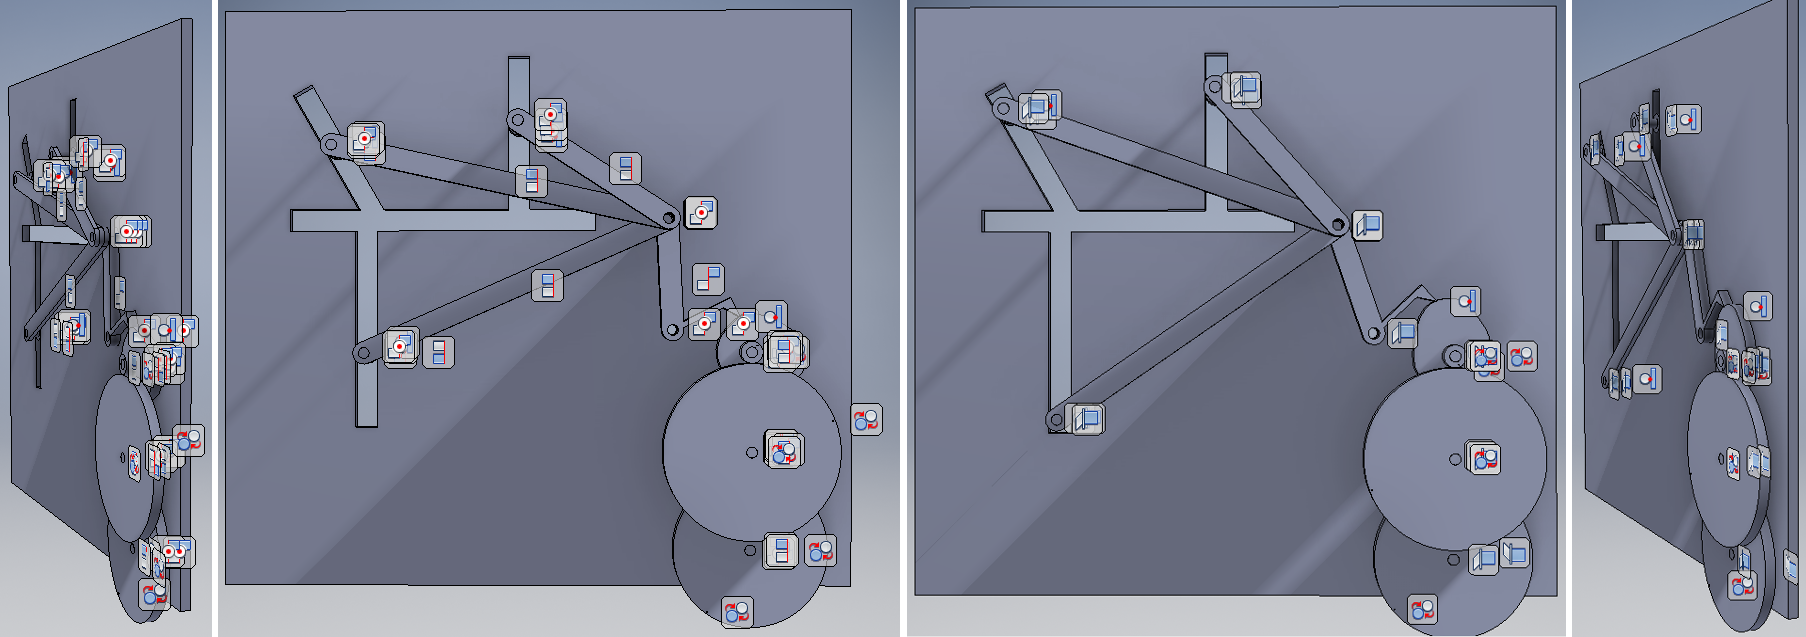
This may not seem significant now, but if you work with large assembly files, the number of relationships you use can grow fairly quickly. This includes a multitude of different parts and sub assemblies. By using Inventor Joint, you can easily “clean up” your assemblies and reduce the total amount of relationships greatly. In the example below, the assembly that didn’t use any joints had a total of 45 relationships. The assembly using joints had only 29 total relationships.
In conclusion
So go ahead and try this out on your own and see for yourself how it can help you in the future.
Interested in learning more? Join us online every Thursday @ 10 am Pacific Time. We cover tips and tricks, instructions, latest industry information, popular topics & customer requests delivered by KETIV’s certified instructors, Autodesk experts, and user community.

