Using iLogic within an Inventor part can unlock many opportunities for automation. However, at some point the requirements of your desired automation outcome surpass what iLogic was designed to do. This is when you need to leverage a full IDE like Visual Studio. A great way to do that is by creating an Add-in.
Getting Started
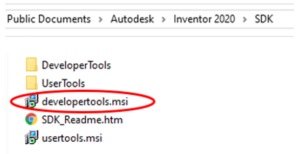
To start connecting Visual Studio to Inventor through an Add-in, the first step is to setup a template. Autodesk provides one as part of its developer tools. To access this, double click on the developertools.msi found in the SDK folder shown below.
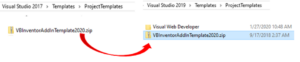
Next, you need to check that the AddInTemplate zip file is in the correct folder based on what version of Visual Studio you are using. Currently the template zip file is placed in the Visual Studio 2017 project templates folder, if you are not using 2017 then you will need to switch it to the appropriate folder as shown for 2020 in the example below.
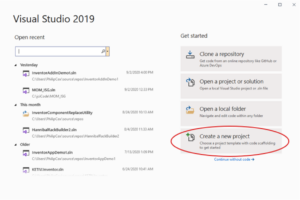
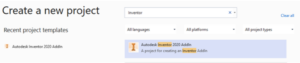
Now that you have done that, you should be able to access that template in your Visual Studio Editor. Create a new project and select the Autodesk Inventor AddIn template.
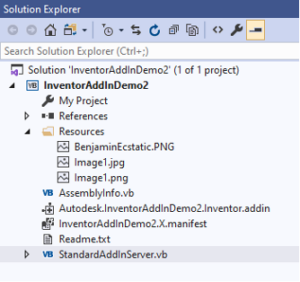
Now that the project is created using the template, several project settings need to be set up. Right click on the project file and open the project properties.
Making Changes
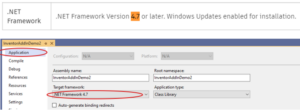
Here there are several things we will need to change. First, on the application tab, make sure the Target framework matches what is listed in Autodesk’s system requirements for Inventor as shown below.
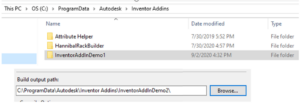
Next, create a new folder at C:\ProgramData\Autodesk\Inventor Addins\ named after your application then select it as your “build output path:” as shown below.
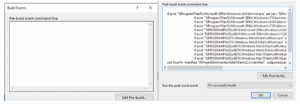
Also on the compile tab, click the Build Events button and clear out all of the build events by deleting any text you see in the pre-build event and post build event text boxes.
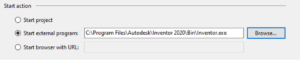
On the Debug tab, switch the Start project radio button to “Start external program”. Then click the browse button and select the inventor.exe file in path shown below (changed based on the version of Inventor).
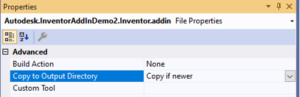
Now that we have set those properties, there are two settings to check on the Inventor.addin file. Select the Inventor.addin and change its “Copy to Output Directory” property to “Copy if newer” as shown below.
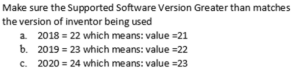
Next, double check that the “supported software version greater than” value is correct within the file’s text. Change the value shown below if needed.
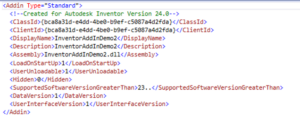
<SupportedSoftwareVersionGreaterThan>23..</SupportedSoftwareVersionGreaterThan>
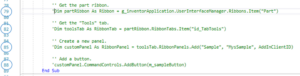
Now all the properties have been set. What remains to be done is to modify the template to make your add-in appear on a ribbon in inventor. Select the “StandardAddInServer.vb” and uncomment the following lines shown below.
![]()


Next, click the start button in visual studio which will launch Inventor.

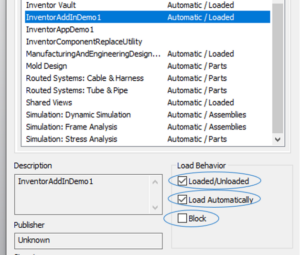
To unblock the app launch the add-in Manager and uncheck the “Block” check box, and check the Load Automatically and Loaded/Unloaded boxes.

This will make a button appear in your tools ribbon that when click will launch a message box saying “Button was clicked.” (Note: the name of the button and ribbons in the example below have been changed).

And there it is. Congrats you have launched your first add-in!
I tried this in VS2019 (16.10) for INV2022 with only one change , I targeted .NET Framework 4.8 since INV2022 requires this and I ended up with number of errors like “Can’t find source for binding reference” when application type was set to Class Library. When I tried it as Windows Form , then it wrote “sub main was not find”. My other Windows Form app runs with .NET 5 without any issues, so I tried to modify AppConfig file in Autodesk template to .NET 5, but with no success. Autodesk Inventor template still offers only .NET Framework 4.8. Any idea?
There are several things that could have gone wrong with the set up based on what he shared. With a different version of inventor it could be an incorrect SDK toolset or the wrong DLLs or something else entirely. Without further information it’s hard to narrow down what is wrong with the setup. If you still have more questions, please feel free to email us at support@ketiv.com. Thank you!