
Each time a new design is made, a new drawing must also be made and sent to manufacturing. This drawing has crucial information for manufacturing, such as front/side/top views, dimensions, and tolerances, BOM, a Part Number, you name it. It is best that some of this information is manually added to the drawing. However, as for the redundant tasks, such as adding the company logo, inserting views, inserting a Parts List, and more, why not templatize the software to auto-populate this information for you? And let us also share amongst your entire team how to create custom title blocks in Autodesk Inventor.
Not only will this save the repetitiveness of having to perform those mundane tasks, but it will also reduce the number of errors users can make when manually inputting this information. Have your engineers spend more time designing the product rather than enter data.
Take a look at the recent Autodesk Virtual Academy on the topic for more information:

What to do to create custom title blocks in Inventor
The First step is to create a new template from scratch
First, let’s start with creating a new template from scratch. Templates are typically located wherever your Project is mapped to look for it under “Folder Options”.
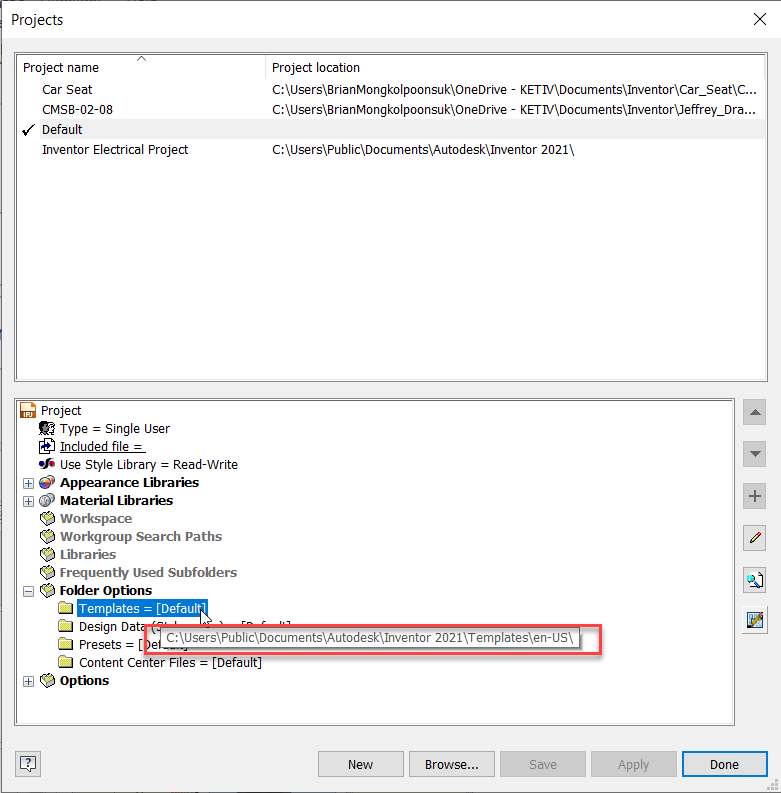
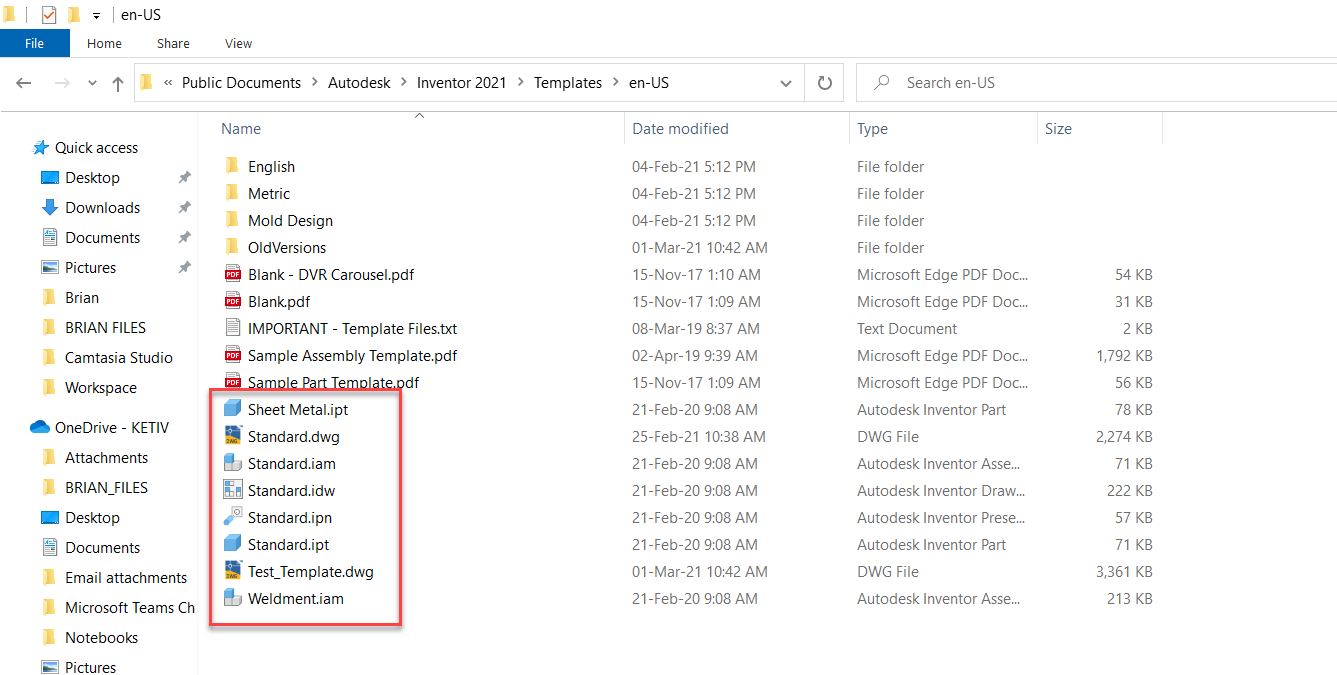
Navigating to this location, you can see all your template files. These are.IPTs,.IAMs,.IDWs,.DWGs ready to be utilized. When opening these up from here, you can make real changes to the template (as opposed to opening them through Inventor).
Keep in mind, if you want to make company-wide changes, these templates will either need to be in a Shared Drive that the entire team’s project file is pointing to. Or if you are using Autodesk Vault, these are uploaded to Vault and are being pointed to using a Vault project. (Reach out to me if you don’t know how to do this step!)
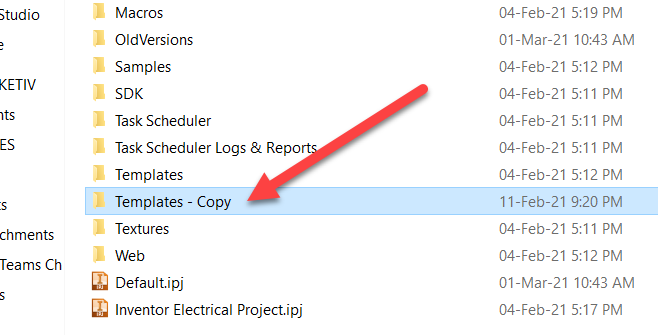
As a precaution, we typically recommend making a copy of these templates and saving them nearby in case you need to reset one of them back to its default. As another precaution, make sure you have Administrative rights or is someone at the company who should be making these company-wide changes.
Open up an .IDW or .DWG template
Now let’s go ahead and open up an .IDW or .DWG template. Drawing our attention to the left-hand side, we can see that there are different types of Drawing Resources. These are types of small “templates” in itself ready to be utilized:
First, there are “Sheet Formats”.
Let’s say you typically input the front, side, top, and isometric views into your drawing with a Parts Lists.
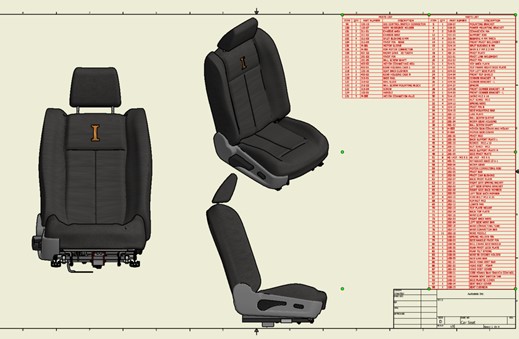
Instead of having to insert these items into your drawing every time, you can have Inventor save all of these settings by right-clicking the sheet and choosing “Create Sheet Format”.
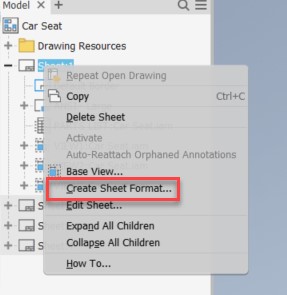
The next time you want to insert these views and Parts List into your drawing, you can just double-click to insert the Sheet Format instead.
Next, there are “Borders”.
This represents the line that goes around the edges of your drawing. You can customize this by drawing your own lines. In addition, you can dimension them about the edges of the paper itself, creating your own “margins” that update every time you decide to change the paper size.

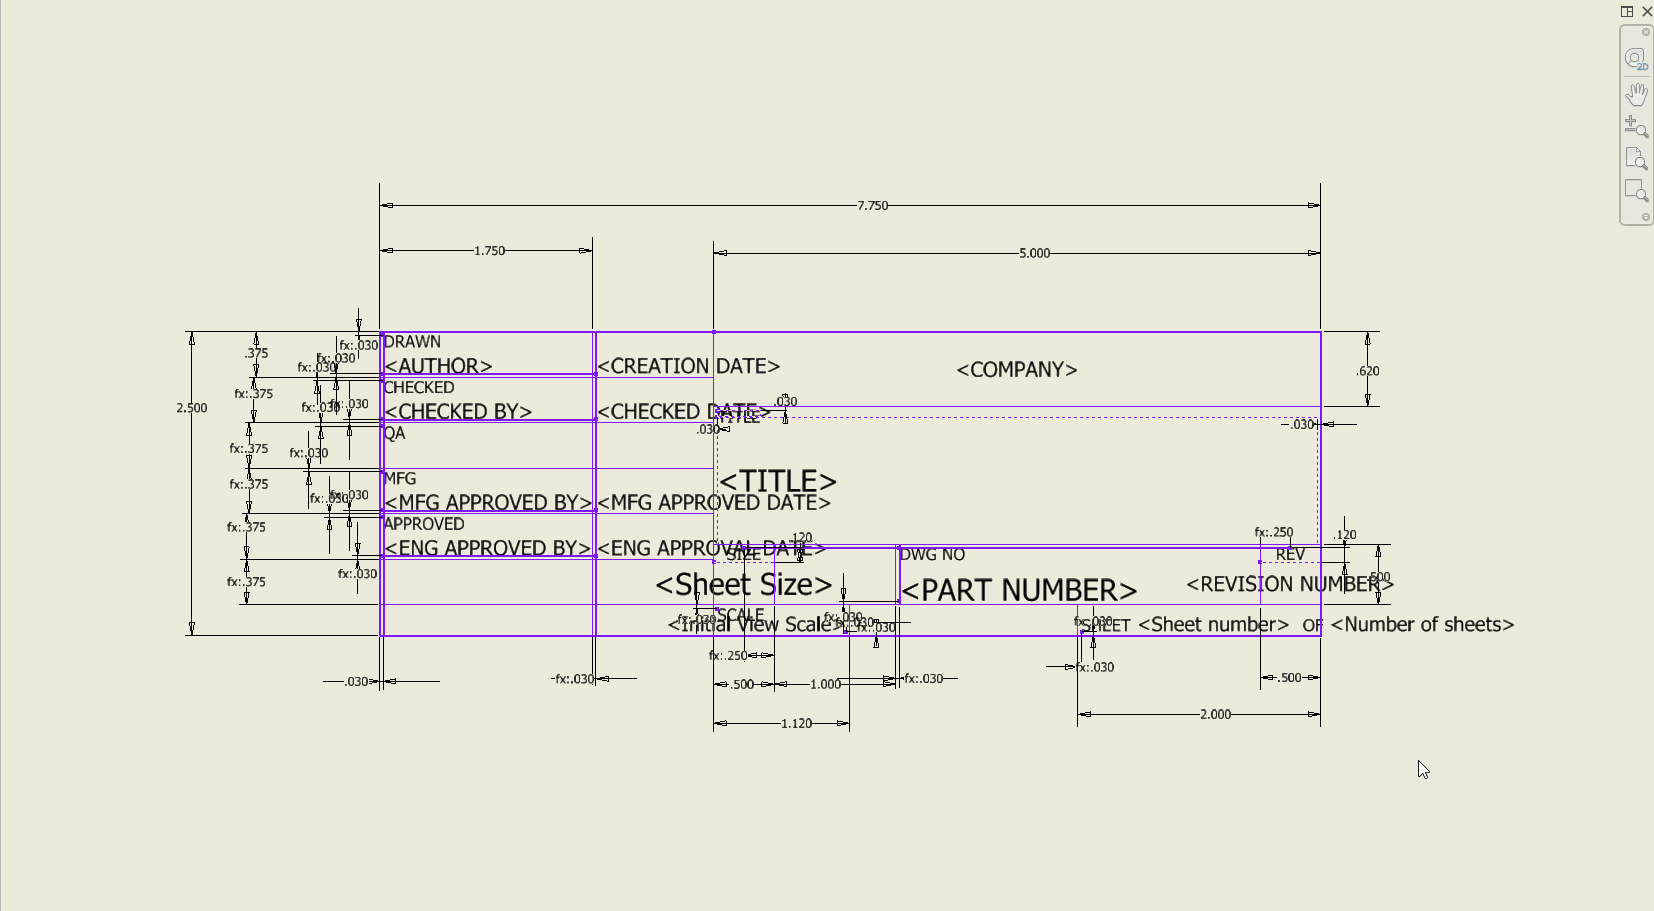
Next, there are “Title Blocks”
This is where most of the customization comes in, where you make add your referenced variables like Part Number, Date, Approved By, etc. here. Setting up your Title Block to reference information that you already have digital knowledge of will not only help the speed in which your team can create Title Blocks, but it will also help reduce the room for error.
Next there are “Sketch Symbols”.
This allows you to create and standardize commonly used symbols that your company may use in your drawing. This one may not be relevant to all users, but it is good to know that this exists.
These Sketch Symbols can be used throughout the company by saving them to the “Symbol Library” by right-clicking the Sketch Symbol.
You can find these files in your “Symbol Library” in your external Design Data folder located here:
C:\Users\Public\Documents\Autodesk\Inventor 2016\Design Data\Symbol Library
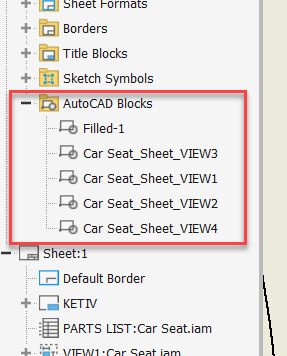
Lastly, there are “AutoCAD Blocks”.
If you are familiar with AutoCAD Blocks from AutoCAD, these are the same thing and have been around for a long time. They are templatized symbols (also like Sketch Symbols) that you can bring in from AutoCAD to be used in your Inventor drawings. However, you cannot create or edit block definitions in Inventor. You can only import blocks to .DWG files. You can insert any .DWG as an “AutoCAD Block” or you can divide them up into more bite-size.DWGs to be inserted.
In conclusion
Above are simple steps that you can use to create custom title blocks in Inventor. If you have a hard time creating it yourself, I encourage you to reach out to us.