
If you, like many of our customers, own a Product and Manufacturing Collection, you may or may not be aware of your access to Autodesk Vault Basic. Implementing Vault into a new environment can seem like a daunting task if the steps are not outlined for you. Today we’re going to look at how to get prepared to implement Autodesk Vault Basic and what the actual process looks like.
We recently hosted an AVA on the topic, you can check it out by clicking the thumbnail below!
Step 1: Autodesk Vault Basic- System Requirements
The first thing we want to look at is where we are going to host our Vault. This will have to be a separate machine that meets the system requirements outlined by Autodesk. The requirements shift from year to year but can be found through the Autodesk article below:
Autodesk Vault System Requirements
What we want to look at are the Hardware specs, Windows Operating System, and SQL Server version. However, we need to make sure that the machine we plan to use can handle hosting Vault. It should be able to manage the traffic that will come from users checking in and out files.
Once we confirm that the hardware meets our system requirements, we should ensure that SQL and Windows OS also meet our requirements as well. This will ensure that we can install Vault Basic Server without any errors.
The Windows Operating System is typically the first thing installed on a server. We just need to ensure that it matches the supported Operating Systems listed for Vault.
In the case of SQL Server, there are a few options that we can go with: Express, Standard, and Enterprise. If we are implementing Vault Basic for the first time, we can use SQL Express. This free version of SQL will allow the Vault Database to grow up to 10 GB before it needs upgrading to Standard or Enterprise (Paid Versions). Once the decision on the type of SQL has been reached, we can move on to step 2 and get the software installed.
Step 2: Initially Set Up Server Machine
Before we install Vault server, there are some steps that we must go through that will make the installation goes smoother. We need to install Internet Information Services (IIS) on the Server, the article below outlines the steps to install IIS on Windows Server 2012 or 2016:
Installing IIS On Windows Server 2012 and 2016
If you are working on a Windows 7, 8, 8.1 or 10 machine (only works for Vault Basic), you can use the link below to install IIS.
Installing IIS on Windows 7, 8, 8.1 or 10
IIS can be installed by the Vault Service installation process automatically. However, we recommend installing it before the Vault server to avoid multiple reboots of the machine before the final installation.
Once IIS is installed, we install the version of SQL that was established in step 1. The process to install SQL is standard whether it is Express, Standard or Enterprise. The following link goes through the process of installing SQL for Vault 2017. The only different between these instructions and the ones that will be used to install on your new environment will be the supported versions of SQL. The reason is that we decided this in step 1 we can skip down to the installation steps.
Install AUTODESKVAULT SQL Instance
After installing IIS and SQL, we can move forward and install Vault Server (ADMS)
Step 3: Install ADMS in Autodesk Vault Basic
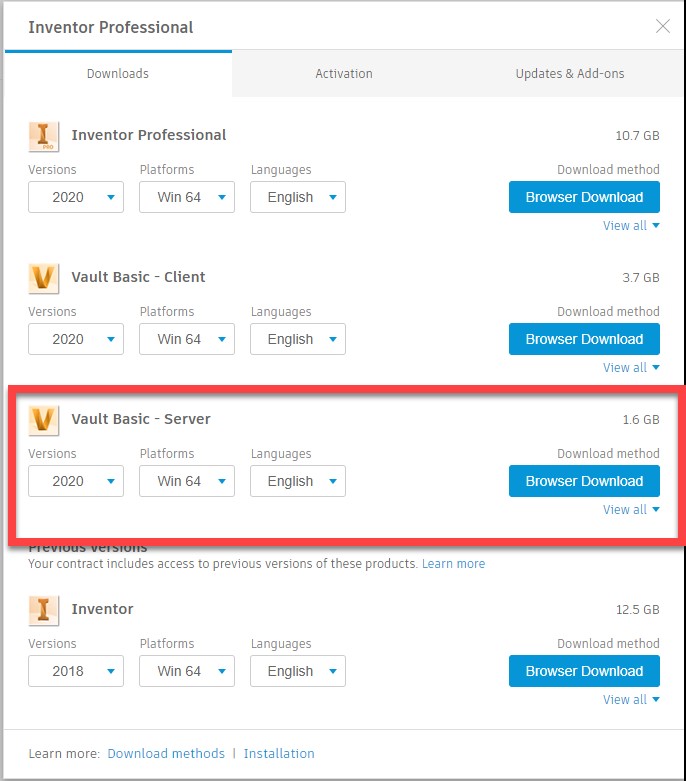
After the required software in Autodesk Vault Basic is installed, we can move on to the Vault server. The installation media is available through the manage.autodesk.com portal. The Contract Manager or Software coordinator for your company will have access to software downloads.
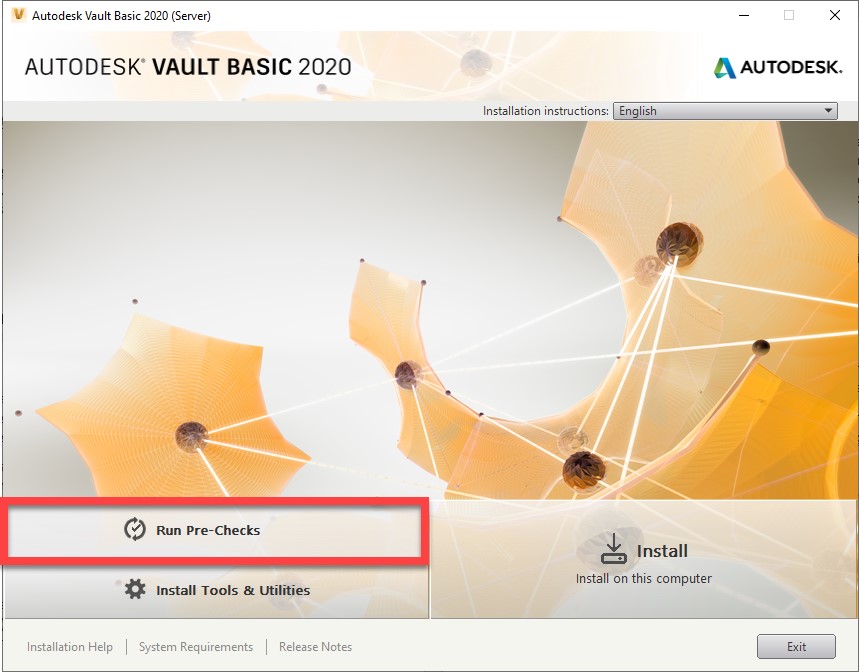
With the installation media downloaded, we can start the installation of Vault Basic. The first thing we do is to run the System Pre-Checks. Running the Pre-Checks before the installation allows us to address any issues that are present before we run the installation.
The installation runs its own pre-checks but just like the installing IIS and SQL beforehand, running the pre-checks first allows us to address them before inputting any information through the installation process.
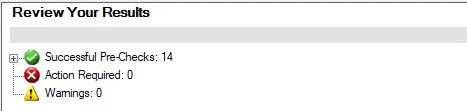
If all the pre-checks are passed and addressed, we continue with the installation. It will ensure that we install it in the preferred location for our environment.
Step 4: Create a New Vault and Inventor Project File
After installing ADMS, we can create a Vault that will be used in our environment by our users. By default, there is an Administrator account with a blank password that can be used to set up the Vault and add new users. The link below goes over the crucial step of creating a Vault in a new environment and setting up a Vault project file. It will allow full functionality in the Vault Client. Not only does it go over the initial creation of this workflow, but it also goes over the recommended workflow when working with Inventor in Vault.
Creating Vault and Inventor IPJ
Step 5: Add Users, Groups and Roles
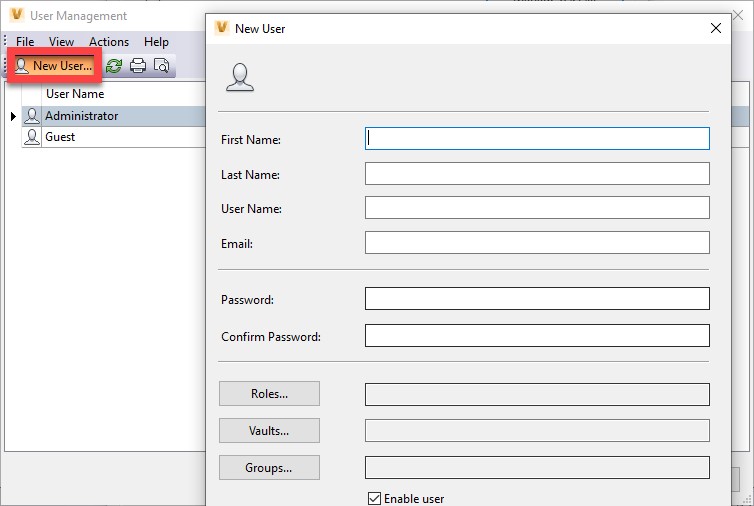
The final step we have is to add the users that will work in this environment. We want to make sure that each user is identifiable in the Vault environment. Hence, we recommend using a username format that may be familiar to the users. In many cases this would be the same format as their company email or a FirstInitial.LastName format. Whichever format is chosen, we want to ensure it is consistent across all users. This process is done through the ADMS, Tools -> Administration -> Manage Users

After adding our users, we want to make sure they have the necessary permissions to do their jobs in Autodesk Vault Basic. Our recommendation for configuring these permissions is to do it through Groups in Vault. You can create them in a similar way that you create users. However, a group cannot be created and left empty. Therefore, we recommend you create your users first and then place them in a group they belong.
Working with groups makes managing the roles of each group and user easier. If you need to change for a user, you just need to add them to the appropriate group or edit the permissions for the group.
Step 6: Adopt It
Now that groups, users, permissions, Vault and all the necessary components of your Vault implementation are in place, it’s time for the users to start using this workflow. We understand that introducing a new tool into a workflow can cause some slow down at first. However, in our experience, the ramp up period can be worked through relatively quickly. It allows the benefits of the new tool to shine through and speed up your process.
In general
KETIV prides itself on the guidance, technology and support that we offer our customers. This article will help many of our customers get started in their journey using Vault and KETIV is here to make sure that the journey as is as smooth as possible. Check out our Autodesk Virtual Academy Session on this topic here! Or you can read our blogs here.
This is a comment I left in one of you nice videos in youtube with no reply so far. Since it has to do with the above Vault presentation article, I dared to post it here, in case is more visible to you, Thanks a lot.
https://www.youtube.com/watch?v=mP5IHU31_wQ&t=1656s
Thanks for this nice and interesting video
Could you please recommend best practice in the following upload non-native Vault project to Vault scenario:
Nowadays we have a bunch of old projects outside Vault with the same folder structure than the ones we are nowadays checking in since we had Vault installed back in 2018. This means that under a parent folder for the project, both types have a folder for assemblies, a second for parts, and a third for drawings. The only difference in their file structure is a folder in the old projects where commercial pieces were being placed every time we needed it. In that way, the very same standard piece could be found in the same folder of those several old projects. At the present time, most of these parts are still valid in new projects, but since Vault has the chance to reuse recurrent pieces by building a library with them, we place them from a library folder tree into new assemblies.
If we would make up our mind to proceed to check-in most relevant non-vaulted projects into Vault to improve their reusability, we would find each time, an average of 500 occurrences from 80 standard pieces that nowadays keep the same name in the library and could be located by a more or less deep browsing. Estimation for an average of pieces that would find their names changed nowadays and need to be pointed manually in the library could round 150 occurrences from 30 different pieces each time.
Do you think Autoloader would prove in this scenario a better tool for this purpose than Vault Server Check-in project tool from Inventor file menu?
What would be the differences in doing that with one or the other way?
Thanks a lot for your wise advice and help.
Hi Ramón,
Thank you for you interest and questions! Our Lifeline team is going to go ahead and reach out to you via email and setup a call to help address your issue. Look out for an email from them shortly!
Best,
KETIV Marketing