
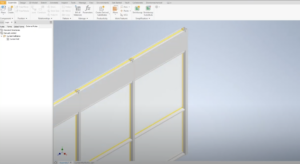
This blog and video review how Autodesk Inventor Automation can help you export data from Revit to Inventor using Inventor iLogic. In Revit, we start with a sample curtain wall that is two walls high and four frames each wall.

We export the curtain wall design data into an excel spreadsheet that gives us wall number, frame number, width and height of panels, the pieces that comprise the frames and information about their sizing. Using the spreadsheet, the Inventor automation adds the business logic through iLogic to create the various frame pieces and assemble them in Inventor.

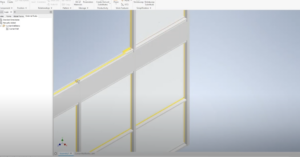
Working off of our spreadsheet, iLogic will start building out the wall in Inventor. For each frame type a unique profile is then modeled in Inventor in a template part that could vary the length or width and height. The added business logic is used to position each piece to create the frames and assemble the frames into walls. By using templates, we enable a maximum re-use of parts. Identical parts are created once and placed as needed without duplicates.
On top of creating the parts and placing the parts that were listed in the spreadsheet from Revit, an additional template is created to model the clip that holds the glazing in place. Note that the clip was never modeled in Revit, modeling the clip in Inventor only, demonstrates the ability of the automation to not only bring over the data from Revit, but with additional business logic, can also extend and enhance that data.
Running the logic rule on a subset of the original spreadsheet, we create a smaller part and expose some of the edges so that the detail can be seen.
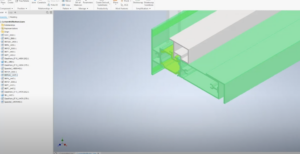
Again, these complex profiles were built as a template part and are extruded to cut length. Once you are in Inventor you have a fully functional Inventor model and as such, can do anything that you want in Inventor, in particular, you now have the Bill of Materials available to you that provide all of the pieces and quantities for what it took to put the wall together.
Take a look at the quick 4 minute video below that walks you through the process!