The Autodesk Vault Job Processor is an essential tool for automating repetitive tasks and enhancing efficiency in any Vault Professional or Vault Basic environment. Whether you’re managing CAD data with Autodesk Inventor, Civil 3D, or AutoCAD, implementing the Job Processor can offload resource-intensive work, like PDF creation, property synchronization, and file conversions, to a dedicated machine. In this post, we’ll explain what the Job Processor does, why you should use it, and how to set it up for optimal performance in your Vault environment.

What is the Autodesk Vault Job Processor?
The Vault Job Processor is a background service that automates common tasks in Autodesk Vault, such as:
- Creating PDFs
- Converting files
- Synchronizing properties
- Managing lifecycle state changes
When users perform actions, such as checking in a file or moving it to a new lifecycle state, a job is queued for processing. The Job Processor picks up these tasks from the job queue and executes them, freeing up user and server resources for more productive work. The Job Processor also supports custom jobs through the Vault API, allowing advanced workflow automation.
Why Implement the Job Processor in Your Workflow?
- Increased Productivity: Automate repetitive tasks and reduce manual errors.
- Improved Efficiency: Offload resource-intensive processes to a dedicated machine or job server, keeping client machines and Vault Explorer responsive.
- Optimal Performance: Maintain a healthy Vault environment by automating tasks at scale.
- Workflow Automation: Enhance product lifecycle management and compliance by ensuring files and metadata are always up to date.
Step-by-Step: Configuring Autodesk Vault Job Processor
1. System Requirements & Initial Setup
- Dedicated Machine: Set up a workstation or VM meeting system requirements for your Vault Professional client.
- Network Location: Ensure the machine has reliable network access to the Vault server.
- Vault License: Assign a license to a dedicated Job Processor user.
- Permissions: The Job Processor user must have permissions to modify files and manage lifecycle changes.
2. Installing and Launching the Job Processor
- Install the Vault Professional Client on your dedicated machine. This will also install the Job Processor.
- Go to the Windows Start Menu > Autodesk Data Management > Autodesk Job Processor for your Vault version.
- Launch the Job Processor; a new window will appear for login and configuration.
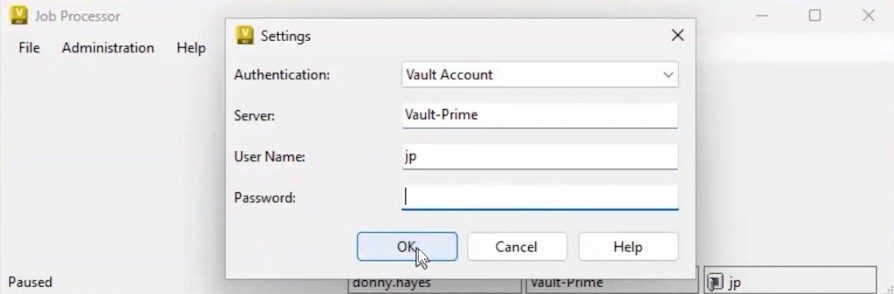
3. Signing in and Configuring the Job Processor
- Click Administration > Settings
- Sign in with the Job Processor user account (set up in Vault) using your authentication method (Autodesk ID, Windows, or Vault Account).
- Enter the Vault server name or IP address, username, and password.
- (Optional) Set the Job Processor to Start on Windows Logon.
- If the processor is paused, go to File > Resume to start processing jobs.
- You can monitor the Job Processor status in the task tray icon.
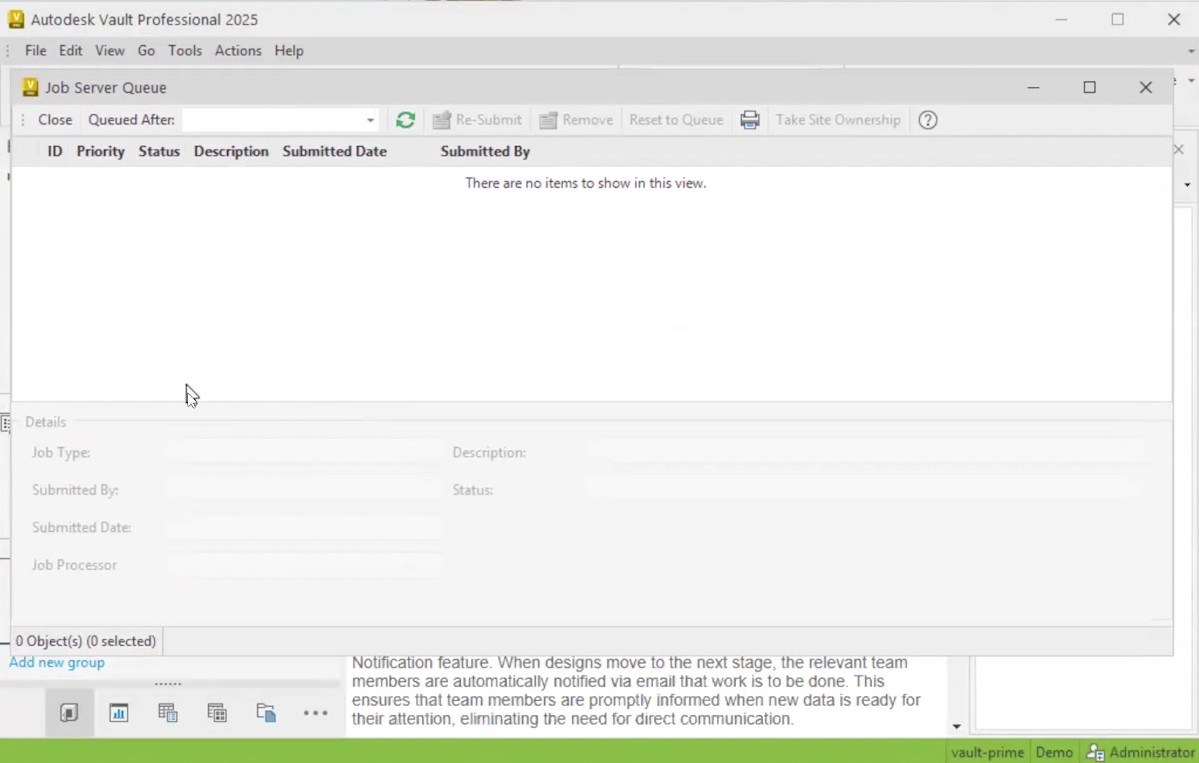
4. Monitoring the Job Queue
- Log in to Autodesk Vault.
- In Vault Explorer, go to Tools > Job Queue to view all queued, processing, or failed jobs.
- Jobs completed are removed from the queue.
- The Job Processor picks up jobs automatically for execution.
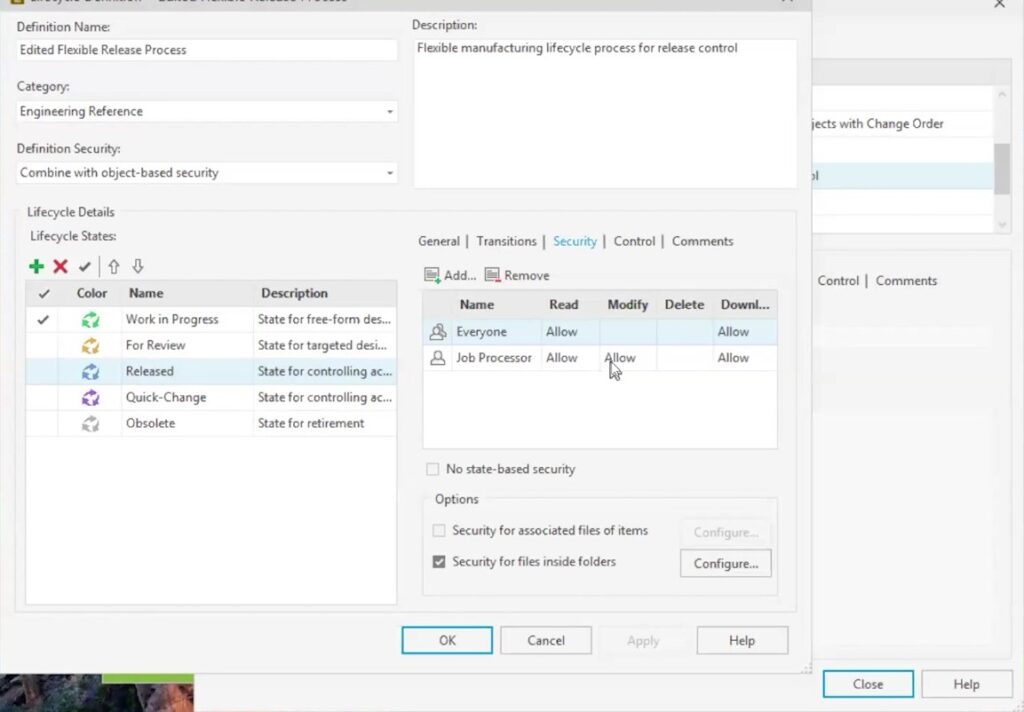
5. Enabling Lifecycle-Driven Job Processing
- Go to Tools > Administration > Vault Settings > Behaviors > Lifecycles.
- Edit the lifecycle you want to automate (e.g., PDF creation upon release).
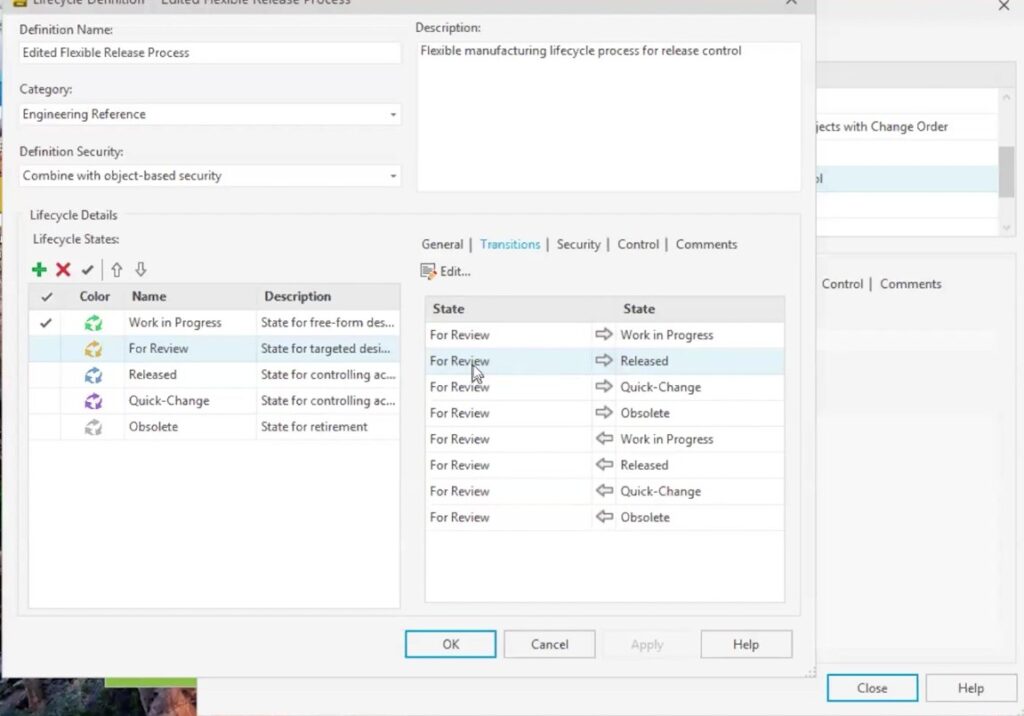
- Go to Tools > Administration > Vault Settings > Behaviors > Lifecycles.
- Edit the lifecycle you want to automate (e.g., PDF creation upon release).
- Under the Actions tab for relevant transitions (e.g., For Review → Released), enable property sync and job types (like PDF creation).
- Make sure the Job Processor user has the appropriate permissions for modifying released files.
- Save your settings.