
A successful Autodesk Vault Professional installation lays the foundation for robust product data management across your engineering teams. Whether you’re upgrading from Vault Basic or Vault Workgroup, deploying on a fresh Windows Server instance, or extending your infrastructure for Vault Client access, this step‑by‑step guide, based on KETIV Technologies’ “Installing Autodesk Vault Professional” tutorial, will ensure you hit every requirement, follow best practices, and avoid common pitfalls.

1. Pre‑Installation Checklist
Before you begin the Vault Server installation, verify:
- System Requirements: Confirm supported operating system, SQL Server edition, RAM, CPU, and disk space via Autodesk Docs.
- SQL Server: Install and configure SQL Server (Express, Standard, or Enterprise) with a sa‑enabled login.
- Windows Server Updates: Reboot if any Windows updates are pending, Vault’s prerequisites check flags reboot requirements.
- Autodesk Trial (if evaluating): You can trial Vault Professional via your Autodesk Manage account before buying licenses.
- Network Deployment Tools: Plan for deploying the Vault Professional client to workstations using Active Directory or other tools.
2. Downloading & Preparing Installation Media
- Sign in to your Autodesk Manage account.
- Download Vault Professional 2025 installation media and the corresponding updates (e.g., 2025.2.1, 2025.5.2).
- Extract the package: Running any of the three setup executables places all files into a common VP folder on your server.
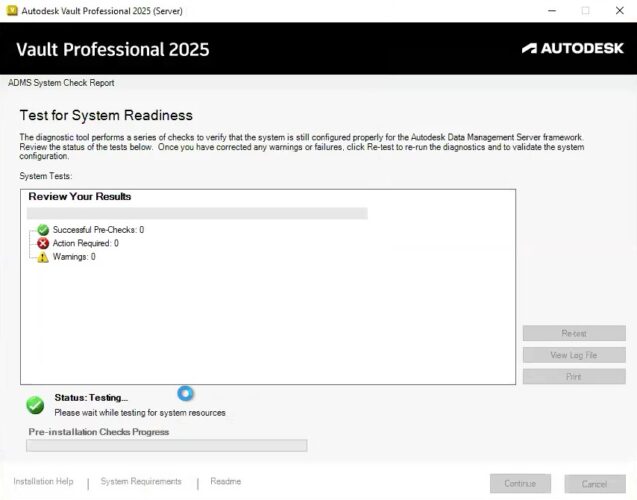
3. Running Prerequisite Checks
Vault’s installer includes a “Projects” validation step to catch common blockers:
- Reboot Pending: Remove any leftover Windows update flags.
- IIS Shortcut: If you see “Autodesk DM” shortcut errors, open Internet Information Services Manager, expand your server’s Default Website, and delete the shortcut.
- Permissions: Ensure the installing account has local administrator rights on the Vault environment machine.
Run Projects until you see “14 successful checks” before proceeding.
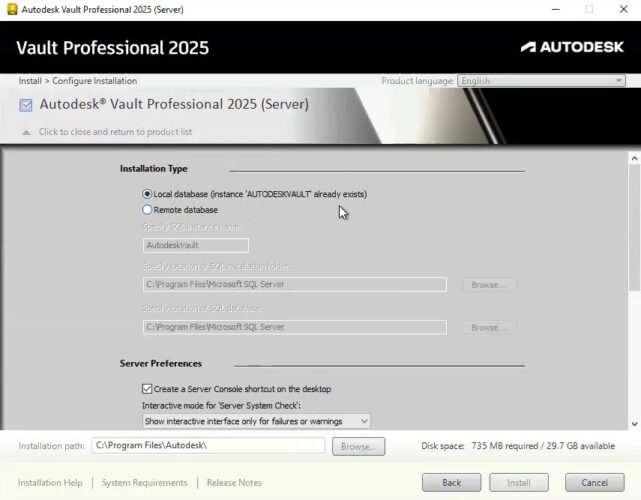
4. Installing Vault Professional Server
- Launch Setup.exe from the extracted VP folder.
- Accept the license agreement.
- Click Install, then expand the configuration panel:
- SQL Instance: Confirm your existing Vault SQL instance.
- SA Account: Supply the correct sa password you configured during SQL setup.
- Vault Service Account: Set a secure local user and password matching your Windows Server’s password policies.
- Installation Folder: Choose a drive with adequate disk space, consider separating program files and data for performance.
- Click Install and wait for the green success indicators.
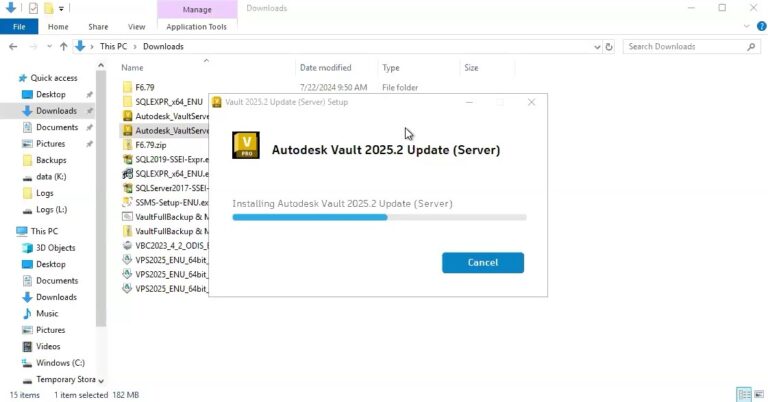
5. Applying Vault Updates
Maintain stability by installing updates in descending order:
- Major Update (e.g., 2025.5.2) first.
- Minor Update (e.g., 2025.2.1) next, Vault will prevent out‑of‑order installs.
- Confirm each update finishes with “Successful installation.”
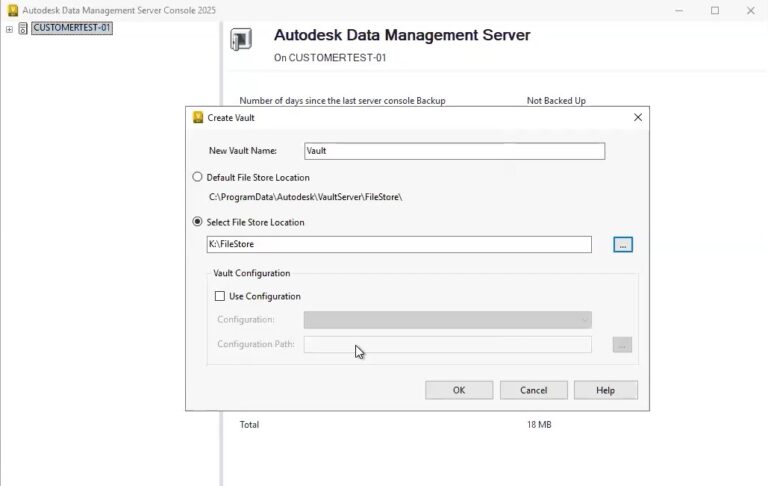
6. Creating Your First Vault
- Launch Autodesk Data Management Server Console 2025.
- Sign in with the default administrator account (blank password).
- Choose Create New Vault. Name it (e.g., “CompanyVault”) and set:
- File Store Location: Point to a dedicated drive or folder outside ProgramData for scalability.
- Configuration Template: Optionally apply a predefined profile optimized for Inventor, AutoCAD Plant 3D, or Construction Cloud integration.
- Click OK and verify the new Vault appears under your server node.
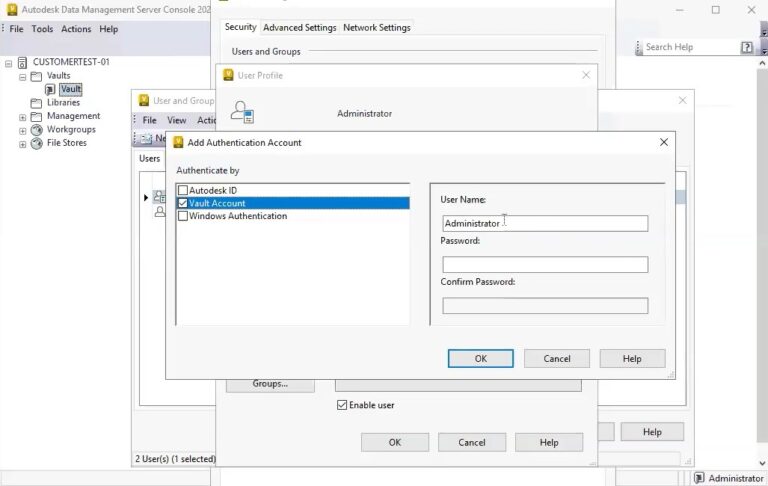
7. Securing & Finalizing Setup
- Change Administrator Password: In the Data Management Server Console, go to Tools → Administration → Manage Access, edit administrator, and enforce a strong password policy.
- Vault Client Deployment: Use your organization’s network deployment tools or distribute the Vault Professional client installer to CAD workstations.
- Community Hub & Support: Ask questions on the Vault Forum, Technology Administrator Forums, or discipline‑specific hubs like Inventor Forums, Civil 3D Forums, Architecture Forums, Autodesk Rail Forums, Fabrication Products Forums, HSM Forums, Arnold Forums, Inventor Nastran Forums, and Map 3D Forums.
- Training & Resources: Explore Autodesk University online classes for deeper insights into Vault Workgroup vs. Professional features, and consult the Construction Hub or Entertainment Hub for industry‑specific workflows.
8. Next Steps
With Autodesk Vault Professional installed and your initial Vault created, you’re ready to:
- Configure Lifecycles and Revision Schemes for automated revision control.
- Set up scheduled Vault backups to safeguard your design data.
- Integrate Vault with Autodesk Inventor or AutoCAD for design synergy.