
Autodesk Vault is a powerful data management solution for engineering teams who rely on Autodesk products like Autodesk Inventor. Whether you’re using Vault Basic, Vault Workgroup, or Vault Professional, configuring users and permissions is crucial to maintaining security, access control, and efficient collaboration across your projects.
This guide walks you through how to configure users and permissions in Autodesk Vault, drawing on best practices and detailed steps shared by KETIV Technologies’ application engineers. By the end, you’ll know how to manage user roles, assign folder permissions, and optimize your Vault server for multi-user environments.

Why Configure Users and Permissions in Autodesk Vault?
In any Vault environment, especially Vault Professional and Vault Workgroup, setting up the right users and permissions ensures that the right team members have access to the right data at the right time. This level of access control protects sensitive files, streamlines workflows, and maintains proper version control. As organizations grow, proper configuration also supports compliance and scalability.
System Requirements & Preparations
Before configuring users, ensure your Vault server and client software meet the latest Autodesk system requirements. You’ll need:
- Autodesk Vault Professional, Workgroup, or Basic installed on your server (often Windows Server).
- Vault Explorer or Vault Client for administration.
- Vault admin (administrator) access to global settings.
- Connection to your SQL Server database that stores user and permission data.
Step 1: Open Vault as an Administrator
- Log in to your Autodesk Vault as a Vault administrator using Vault Explorer.
- Go to the Tools menu.
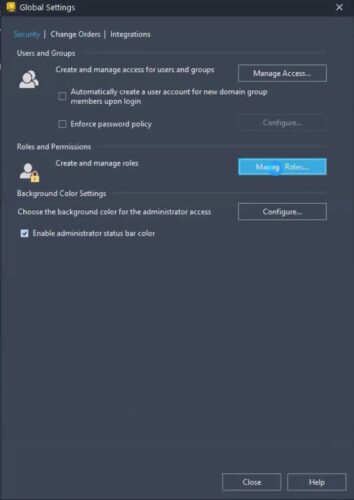
- Select Administration, then Global Settings.
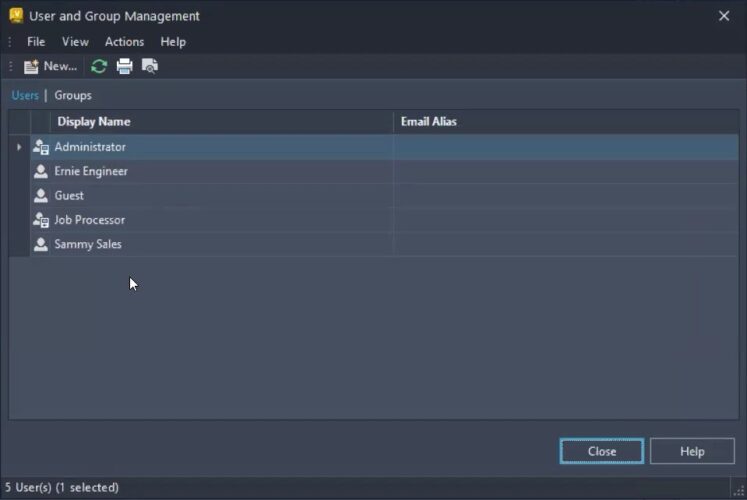
- Click the Manage Access button. Here, you’ll see the list of users set up inside your Vault server.
Step 2: Add a New User
To add a new user (for example, a new engineer joining your team):
- Click New in the Manage Access menu.
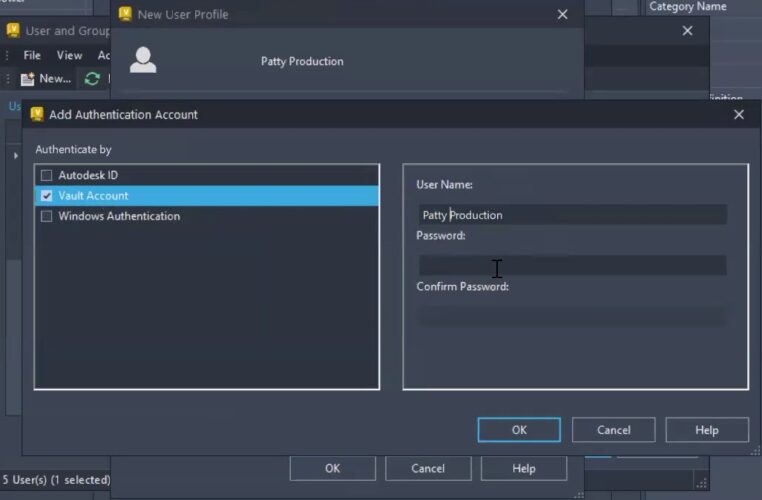
- Enter the required fields:
- Display Name: Used throughout Vault (e.g., “Patty Production”).
- Account Type/Authentication Method:
- Autodesk ID: Requires the user’s Autodesk-registered email.
- Vault Account: A local username and password managed by the Vault admin.
- Windows Authentication: Imports user credentials from your company’s Active Directory.
- Assign a Password (if using a Vault Account).
- Assign Roles: (More on this in Step 3)
- Grant Vault Access: Specify which Vault(s) the user can access.
- Enable the User: Ensure the new user is enabled to allow logins.
- (Optional) Add Email, Alias, First Name, and Last Name: Useful for identification and notifications.
- Add to Groups (if applicable): Assign the user to one or more groups to inherit pre-defined roles and permissions.
- Click OK to add the new user
Step 3: Assign User Roles and Permissions
Roles are a core part of access control in Autodesk Vault. Every user must be assigned at least one role to log in. Each user role bundles together a set of permissions (e.g., read, modify, delete, approve).
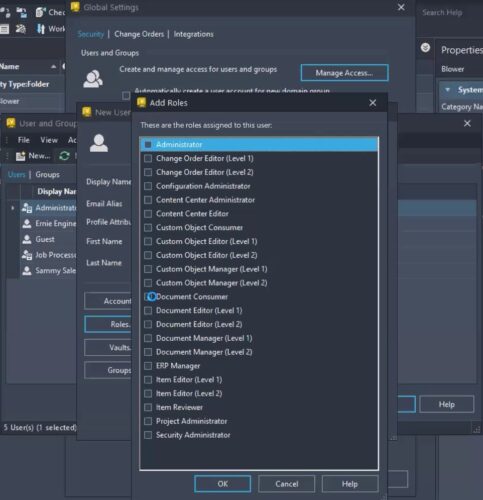
- Click the Manage Roles Button: Review all available roles.
- Assign One or More Roles:
- Users can have multiple roles; permissions are combined across roles.
- Vault Professional allows you to create custom roles with specific permission sets.
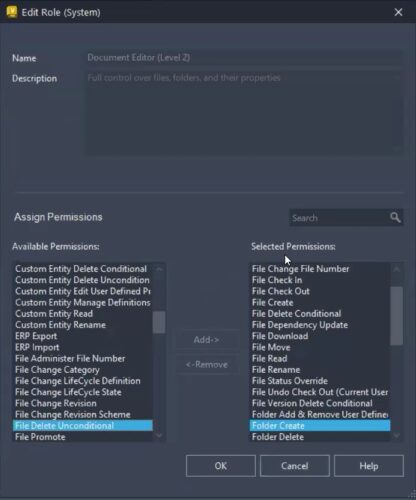
- Review and Edit Permissions:
- Double-click a role to see the individual permissions it grants.
- Create new roles if the defaults do not fit your workflow.
Note: Role changes take effect the next time the user logs out and logs back in.
Additional Tips for Autodesk Vault User Management
- Central Location: Manage all users and permissions from a central administration panel.
- Multiple Users: Efficiently handle onboarding and offboarding with groups and default roles.
- Audit and Compliance: Leverage Vault’s logging to track changes and ensure security best practices.
- Autodesk Support: For troubleshooting, Autodesk support and the Vault documentation offer guidance on complex configurations.
- Client Software: Ensure all Vault users are running compatible client software to avoid permission sync issues.
Conclusion
Learning how to configure users and permissions in Autodesk Vault is essential for any organization that values data security, controlled collaboration, and streamlined workflows. By following the steps above, Vault administrators can create a robust system of access control that grows with the team.
Ready to optimize your Vault setup? For more in-depth tutorials or direct support, reach out to Autodesk support or consult with a certified application engineer. Secure your data, empower your team, and get the most from your investment in Autodesk Vault Professional.