
At some point, most users will run into some kind of dilemma that’s linked to dimension styles in Autodesk Inventor software. If you’re designing an engine you’ll want different dimension style than say, a watch. Or maybe your project is growing into something that needs a different style than when it started. I’ll show you how to create and how to change dimensions in Inventor.
How to Change Dimensions in Inventor
Create and Edit
To start off let’s go over how to create a new dimension style. This will give a better understanding on how to change them as well.
First, go to Manage > Styles and Standards > Styles Editor.

This will open the Style and Standard Editor. Here we can customize dimension settings such as: Precision, Units, Tolerances, etc. The style selected is the default for the drawing that is in place. In our example it is Default (ANSI).
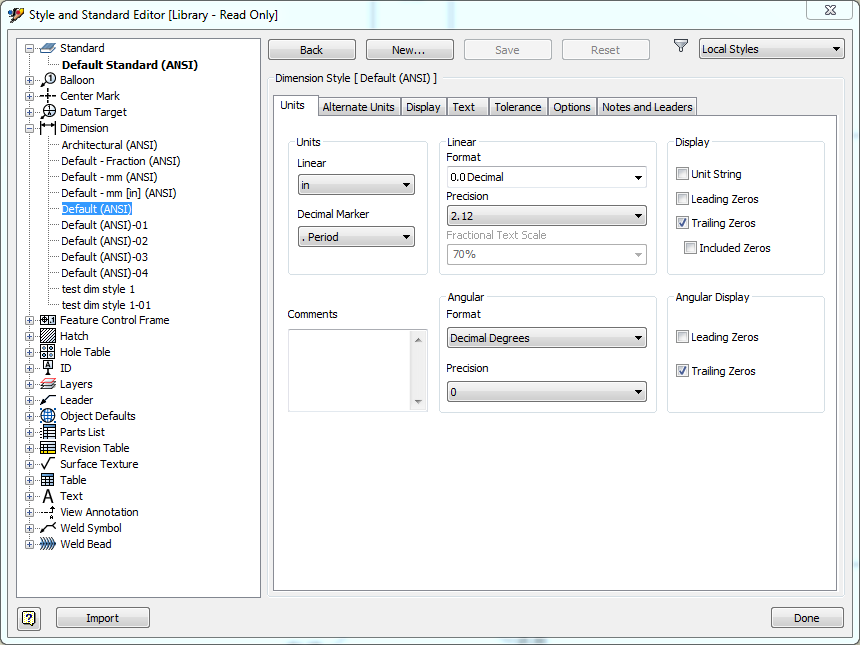
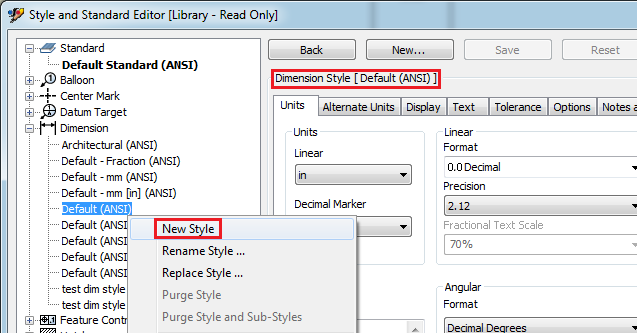
Now to create a new style, go to the Style Editor library located in the left of the window. Under Dimensions, we Right-click our current style which is Default (ANSI). After that it gives us a drop down menu, select New Style.
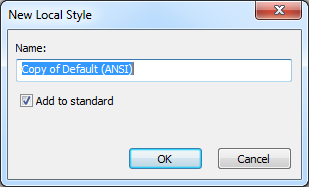
It will prompt us to create a name for the new style and then we click OK.
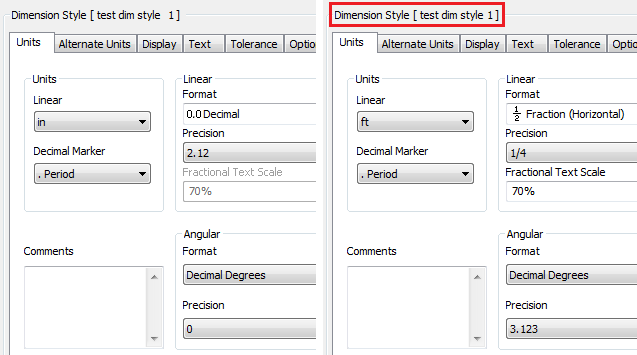
After pressing OK, it will take us back to the original window, except now our newly created style is selected and ready for customization. You can see below on the right that I changed some of the settings.
Change
Now that we’ve gone through how to create and edit a dimension style, I’ll show you how to how to change dimensions in Inventor and choose this new style for our project.
Below is an assembly drawing that I’ve been dimensioning. I forgot that I had been using the default Dimension style and I want to use a custom one instead. To fix this, first go to the Annotate tab and click the Dimension icon. Then, go to the right where it shows the Format section and select the Style option.

The drop down menu will open up and we then select the correct style.
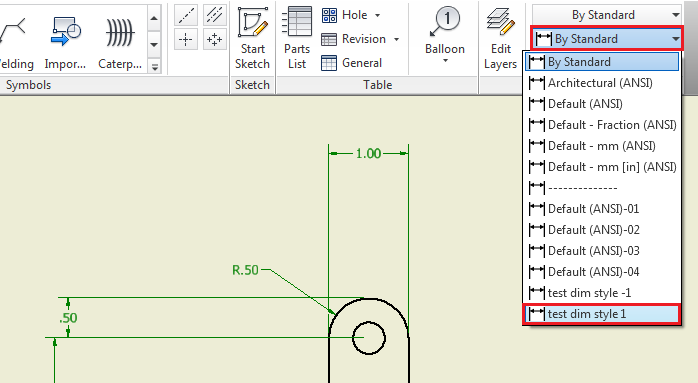
Important note: doing this only changes the dimensions created after applying the new dimension style and does not affect the pre-existing dimensions. If we don’t replace the pre-existing it could end up looking something like this:
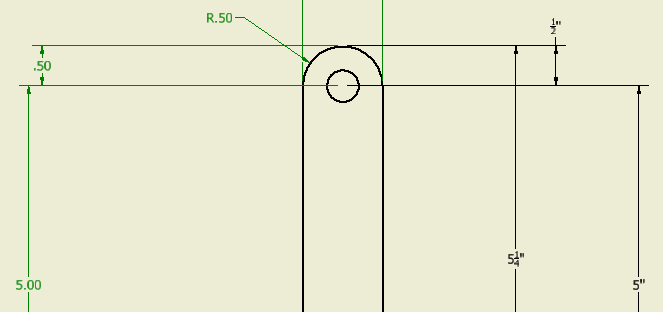
Replace
If you’ve already started your project in one style and want to change it to another, you’ll need to replace all of your existing dimensions to keep a consistent style.
First use Ctrl + Left click to select all of the dimensions that need to be replaced.
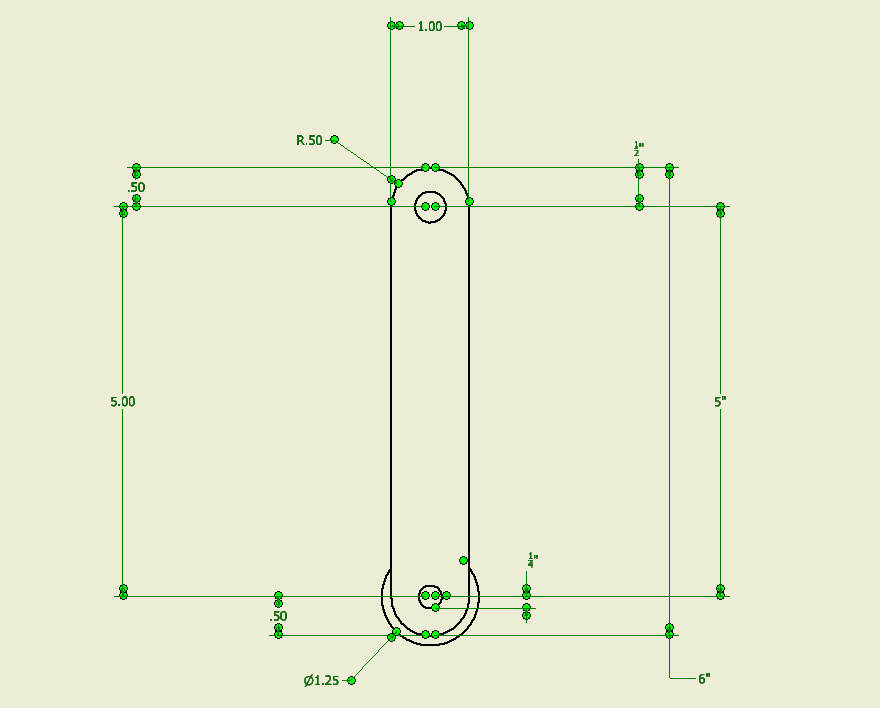
Next, go to Annotate > Format > click Styles and the drop down will show.
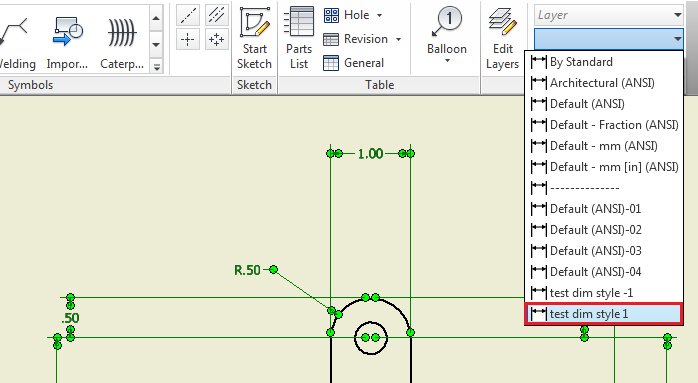
Then, while all the dimensions you want to replace are still selected, choose the dimension style you want.
Now that you’ve gone through everything about how to change dimensions in Inventor, the next time you run into an issue you’ll be up and running again in no time.
Feel like you still need help getting a handle on Inventor? Join one of our training classes or get custom training tailored just for you and your company. Check here for more information.
Join the Autodesk Virtual Academy community and never stop learning.

Thank you! I find this to be very useful.
However I’m having trouble to set the style for the rest of the drawing. It’s a large drawing and I have to keep choosing the style from the format panel every time i need to add some more dimensions. Am I just not following the instructions correctly?
Thank you again for your help.
Luis I’ve forwarded your request for support to the KETIV Lifeline team. Please expect to hear from them shortly.