
Configuring item categories in Autodesk Vault is an essential step to streamline data management, enforce consistency, and automate lifecycles and metadata for your items. With proper setup, you can ensure every item category in your Vault is assigned the right lifecycle, revision scheme, and custom fields, empowering your engineering, design, or product teams to work more efficiently.
This guide will walk you through how to configure item categories in Vault, covering both fundamental steps and best practices, as demonstrated in KETIV Technologies’ “Mastering Autodesk Vault” video.
Why configure Item Categories in Autodesk Vault?
Item categories determine how items, such as assemblies, parts, or custom objects, are classified and managed in Vault. Proper configuration means that every new item inherits the correct workflow, metadata, and properties, whether you’re using Vault Professional, Autodesk Inventor, or managing large organizational units.
Key benefits:
- Automate item lifecycles and revision schemes
- Assign default and custom fields for metadata consistency
- Control access, roles, and credentials for secure item management
- Enable better search, filtering, and reporting with key-value pairs
Step-by-step: How to configure Item Categories in Vault
1. Access Vault Settings
- Log in as an admin and navigate to Tools > Administration > Vault Settings in the Vault UI.
- Go to the Behaviors tab and click Categories.
2. Select Item Categories
- Switch the dropdown to Item Categories to view and configure existing categories.
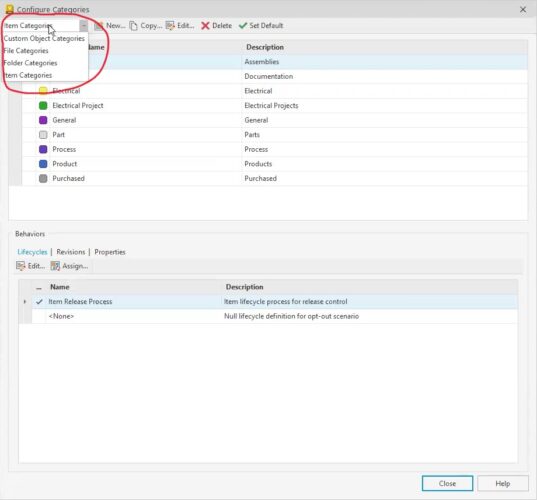
3. Review and Manage Default Categories
- Vault comes with default item categories, such as Assembly and Part.
- For Autodesk Inventor files, assemblies, and parts are auto-assigned to their respective categories upon item creation.
- You can edit category names, labels, colors, and descriptions as needed to fit your organizational unit or workflow.
Tip: If you no longer need a default category, make it unavailable rather than deleting, preserving data integrity.
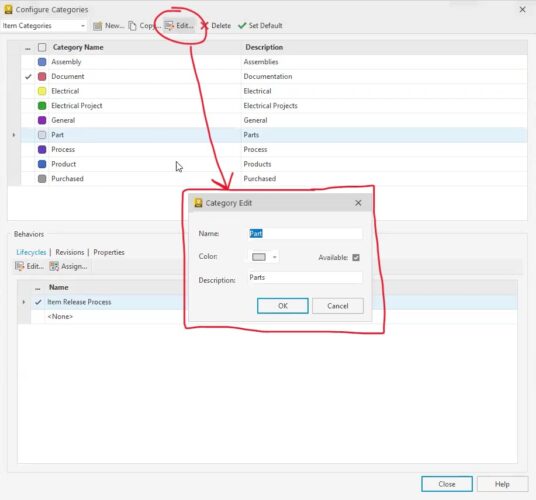
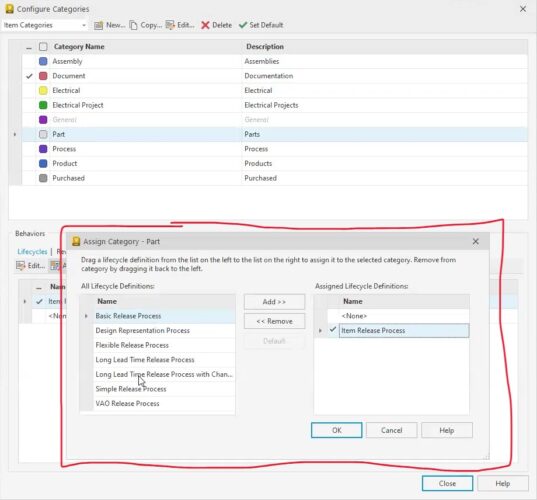
4. Assign Lifecycle Definitions and Revision Schemes
- Select an item category and click Edit.
- Click Assign to choose the relevant object lifecycle (for example, “Item Release Process”).
- Set the revision scheme for consistent item versioning (e.g., numeric, alpha, or custom).
Always ensure the right lifecycle and revision scheme has a checkmark to auto-inherit for new items. For consistency, update both assembly and part categories to use the same revision scheme if needed.
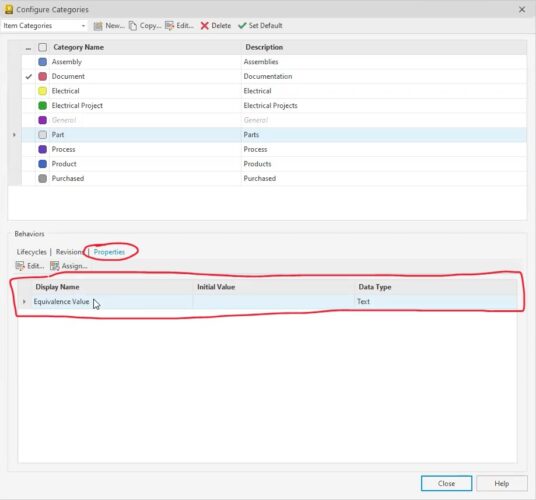
5. Configure Custom Fields and Metadata
- Within each item category, specify which object fields and custom fields should be included, such as designer, part number, or project.
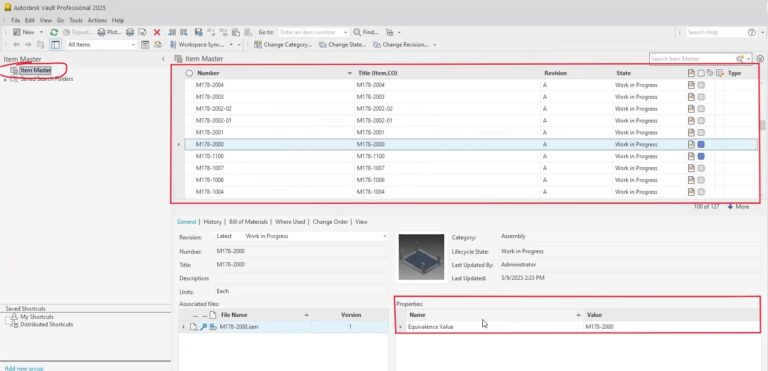
- Keep important metadata fields like “equivalence value,” which often links to the Autodesk Inventor part number and drives the item number.
- Add or remove fields to align with your team’s data requirements, improving item searchability and supporting VQL queries or API integrations.
6. Test and Apply Category Changes
- Remember that changes to item categories only affect new items created after the configuration update.
- To test, create a new item (or delete and remake an existing test item) and verify it receives the correct lifecycle, revision, and custom fields.
- If you need to create items for all children in an assembly, use the Assign and Update command to automatically create items for all related files.
- Testing ensures your configuration is applied as intended across all object types, folders, and parent records.
7. Maintain Consistency Across Object Types
If you change a lifecycle or field value for parts, apply the same update to assemblies or other custom object types to maintain data integrity.
Conclusion
Mastering how to configure item categories in Vault is essential for robust, efficient, and secure data management in Autodesk Vault Professional. By assigning the right lifecycles, custom fields, and metadata to each item category, you simplify workflows, improve compliance, and enable smarter automation and search capabilities.
For more advanced configuration or Vault integration needs, consult with your Autodesk partner, use the Vault API, or explore KETIV Technologies’ full Mastering Autodesk Vault video series.