
Efficiently managing Xrefs (external references) in AutoCAD is crucial for any design team using Autodesk Vault. Poor setup can quickly lead to versioning confusion, file duplication, and inefficient collaboration. In this guide, you’ll learn the best practices for using AutoCAD Xrefs with Vault, how to centralize your shared files, and how to prevent common pitfalls, saving you time and headaches on every project.

Why Organize AutoCAD Xrefs in Vault?
AutoCAD’s Xref feature allows you to reference external DWG files in your main drawings, such as title blocks or standard details. When multiple projects or team members reference the same Xref, centralized control and a clear folder structure become essential. Autodesk Vault helps you manage, secure, and update these references across all your design files if set up correctly.
Step-by-Step: Using AutoCAD Xrefs with Autodesk Vault
1. Place Your AutoCAD Files and Xrefs in the Vault Working Folder
- Copy your main DWG files and associated Xrefs into your Vault working folder (e.g., C:\_Vault\Project1).
- For project-specific Xrefs, keep them in the same subfolder as your main drawing.
- For Xrefs reused by multiple projects (like title blocks), plan to store them separately.
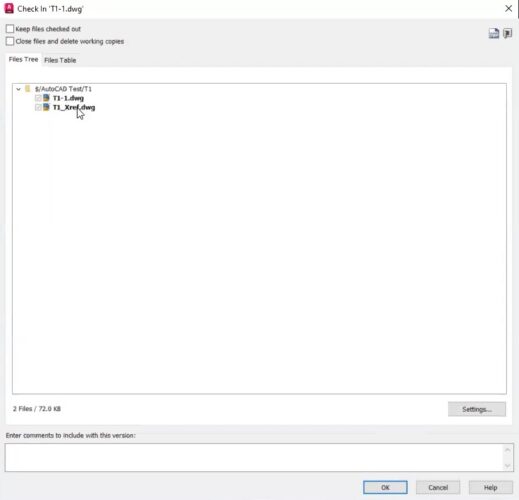
2. Check In Drawings and Xrefs Together
- Open your DWG file in AutoCAD.
- Use Vault’s Check In feature.
- If the Xref and the main file are in the same subfolder, Vault will check them in together and maintain their relationship.
3. Avoid Duplicate Xrefs Across Projects
- If you reference the same Xref from outside your working folder, Vault creates a subfolder (e.g., “XREF”) in each project folder by default, causing unwanted duplicates.
- Avoid storing shared Xrefs directly in every project directory to prevent this.

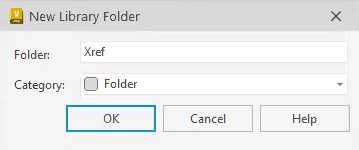
4. Set Up a Library Folder for Shared Xrefs
- In Vault, create a top-level Library Folder named “XREF” or similar for all shared external references.
- This ensures there’s only one master copy of each shared file.
5. Update Xref Paths in AutoCAD to Point to the Library Folder
- In AutoCAD, use the Xref Manager to browse and point your drawing’s Xref references to their new location in the Vault library folder.
- Check in your drawing again, Vault will now properly associate the Xref with the centralized library location.
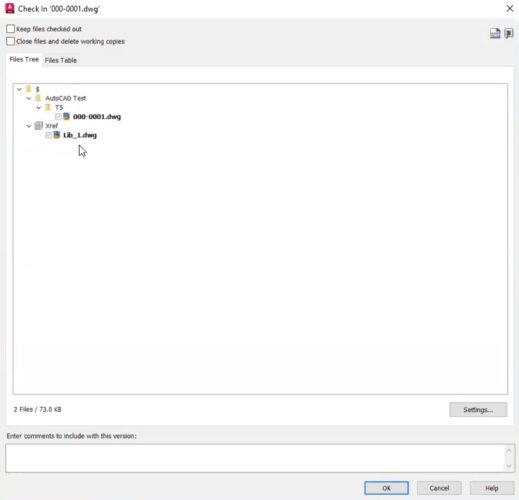
6. Check In New and Existing Drawings with Shared Xrefs
- Now, any drawing checked in that references the shared Xref will point to the single file in the library folder, eliminating duplicate uploads.
7. Apply Security and Lifecycles to Library Xrefs
- Use Vault’s file or folder-based security to control who can modify Xrefs in the library.
- Apply file-based lifecycles if you want to ensure updates are tracked and changes reviewed, as edits to shared Xrefs affect all referencing drawings.
Conclusion
Organizing your AutoCAD Xrefs in Autodesk Vault is key to clean, efficient, and scalable design management. By centralizing shared files, enforcing security, and updating reference paths, you ensure that every project always references the correct version, reducing errors and boosting productivity. Take the time to set up your Xref libraries properly, and your team will benefit from smoother workflows, safer updates, and easier project scaling.