
When using Content Center for the first time in Inventor 2017 you can sometimes run into some trouble when trying to create a new Category. The fix for it is simple and easy to learn, and to help you this post will walk you through each step of the process such as how to create a new Content Center Library, creating a new Category, and explain briefly as to why this problem occurs.
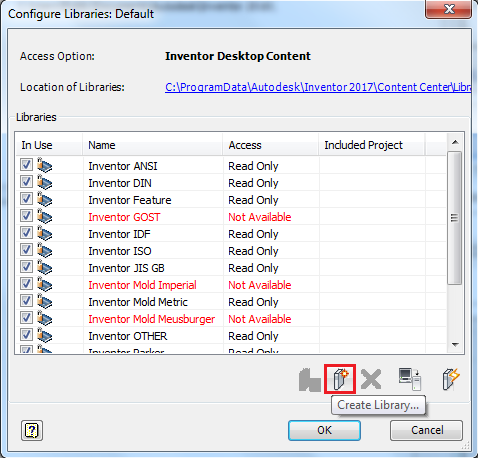
Alright, let’s play a game. Can you spot whats wrong in the picture below?
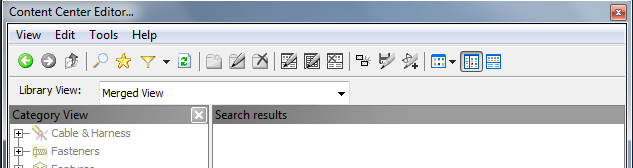
If you answered with, “All of the options including creating a new category are grayed out.”, you’re right. If you didn’t see it that’s ok too.
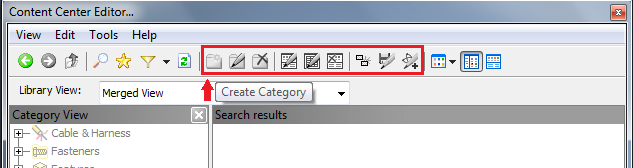
The reason why this happens is because the current library being viewed is read only or you haven’t yet set up a Read/Write library. By default, Content Center only displays the default libraries that exist already within the program. These default libraries are set automatically to Read Only and cannot be edited meaning you can’t create a new category folder within them. To make a new category folder the library has to be a Read/Write library. I am going to go through and explain and show how to create a new read/write library and then from there show how to create a new category folder.
Steps to Creating a new Read/Write library:
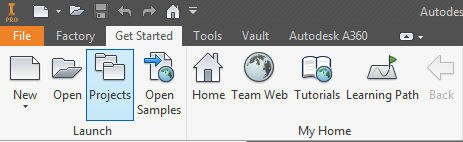
1) When you first fire up Inventor go ahead click the Get Started tab and from there click Projects.
Home > Get Started tab > Launch > click Projects
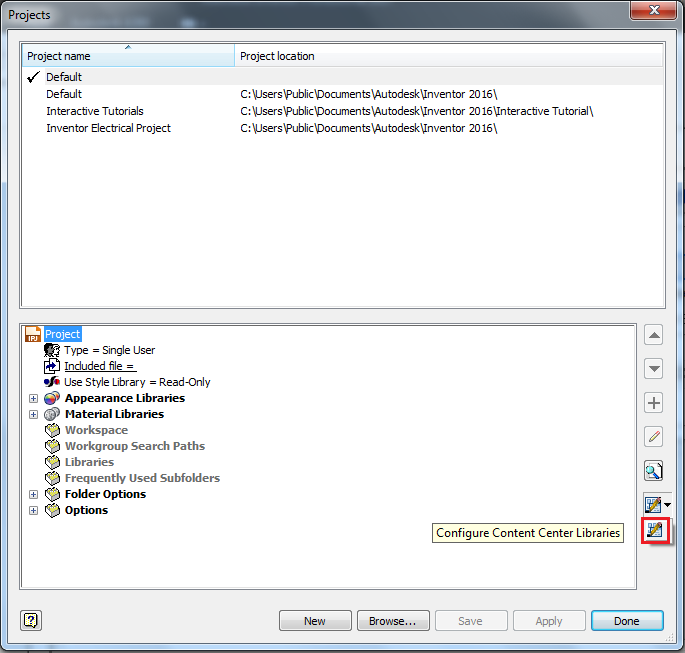
2) Once you have the Projects Dialog box open, go down to the bottom and click the dropdown icon on the right and click Configure Content Center Libraries.
Projects dialog box >open dropdown > click Configure Content Center Libraries
3) Now, that you have the Configure Libraries window open, go to the bottom and click Create Library.
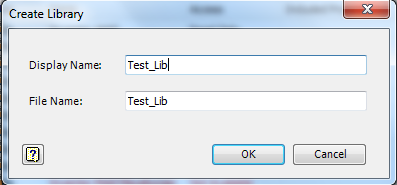
From here you generate a name for the library and click OK.
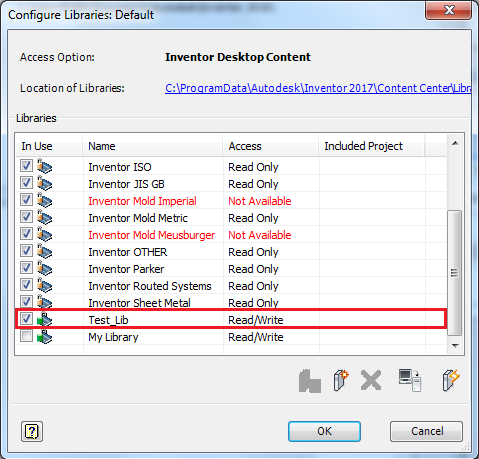
4) Your newly created Library is now visible and has it’s access preset to Read/Write. Be sure to click the check box next to it to place it In Use. Once, you’ve looked over everything click OK.
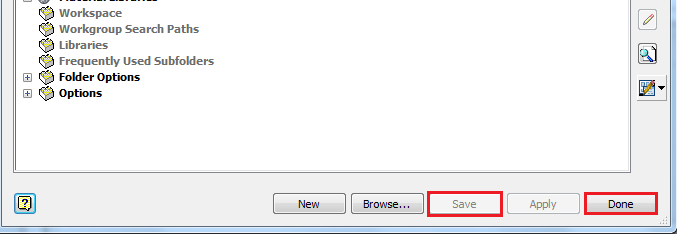
Once you’re done, it brings you back to the Projects dialog box. Be sure to click Save before you click Done.
Steps for Creating a New Category Folder
1) Open the part you want to use. Once you’ve opened your part or assembly, go to the Manage tab and under the section labeled Content Center click Editor to bring up the Content Center Editor window.
Manage > Content Center > click Editor

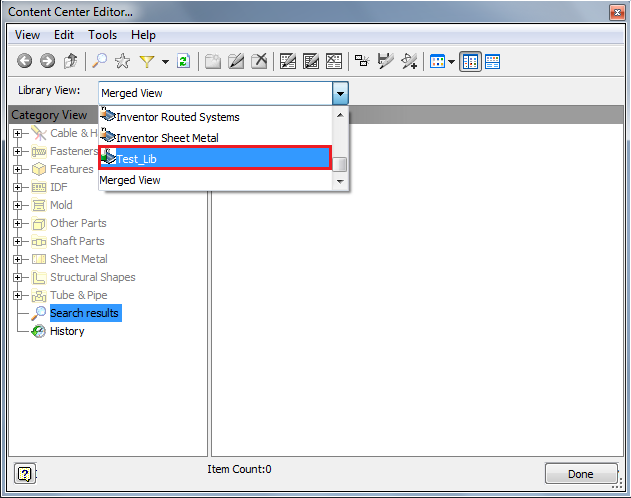
2) Click the dropdown menu to the right of Library View to see all of the available libraries. Scroll down to find and select your newly created content center library.
Note – You’ll notice that there is a lock icon next to the libraries. When you see the closed lock it means that the library is set to Read Only. Whereas, next to your new library you’ll notice that the lock is both open and green this means that it is set to Read/Write.
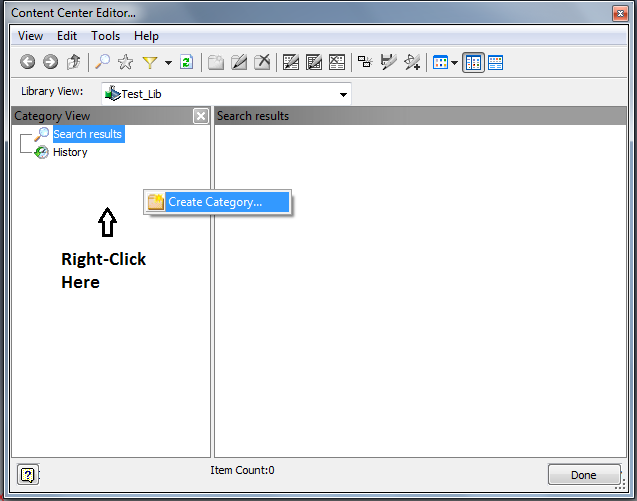
3) Now that your new library is open, right-click in the Category View column. Click the option to create a new category to bring up the dialog box.
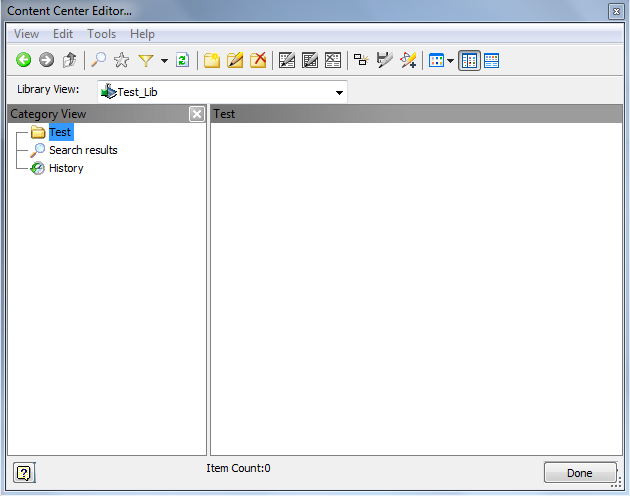
4) Once here, generate a name for your new Category and when you’re done click OK at the bottom.

That’s all there is to it!! You now have both a new Library and Category folder.
So now it’s time for you to give this a try on your own. If you have any questions or comments be sure to leave them in the comment section below. If you have a specific question or problem be sure to call into the KETIV support line and we can take a closer look and help you through any problems.