
One of the most common issues we run into here at the KETIV Support desk is how to restore the Vault tab if it goes missing in Inventor. We’ll show you three ways to solve this issue so you can get your Vault tab back.
These fixes apply to Inventor Inventor LT 2014 and newer.
1. Use Add or Remove Features in the Vault Installer
Open your Windows Control Panel, then navigate to Programs > Programs & Features > and click Uninstall a Program.
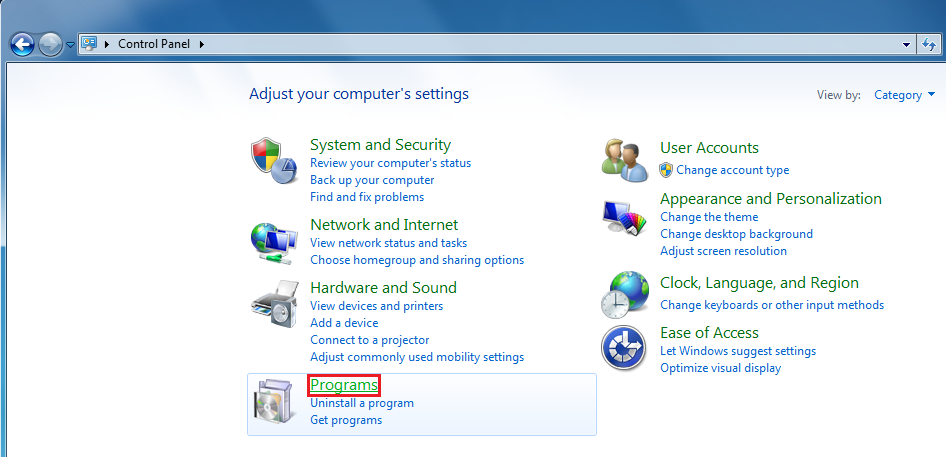
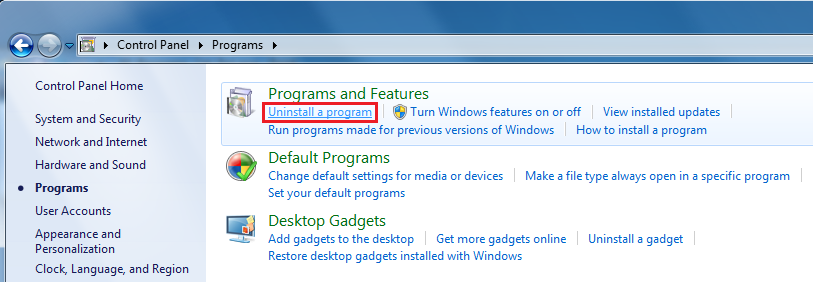
Select Autodesk Vault (Client) and then Uninstall/Change

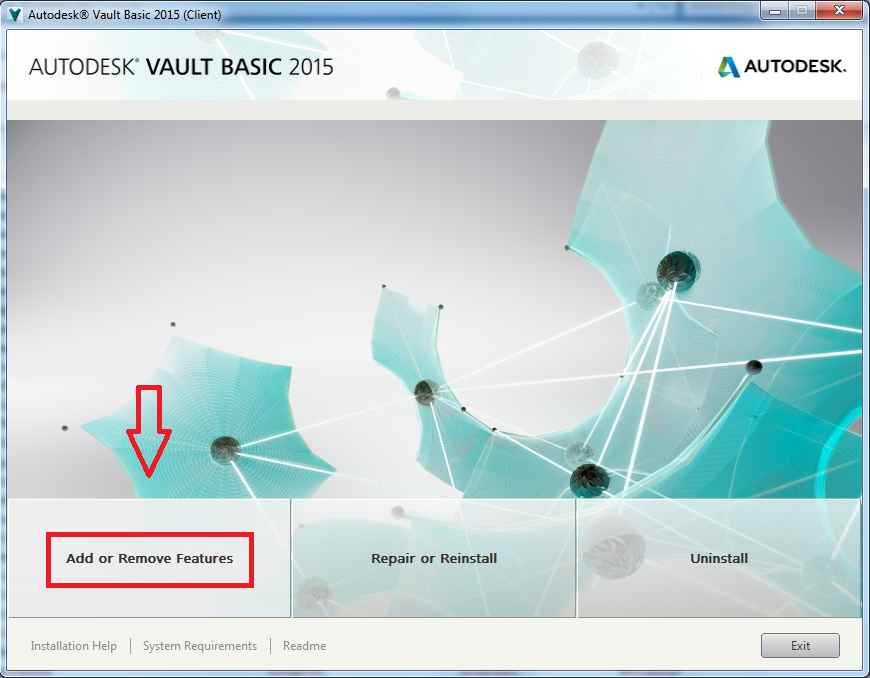
Don’t worry, this won’t uninstall your Vault. The program that opens lets us modify our Vault installation. From here, select Add or Remove Features
Select the Inventor Add-In option and click Update
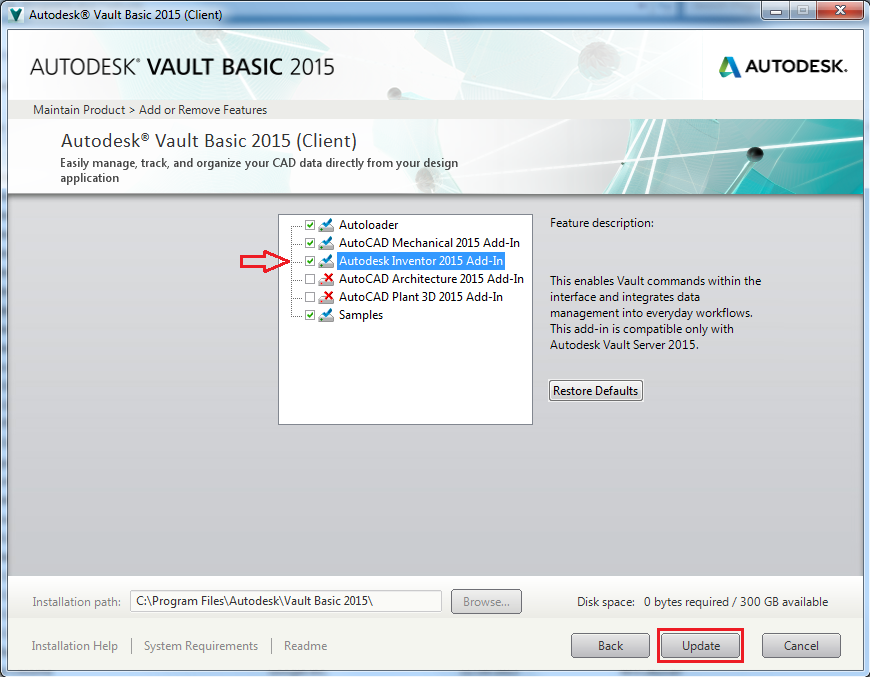
The installer will take care of the rest and install the necessary files for the ribbon.
2. In Inventor, Enable Inventor Vault in Add-Ins
Open Inventor > go to the Tools tab > select Add-Ins

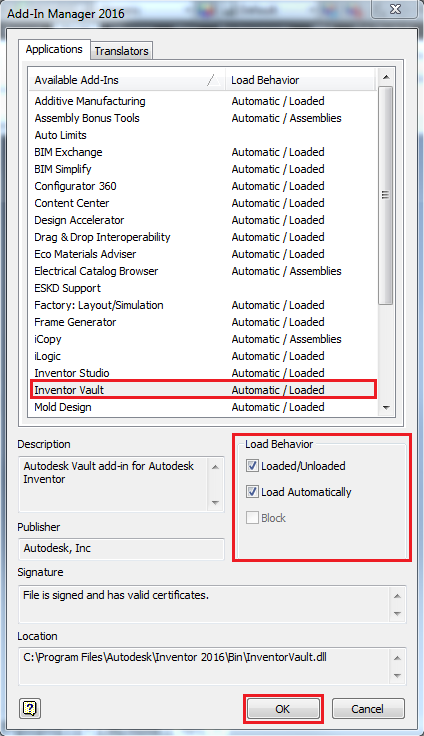
Once you’ve selected Add-Ins it brings up the Add-In Manager.
Select “Inventor Vault” > enable “Loaded/Unloaded” and “Load Automatically” > click OK
3. If This Only Happens to Specific Users
- Log into the users for whom the Vault Add-in is not working
- Delete the “C:Users<username>DocumentsVaultVault_Default.ipj”
- Start up Inventor Inventor LT
- Now the Vault Ribbon should be visible again
So the next time you launch Inventor and find your Vault tab missing from your ribbon, don’t worry. Simply follow these steps and you’ll be on your way to having everything be right in the world again with your Vault tab back where it belongs.
Want to learn more about Inventor? From beginner to advanced courses, KETIV offers a variety of training classes to fit our customers needs. Take a look at our brochure below and find out more.