
The basic tips for making holes in the sheet metal in Inventor
The problem of holes made in flat pattern and folded model:
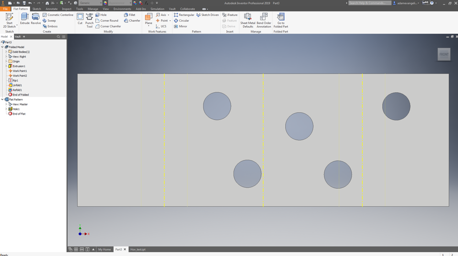
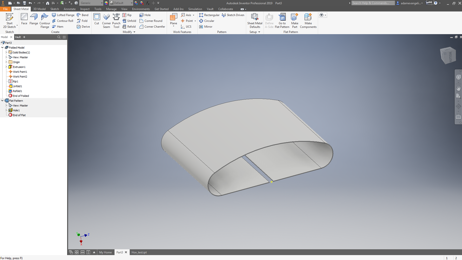
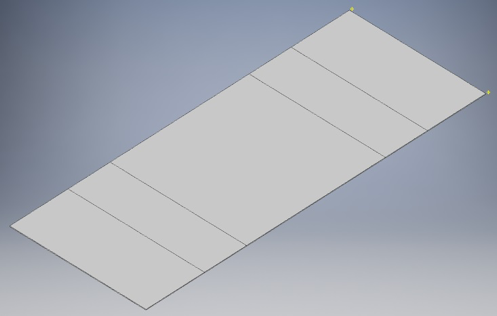
You have a curved surface on a sheet metal in Autodesk Inventor that you would like to punch perpendicular holes into. You attempt to make the holes in the flat pattern. However, they do not show up on your folded model. Maybe you’re making some sort of baffler to homogenize air flow over a channel. Maybe you need the perforations to meet weight requirements. Whatever the case, holes made in the flat pattern don’t show up in the folded model.
Why does that happen to Sheet metal in Inventor?
Simply put, this is intended behavior: changes made to the flat pattern will not be reflected in the folded model. In fact, when you go to make a change to the flat pattern, you will get this error message: “Edits to the flat pattern are exclusively applied to the flat pattern and will not be reflected on the folded model.”

That’s fine, but you still need to make your holes. Luckily, there is a built-in workflow for flattening your folded model while staying in model space – I’m speaking of course of the handy, dandy unfold/refold command:
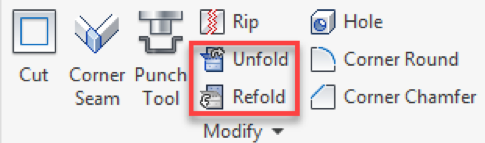
These commands allow you to – surprise – unfold your folded pattern resulting in a flat working surface, much like you would see in your flat pattern. The big difference now though is that we have the flat surface in the folded model space. Any changes made in folded space, will be reflected in the flat pattern!
After selecting the unfold command, you will be prompted to choose A) a stationary reference and B) which bends to unfold (you can choose the all bends option to just completely flatten a part like this one).
First step is to select a stationary reference:
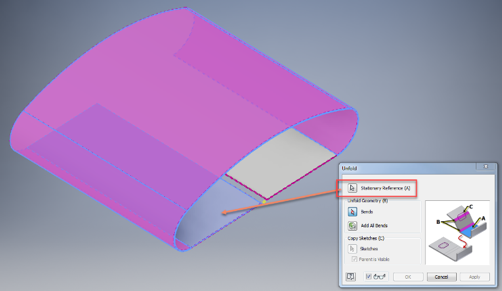
Next you select which bends to unfold:

Press “Apply” or “OK”:
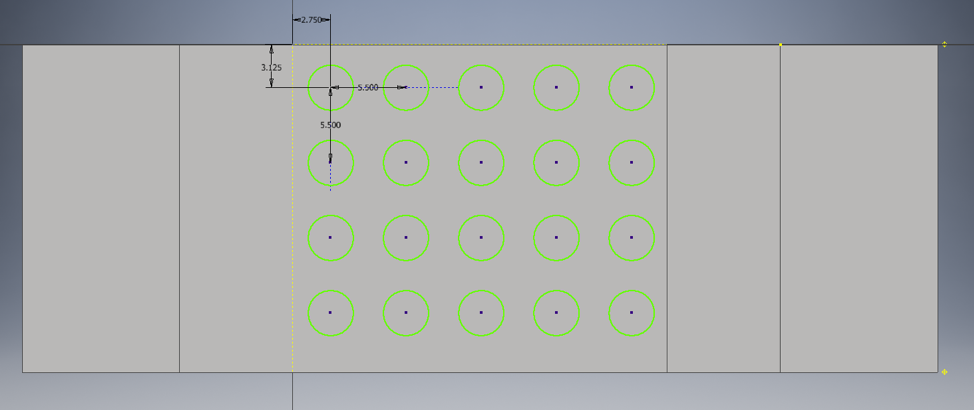
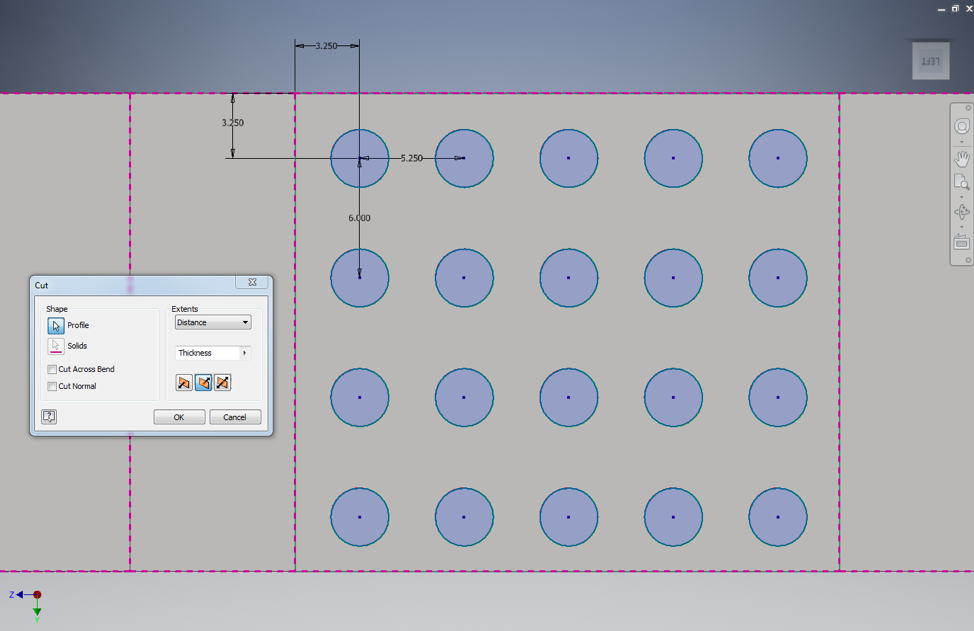
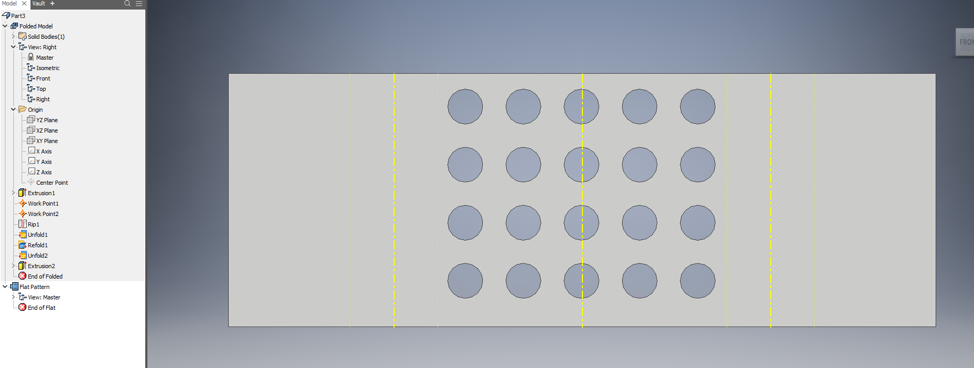
From here, you have a flat face which you can perform all your normal sketching and hole cutting. I done just a simple rectangular pattern:
Once the holes are cute, we select the “Refold” command, where we’ll be prompted to select again a stationary reference and bends to fold.
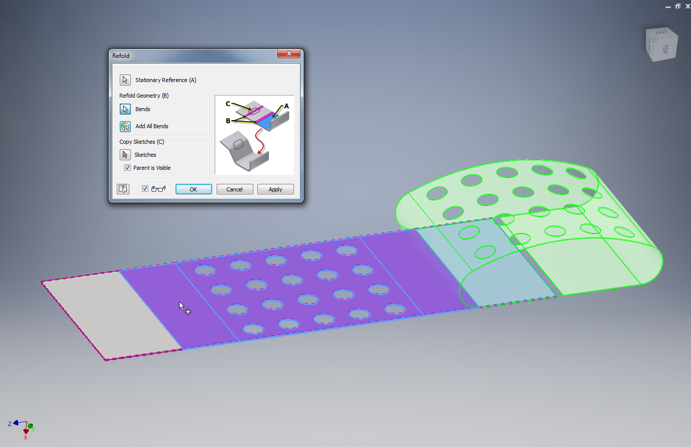
Then, the resulting Pattern will look like such:
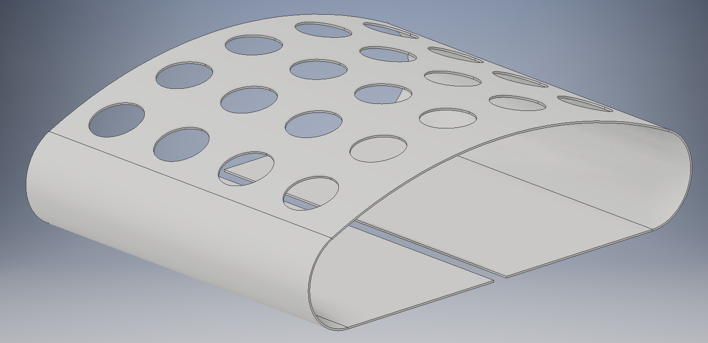
And then, when we go to the flat pattern, we’ll see that the software has updated the holes to appear on there as well.
Conclusion:
In summary, changes to the flat pattern will not be reflected in the folded model. The software will only reflect changes made to the folded model in the flat pattern. Therefore, if you need to make perpendicular cuts on a curved surface, you can use the unfold/refold tools to make proper cut on the a flat working surface inside of the folded model.
For more learning, feel free to check out our sheet metal basics video on our lovely youtube channel
https://www.youtube.com/watch?v=wMrZ-nHitSo
and subscribe to Autodesk Virtual Academy:
Great tip about using computer software to cut holes on a flat face. I need a metal sheet produced to add to my car door. I’ll have to consider getting a metal company to send me an aluminum piece pre-cut.
Glad you enjoyed this blog! Make sure to subscribe to our blog at https://ketiv.com/blog/subscribe