
You need to ensure your product can withstand the test of time. Running your design through a number of simulation tests will ensure you catch potential flaws earlier in the production process, saving you time and money. In our 3rd episode of Autodesk Fusion Fridays, we ran a static simulation test on a bicycle fork crown, the part that connects the handlebar and the front shocks. Read on to discover how you can use the Static Stress Simulation environment in Fusion 360 to avoid potential failures and maintain design integrity.
Watch the Session
If you missed the session, watch it below. Subscribe to our YouTube Channel and never miss a session.
Key Takeaways
The big lesson learned – make sure you know what parts in your assembly are fixed, where to apply the load, and what material to use. Knowing these three components of simulation are essential before you even run the solver.
Speaking of solver, Fusion 360 uses Nastran as a solver to run its calculations. Nastran is trusted among the engineering community and was originally developed for NASA to be their robust FEA tool.
After applying fixed points, loads, and generating contacts, it’s time to run the simulation. You have the option to run the simulation locally or in the cloud. I recommend running it in the cloud, especially when running hour-long simulations. This allows you to remain working in Fusion 360 while essentially “outsourcing” the simulation process.
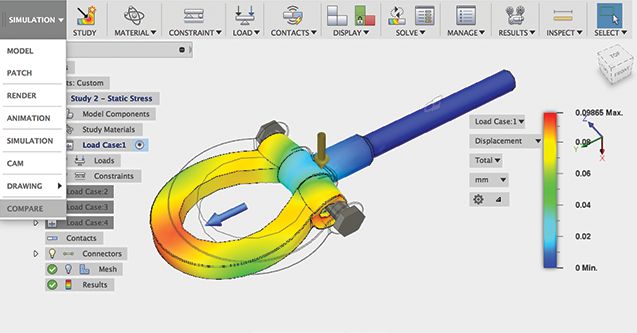
In the video example above, we ran it locally since it was a small, easy-to-solve simulation. Within seconds, we received information on the Safety Factor, Stresses, Displacement, Strain, and more calculated by Fusion 360. We noticed some potential issues and swapped over to the model workspace to make some changes. We edited the part referencing parameter variables to control the shape of the part without having to enter the sketch environment.
After editing the part, we switched back to the simulation environment, created a clone of the previous test, and ran another test. This time, we received the results we were looking for. But we’re not finished yet! Since we now have two tests, we used the Compare tool to view side-by-side results of our first and second models.
There’s still more! We wanted more precise results so we increased the number of iterations the solver runs to attain a convergent value. This was done using the Adaptive Mesh Refinement tool.
If you’re looking for more Fusion 360 training, check out our YouTube Playlist.
And as always, feel free to send your questions to Fusion360@ketiv.com. We’d be more than happy to have a conversation with you!